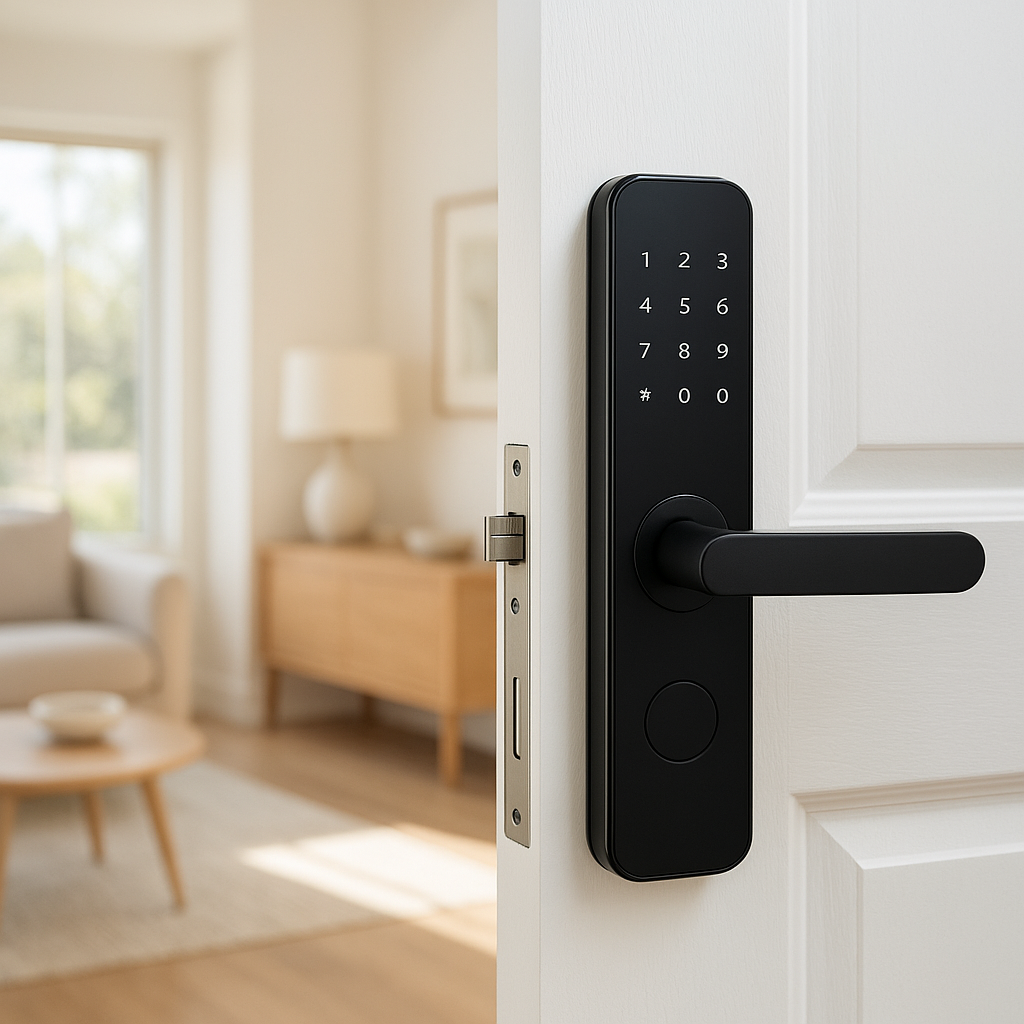
If your smart lock auto-lock is not working, it can quickly go from handy feature to security worry. Whether you’re using an August, Yale, Schlage, or Level lock, auto-lock problems usually come down to a few common settings, sensor, or door alignment issues—not a completely broken lock.
This guide walks through how auto-lock works, why it fails, and nine practical fixes you can try at home. You’ll see brand-specific tips for August, Yale, Schlage, and Level, plus a quick reference section so you can jump straight to the most likely causes.
Most of these steps are simple: checking app settings, re-aligning a door sensor, or recalibrating the lock. Work through them in order and you’ll usually get auto-lock working again without calling a locksmith.
How Smart Lock Auto-Lock Works (And Why It Fails)
Time-based vs. sensor-based auto-lock explained
Most smart locks use one of two methods for auto-locking:
- Time-based auto-lock: The lock waits for a set delay (for example, 30 seconds or 2 minutes) after you unlock it, then automatically re-locks. This is common on August, Yale, Schlage, and Level locks.
- Sensor-based auto-lock: The lock checks a door position sensor to confirm the door is actually closed before it locks. August’s DoorSense, Level’s built-in sensors, and some Yale/Schlage setups use this approach.
Some models combine both: the lock will auto-lock after a delay only if the door is detected as closed. If the sensor thinks the door is open, auto-lock is skipped to avoid throwing the bolt into the door frame.
So if your smart lock auto lock is not working, you’re usually dealing with either a timer that’s disabled or misconfigured, or a sensor that isn’t correctly detecting the door’s position.
Common causes of auto-lock failures across August, Yale, Schlage, and Level
Across these brands, the most common reasons auto-lock stops working include:
- Auto-lock is turned off in the app after a reset, firmware update, or initial setup.
- Door isn’t fully closed due to hinge sag, weatherstripping, or a tight latch.
- Door sensor or magnet is misaligned by just a few millimeters.
- Calibration is off, so the lock doesn’t know the full locked/unlocked positions.
- Low batteries causing weak motor performance or conservative power-saving behavior.
- Outdated firmware or app bugs that interrupt auto-lock logic.
- Conflicting automations from HomeKit, Alexa, Google Home, or SmartThings.
The good news: most of these can be fixed without tools, and without removing the lock from the door.
Quick safety note before you start troubleshooting
While you’re testing and changing settings, assume your auto-lock may not behave as expected. For safety:
- Carry a physical key or have another entry method (keypad code, NFC keycard, backup lock).
- Warn household members that the door might lock or unlock at unusual times during testing.
- If you’re on an upper floor or have children or pets, avoid leaving a door open and unattended while testing.
Once you confirm auto-lock is working again, do a few test cycles to make sure it’s reliable before you rely on it day-to-day.
Fix 1 – Confirm Auto-Lock Is Actually Enabled in the App
How to check auto-lock settings in the August app
August auto-lock issues are often just a disabled setting. To check:
- Open the August app and select your lock.
- Tap the settings gear for that lock.
- Look for Auto-Lock or Auto-Lock Settings.
- Make sure the toggle is On and that a reasonable delay is set (for example, 30–120 seconds).
- If you use DoorSense, ensure the option that requires the door to be closed is enabled or configured correctly.
If the setting looks correct, try toggling auto-lock off, saving, then turning it back on and choosing a different delay. Sometimes this forces the app and lock to resync the configuration.
How to check auto-lock settings in Yale and Schlage apps
Yale and Schlage often allow auto-lock to be managed either on the keypad itself or through a companion app (Yale Access, Yale Secure, Schlage Home, or a hub’s app).
- Open your lock’s app and select the specific lock.
- Go to Lock Settings or Auto-Lock / Re-Lock settings.
- Confirm the auto-lock feature is turned on and set to your preferred delay.
- If your lock also has a keypad menu, check the printed manual to verify the keypad setting hasn’t disabled auto-lock.
On some Schlage keypad models, a physical programming code sequence at the keypad can override app settings. If auto-lock recently stopped after someone changed keypad settings, re-enable it using the instructions in your manual or manufacturer’s support page.
How to confirm auto-lock timing in the Level app
Level locks (Level Bolt, Level Lock, Level Lock+ etc.) manage auto-lock timing through the Level app:
- Open the Level app and tap your lock.
- Enter the lock’s settings menu (gear icon).
- Find the Auto-Lock section.
- Confirm auto-lock is enabled and check the delay (for example, 1, 3, or 5 minutes).
- If you changed the delay recently, try setting it back to a shorter interval for testing.
After saving, stand near the door and watch a full unlock–to–auto-lock cycle to verify the new timing actually takes effect.
Fix 2 – Check Door Position & Alignment (Latch Not Fully Closing)
How door misalignment stops auto-lock from engaging
Even if the auto-lock timer is working, many locks refuse to throw the bolt if they encounter too much resistance. A heavy or misaligned door can keep the latch from fully seating in the strike plate, so the deadbolt binds when it tries to extend.
August, Yale, Schlage, and Level locks all rely on the mechanical deadbolt and latch operating smoothly. If the bolt needs extra force to lock manually, the motor may stop early or cancel auto-lock altogether to avoid damage.
Simple tests: latch, deadbolt throw, and door sensor contact
Try these quick checks:
- Manual lock test: With the door closed, lock it using the thumbturn. It should move smoothly, with no grinding or forcing.
- Open-door test: Open the door and lock/unlock using the thumbturn and app. If it works perfectly when open but struggles when closed, alignment is the culprit.
- Latch seating: Close the door slowly and watch the latch enter the strike plate. It should click fully into place without rubbing or stopping early.
- Sensor contact: If you have a visible door sensor or magnet, confirm the two parts line up vertically and are within the recommended distance.
If any of these feel tight or inconsistent, address the physical alignment before blaming the lock itself.
Easy alignment adjustments you can do yourself
You don’t always need a pro to fix minor door alignment issues:
- Tighten hinge screws: Use a screwdriver to snug up loose hinge screws on the door and frame. This often lifts a sagging door just enough.
- Adjust the strike plate: Loosen the strike plate screws slightly, shift the plate up, down, or in/out, then retighten and test.
- File the strike opening: If the bolt barely scrapes, a few light passes with a metal file can give extra clearance.
- Check weatherstripping: Overly thick or mispositioned weatherstripping can push the door outward and bind the bolt; adjust or trim if needed.
After each change, repeat the open-door and closed-door tests to confirm the deadbolt throws easily under motor power.
Fix 3 – Inspect Door Sensors, Magnet Placement & Contact Strips
August DoorSense: distance, angle, and placement issues
August’s DoorSense sensor tells the lock whether the door is open or closed. If it can’t detect the door as closed, auto-lock may never engage, even though the timer is running.
Check the following:
- Placement: The small DoorSense magnet should be mounted where August’s instructions specify—usually near the edge of the door, aligned with the lock.
- Distance: If the magnet is too far from the lock, the sensor reading becomes unreliable. Even a few extra millimeters can matter.
- Angle: Ensure the magnet sits flat and isn’t twisted on a decorative trim piece that changes its distance from the lock as the door moves.
If you’ve changed the trim, replaced the door, or repainted, re-check the DoorSense location and recalibrate it in the August app.
Yale and Schlage door position sensors and strike plate fit
Some Yale and Schlage systems use separate door position sensors or integrated frame sensors. If the sensor thinks the door is open, it may block auto-lock.
- Verify sensor alignment: The sensor and magnet (or paired pieces) should line up cleanly when the door is closed.
- Inspect wiring (if any): If your lock uses a wired sensor tied to a hub or alarm panel, check for loose or damaged wires at the sensor and hub terminals.
- Check for strike interference: If the bolt is only partially entering the strike because of a shallow pocket, the lock may misinterpret the locked/unlocked position and skip auto-lock.
Level built-in sensors and frame magnet alignment
Level locks often hide electronics inside the door, using internal sensors and frame magnets instead of obvious external parts. Over time, tiny shifts in the frame magnet’s position can affect detection.
- Inspect the frame for the small magnet or insert that shipped with the lock.
- Confirm it’s still firmly attached and hasn’t shifted due to temperature changes or door frame swelling.
- If necessary, re-seat or slightly adjust the magnet so it aligns with the lock body when the door is fully closed.
After adjusting, use the Level app’s diagnostics or calibration tools to verify that the door-closed status is detected correctly.
Fix 4 – Calibrate or Recalibrate the Lock
When to recalibrate your smart lock
Calibration tells your smart lock exactly how far to turn to be fully locked or fully unlocked. You should recalibrate if:
- You’ve adjusted the strike plate or hinges.
- You’ve removed and reinstalled the lock.
- The lock seems to stop early or runs the motor longer than necessary.
- Auto-lock works intermittently depending on how you closed the door.
Step-by-step: recalibrating August locks
The exact steps can vary slightly by model, but generally:
- Open the August app and select your lock.
- Go to Lock Settings > Calibrate Lock or similar.
- Follow the on-screen prompts to position the lock in the unlocked and locked positions as instructed.
- Keep the door closed during calibration if your instructions require it, especially when DoorSense is involved.
After calibration, test auto-lock again. If it now locks reliably with the door closed but not when the door is pulled tightly, your alignment may still need fine-tuning.
Calibration and bolt length settings for Yale, Schlage, and Level
Yale, Schlage, and Level often include bolt length or handing detection during setup:
- Yale: Many Yale deadbolts auto-detect bolt length and door handing on first power-up, but you can usually re-run handing or calibration from the app or by entering a programming sequence at the keypad.
- Schlage: Some Schlage smart deadbolts perform a bolt travel test during installation. If you changed the door hardware, consult the manual to trigger this test again.
- Level: Level locks rely on precise measurements inside the door. Use the app’s setup and calibration tools again if you’ve changed the door, strike, or latch.
Always keep the door in the position the instructions specify (open or closed) during calibration. Incorrect positioning can train the lock to the wrong endpoints and cause auto-lock failures.
Fix 5 – Check Battery Level, Power Saving & Low-Temperature Issues
Symptoms of low batteries affecting auto-lock
Weak batteries don’t always make the lock stop working entirely. Instead, you might see:
- Auto-lock working sometimes but failing when the door is tight.
- Slower motor movement or a chattering sound.
- Auto-lock disabling itself after a few failed lock attempts.
- Battery warnings in the app that you’ve been ignoring.
Since auto-lock relies on the motor doing the full work of throwing the bolt, it’s often the first feature to misbehave as batteries weaken.
Recommended batteries and replacement tips
Most August, Yale, Schlage, and Level locks use AA, AAA, or CR2/CR123 lithium batteries. For best performance:
- Use high-quality alkaline or lithium batteries from reputable brands. Rechargeable NiMH batteries often have lower voltage and may be less reliable in smart locks.
- Replace all batteries at the same time; don’t mix old and new.
- Check battery orientation carefully; incorrect placement can cause odd behavior without an obvious error.
If you want to understand why these locks prefer alkaline or lithium batteries, the article on alkaline batteries gives a good overview of how they deliver consistent voltage over time.
Cold weather and stiff deadbolts: how this affects auto-lock
In colder climates, doors can swell and hardware can stiffen, making the deadbolt harder to turn. Your hand may power through this resistance, but the lock’s motor might stall and cancel auto-lock.
- Lubricate the deadbolt and latch with a lock-safe dry lubricant (avoid heavy oils that attract dirt).
- Check that weatherstripping isn’t compressing excessively in cold weather.
- Consider slightly loosening the strike plate screws or adjusting the strike position during the coldest months.
If auto-lock only fails on extremely cold days, this combination of temperature and door swelling is a likely cause.
Fix 6 – Update Firmware & App (Bug Fixes and New Features)
How to update August, Yale, Schlage, and Level firmware
Manufacturers regularly release firmware updates that fix bugs, including auto-lock timing and sensor logic issues. To update:
- Open your lock’s app (August, Yale, Schlage Home, Level).
- Tap into Settings or the specific lock.
- Look for a Firmware / Device Info / Update option.
- If an update is available, follow the prompts and stay close to the lock with your phone during the update.
Don’t operate the door or power off the lock during the firmware process; wait until the app confirms completion.
Checking for app updates on iOS and Android
Outdated apps can have UI glitches or communication issues that cause settings to appear correct even when they’re not properly saved to the lock.
- On iOS, open the App Store, tap your profile, scroll to see pending updates, and update your lock’s app.
- On Android, open Google Play, tap your profile > Manage apps & device, then update.
After updating, re-open the app, recheck your auto-lock settings, and run a few test cycles.
Known auto-lock bugs and how updates usually fix them
Over the years, manufacturers have patched issues like:
- Auto-lock not respecting door sensor states under certain Wi-Fi or Bluetooth conditions.
- Auto-lock timers resetting unexpectedly after power loss.
- Inconsistent behavior when locks are controlled simultaneously by multiple platforms.
Because these fixes are delivered via firmware, staying updated is one of the easiest ways to avoid stubborn, hard-to-diagnose auto-lock issues.
Fix 7 – Review Connected Platform Settings (HomeKit, Alexa, Google, SmartThings)
When routines and scenes override your auto-lock setting
If your lock is connected to Apple Home, Alexa, Google Home, or SmartThings, automations from those platforms can unintentionally override the lock’s own auto-lock behavior.
Examples:
- A “Good Night” routine that locks the door at a set time may clash with the built-in auto-lock timer.
- A presence-based routine might unlock the door when you arrive, just as auto-lock is about to trigger, making it seem like auto-lock failed.
- A misconfigured rule could repeatedly send “unlock” commands after the lock auto-locks.
Checking HomeKit, Alexa, Google Home, and SmartThings automations
Audit your automations on each platform that controls your lock:
- Apple Home: Open the Home app > Automation tab and look for any that include your lock as an action.
- Alexa: In the Alexa app, check More > Routines for routines that lock or unlock your door.
- Google Home: Open the Home app, go to Automations and review any that mention the lock.
- SmartThings: Open the SmartThings app and review Routines or Scenes that involve the lock.
Temporarily disable any automations that lock/unlock the door, test built-in auto-lock alone, then re-enable or adjust routines as needed.
Best-practice rules so automations don’t break auto-lock
To keep auto-lock reliable:
- Let the lock’s own auto-lock feature handle everyday re-locking after entry.
- Use platform routines mainly for special cases (e.g., lock all doors at midnight).
- Avoid creating loops where one platform tries to undo what another just did.
- Document your key routines so other household members don’t unknowingly add conflicting ones.
Fix 8 – Reset the Lock’s Settings (Last Resort Option)
Soft reset vs. factory reset: what’s the difference?
A soft reset usually reboots the lock’s electronics without erasing configuration. A factory reset wipes all users, settings, and connections, returning the lock to out-of-the-box state.
- Soft reset: Useful for clearing glitches after a firmware update or app crash.
- Factory reset: Use only if calibration, updates, and setting changes don’t fix your auto-lock problem.
Each brand has its own reset sequence—often a button press inside the battery compartment or a specific keypad code.
How to safely back up users, codes, and access history
Before resetting:
- Open the app and take screenshots of your users, codes, and schedules.
- If supported, export access logs or note any important history you want to keep.
- Verify you know the master code or have the account login details needed to set the lock up again.
This makes it much easier to rebuild your configuration after a factory reset.
Reconfiguring auto-lock after a reset
Once you’ve reset and re-added the lock to your app:
- Complete the initial setup wizard fully, including calibration or handing.
- Re-enable auto-lock and set your preferred delay.
- Re-add users, codes, and any integrations (HomeKit, Alexa, Google, SmartThings).
- Test auto-lock several times with the door open and closed to ensure the fresh configuration behaves properly.
Fix 9 – When to Call Support or a Locksmith
How to tell if the problem is software, hardware, or the door
Use these clues to narrow down the issue:
- Software issue: Auto-lock fails inconsistently, seems tied to app updates, or behaves differently across user accounts.
- Hardware issue: You hear grinding, clicking, or see the motor stall even with a well-aligned door and fresh batteries.
- Door issue: Lock works perfectly with the door open but struggles or fails when the door is fully closed.
This helps you decide whether to talk to the lock manufacturer or a local locksmith.
What August, Yale, Schlage, and Level support can do
Manufacturer support can:
- Walk you through advanced diagnostics or hidden settings.
- Check for known firmware issues with your exact model and version.
- Authorize warranty replacements if the lock hardware is defective.
Support pages for smart locks often include detailed troubleshooting trees and manuals. For a deeper technical background on how smart locks work in general, the smart lock overview on Wikipedia can be a helpful reference.
When you should involve a professional locksmith
Call a locksmith if:
- The deadbolt or latch is clearly binding, and basic strike/hinge adjustments haven’t helped.
- You’re uncomfortable removing or realigning hardware yourself.
- You suspect the mechanical lock (not just the smart housing) is worn out or damaged.
A locksmith can repair or replace the deadbolt cylinder and strike while preserving your smart lock investment.
Brand-Specific Quick Reference: August, Yale, Schlage, Level
August: most common auto-lock problems and quick fixes
Typical August auto-lock issues:
- DoorSense misalignment: Check sensor placement and recalibrate.
- Auto-lock disabled after update: Re-open app settings and re-enable auto-lock.
- Bluetooth/Wi-Fi quirks: Update firmware and app; try power-cycling your phone and any August Wi-Fi bridge.
If auto-lock only fails when DoorSense is enabled, temporarily turn off the “lock only when door is closed” option and test. If it then works, you’ve confirmed a sensor issue rather than a lock or timer problem.
Yale & Schlage: keypad lock quirks that affect auto-lock
For Yale and Schlage keypad locks, a few extra factors matter:
- Certain models allow auto-lock to be enabled or disabled from the keypad using the master code and a menu option.
- If someone changed the programming code or used the wrong sequence, auto-lock might have been disabled at the lock level even if the app shows it as on.
- Some older Z-Wave or Zigbee models rely on the hub for auto-lock logic, so hub automations and time sync become more critical.
Whenever keypad behavior doesn’t match what the app says, double-check the manual’s programming section and ensure the keypad configuration matches your expectations.
Level: invisible lock-specific auto-lock behaviors
Because Level hides most of its hardware inside the door, a few things are unique:
- Without a visible thumbturn housing, it’s easy to overlook subtle resistance in the bolt. Always test manual turning with the door closed.
- Frame magnets and internal sensors must be very precisely aligned; even paint buildup or trim changes can affect detection.
- Level relies heavily on its app for configuration and diagnostics, so keeping the app updated is especially important.
If your Level lock’s auto-lock works perfectly during app-based tests but fails in daily use, focus on magnet and door position alignment first.
Preventing Future Auto-Lock Issues
Seasonal maintenance: hinges, strike plates, and deadbolts
A little mechanical upkeep goes a long way toward keeping auto-lock reliable:
- Tighten hinge screws and check for sag twice a year.
- Inspect and lightly lubricate the deadbolt and latch with a dry lock lubricant.
- Look for paint, dirt, or debris building up in the strike plate pocket.
- Watch how the door behaves in different seasons—if it sticks in winter, plan for a slight strike adjustment.
Recommended auto-lock timing for safety and convenience
Choosing the right auto-lock delay balances security and usability:
- 30–60 seconds: Good for front doors in busy neighborhoods where you want quick re-locking.
- 2–5 minutes: Better for doors you use while carrying groceries or kids so you’re less likely to get locked out.
- Longer delays or disabled auto-lock: Consider for interior garage doors or doors you use for frequent in-and-out tasks.
Start with a slightly longer delay while you test and shorten it once you’re confident everything is working smoothly.
Creating a simple checklist when you install or move a lock
Whenever you install a new smart lock or move one to a different door, run through this quick checklist:
- Confirm the deadbolt operates smoothly by hand with the door closed.
- Calibrate or run the initial bolt travel test per the manual.
- Enable auto-lock in the app and set a test delay.
- Verify any door sensors or magnets are properly aligned and calibrated.
- Add integrations (HomeKit, Alexa, Google, SmartThings) and confirm they don’t conflict with auto-lock.
- Do at least 5–10 unlock/auto-lock cycles while you’re at home and have a key available.
These steps only take a few minutes and greatly reduce the chance of surprises later.
Conclusion
If your smart lock auto lock is not working on an August, Yale, Schlage, or Level lock, the fix is usually straightforward: confirm settings, ensure the door and sensors are properly aligned, recalibrate, and keep firmware and batteries fresh. By working through the nine fixes in this guide, you can usually restore reliable auto-lock without replacing the lock or calling a professional.
Once everything is dialed in, your lock should quietly take care of itself again—locking behind you so you don’t have to wonder if the door was left open.
FAQ
Why does my smart lock only auto-lock sometimes?
Intermittent auto-lock is often a sign of marginal issues: a slightly misaligned strike, low batteries, or a door sensor that only reads correctly some of the time. Start by checking door alignment and recalibrating the lock, then confirm the sensor and batteries are in good shape.
Is it safe to rely only on auto-lock for home security?
Auto-lock is a great safety net, but you should still develop the habit of checking your door manually, especially at night. Regularly test auto-lock, keep your app and firmware updated, and carry a key or have a backup entry method in case something fails.
Can I use auto-lock on a door with a handle latch and a separate deadbolt?
Yes, but make sure the handle latch fully closes the door and pulls it snugly into the frame. If the door isn’t seated well, the deadbolt may bind or fail to extend, causing auto-lock problems. Proper strike adjustment is especially important on this type of setup.
Why did auto-lock stop working after I connected my lock to Alexa or Google Home?
Adding a new platform can introduce routines or scenes that send lock/unlock commands. These can interfere with the lock’s built-in auto-lock timer. Review your Alexa or Google Home automations and temporarily disable anything that controls the lock to see if the problem goes away.
Should I disable auto-lock if I have kids or guests coming in and out?
You don’t have to. Instead, consider extending the auto-lock delay during busy times, and make sure everyone knows the door may lock automatically. For frequent visitors, share temporary codes or app access so they’re not locked out if the door closes behind them.