Upgrading a 3-way or 4-way light circuit to smart control can feel intimidating. You may have multiple switches controlling the same light, old wiring, and a strong desire not to open every box or hire an electrician.
The good news: there are smart switches and dimmer combos designed specifically for multi-way circuits that can work with your existing wiring and often without full rewiring. With the right products and a bit of planning, you can add app control, voice control, and schedules to hallways, stairwells, and other multi-switch locations.
This guide walks through how these systems work, what to look for, and the best smart light switches for 3-way and 4-way circuits for different types of homes and budgets.
Overview: Smart Switches for 3-Way and 4-Way Circuits Without Rewiring
What makes 3-way and 4-way smart lighting different from single-pole setups?
In a single-pole circuit, one switch controls one light. A 3-way circuit lets two switches control the same light (common on stairways and hallways). A 4-way circuit adds one or more additional switches to the same light.
In traditional wiring, this is done with traveler wires running between switches. A smart switch has to understand and replace that behavior. Some do this by using a “master + companion” approach, others by turning extra locations into wireless remotes instead of full wired switches.
If you’re new to how multi-way wiring works, the overview on three-way and four-way switching is a helpful reference. You don’t need to be an electrician, but understanding the basics will make your install smoother.
Common user goals: keep existing wiring, add app and voice control, avoid hiring an electrician
Most homeowners looking for smart 3-way or 4-way solutions want to:
- Keep existing wiring and boxes as much as possible.
- Avoid pulling new cables or opening walls.
- Add app control for remote access and schedules.
- Use voice control with Alexa, Google Assistant, or Siri.
- Maintain normal wall switch behavior for family and guests.
- Avoid hiring an electrician for what feels like a small upgrade.
The products in this guide aim to meet those goals by using the wiring you already have, or by converting secondary switches to wireless companions without rewiring the whole circuit.
Quick summary of the best smart light switches for 3-way and 4-way circuits
Here’s a quick overview of strong options you’ll see referenced later (availability can vary):
- Lutron Caseta Wireless – Excellent overall reliability and multi-way support using Pico wireless remotes; ideal if you’re okay with a hub.
- TP-Link Kasa HS210 3-Way Kit – Budget-friendly Wi‑Fi 3-way kit that includes two matched switches designed for multi-way use.
- TP-Link Kasa HS220 – Affordable Wi‑Fi dimmer with 3-way support when paired correctly.
- Leviton Decora Smart (Wi‑Fi or Z-Wave) – Strong choice for hub-based and larger homes, plus a Wi‑Fi line that doesn’t require a hub.
- Wemo Smart Dimmer with Thread/Matter – Good fit for Apple-centric homes once fully supporting Matter ecosystems.
- Aqara Smart Wall Switch (No Neutral) – Helpful in older homes without neutrals (hub required).
Specific models change over time, but the selection criteria and wiring concepts stay mostly the same.
Key Buying Criteria for 3-Way and 4-Way Smart Light Switches
Confirming your circuit type: 3-way vs 4-way vs multi-location
Before buying anything, you need to know what you have:
- 3-way circuit – Two switches control one light.
- 4-way circuit – Three or more switches control one light (two 3-way switches plus one or more 4‑way switches in the middle).
- Multi-location (manufacturer term) – Often means a system that supports multiple controls for the same load using companions or wireless remotes, regardless of whether it’s a 3-way or 4-way.
Count the switches that control the same light. If there are two, it’s a 3-way; three or more is typically a 4-way setup. Make sure any product you choose explicitly states support for “3-way” or “multi-location” circuits. Some will also call out support for “up to 4 locations” or similar.
No-neutral vs neutral-required switches and what homeowners need to check
Modern smart switches often require a neutral wire in the box. Older homes, especially pre-1980s, may not have neutrals at the switch location.
To check (with power off):
- Remove the wall plate and gently pull the switch forward.
- Look for a bundle of white wires wirenutted together in the back of the box. That’s usually the neutral bundle.
- If you only see two or three wires attached directly to the switch with no white bundle in the back, you may not have a neutral at that location.
If you don’t have neutrals, look for specifically labeled “no-neutral” smart switches or systems like certain Lutron Caseta dimmers or Aqara switches. Otherwise, pick neutral-required models and plan to install them where the neutral is present in the circuit (often the box receiving power from the panel).
Compatibility with smart hubs, Wi-Fi, Matter, Alexa, Google Home, and HomeKit
Decide how you want the switch to connect:
- Wi‑Fi only – Connects directly to your router. Simple for small setups (e.g., Kasa HS210). Too many Wi‑Fi devices can crowd your network.
- Zigbee/Z-Wave – Requires a hub (like SmartThings, Hubitat, or a Z-Wave USB stick) but scales better for whole‑home setups.
- Matter/Thread – Newer standard aiming for cross-platform support with Thread radios. Good option if you want future flexibility.
Also check voice and app compatibility:
- Alexa / Google Home – Most major brands support these.
- Apple HomeKit – More limited; Lutron Caseta (with the right bridge) and some Wemo and Eve products are strong options.
- Local control vs cloud – Hub-based systems often keep basic on/off/dimming working even if the internet goes down.
Dimmer vs on/off only: bulbs, fixtures, and minimum load requirements
Decide if you actually want dimming at that location:
- Use a dimmer when you have dimmable LED or incandescent bulbs and actually use brightness control (living rooms, bedrooms, dining rooms).
- Use on/off switches for non-dimmable loads like some LED fixtures, motors, or exterior lights.
Check the dimmer’s minimum and maximum load. Some smart dimmers need a minimum wattage to operate reliably, especially on no-neutral models. Many support low-wattage LED loads (for example, 10–150W LED), but cheap or mismatched bulbs can still flicker. Look for compatibility lists or “LED optimized” dimmers from established brands.
Safety, code compliance, and when you still might need an electrician
Even though these products aim to avoid rewiring, you’re still working inside electrical boxes. Follow basic safety:
- Turn off the correct breaker and verify power is off with a non-contact voltage tester.
- Match all wiring to the manufacturer’s diagrams, not guesswork.
- Never bury loose wire nuts or ground wires.
If you open the box and see aluminum wiring, damaged insulation, or a confusing bundle that doesn’t match the manual, calling an electrician is wise. They can identify line/load, confirm neutrals, and ensure everything meets local code while you still get the smart upgrade you want.
How No-Rewiring Multi-Way Smart Switch Solutions Work
Master and auxiliary (add-on) switch setups explained
Many smart multi-way solutions use a “master + auxiliary” approach:
- Master switch – The only device that actually switches power to the light (“the load”) and connects to Wi‑Fi or your hub.
- Auxiliary/add-on switch – Communicates with the master (often using traveler wires or low-voltage signaling) but doesn’t control the load directly.
This simplifies wiring and avoids strange behavior from mixing smart and traditional traveler logic. Systems from Leviton, GE/Jasco, and others offer dedicated add-on switches specifically for this purpose.
Using smart switches with existing dumb switches: when it’s possible and when it’s not
Some smart switches advertise that they can work with an existing 3-way dumb switch at the other location. Typically, this means:
- The smart switch goes in the box with line and load.
- The dumb switch stays in the other box and acts as a simple toggle input.
However, not all smart switches support this. Using a random dumb switch in the second location when the manual calls for a branded add-on can lead to flicker, ghost switching, or the circuit not working at all. Always follow the wiring options listed in the manufacturer’s instructions.
Wireless companion switches and remote paddles for 3-way locations
Another popular approach is to hard-wire a smart switch in one location, then replace the other switch locations with wireless remotes. These remotes send commands over RF, Zigbee, or Thread instead of using travelers.
Examples include Lutron Caseta Pico remotes and some newer Matter/Thread remotes. You mount the remote in a wall plate so it looks like a regular switch, but it’s powered by a coin cell battery.
This method often avoids touching complex 4-way wiring entirely: you wire the main switch to the load and power, cap off travelers safely, and let remotes handle additional locations.
Using smart bulbs plus a smart switch or button in multi-way circuits
Another path is to keep wiring simple and make the bulbs smart instead of the switch. There are a few caveats:
- All switches controlling that circuit must either stay on or be converted to smart buttons/remotes that don’t cut power.
- Turning power off at a traditional switch makes the smart bulbs unreachable.
A common approach is:
- Install smart bulbs (e.g., Philips Hue or Kasa bulbs).
- Use wall-mounted wireless remotes or smart buttons at traditional switch locations.
- Leave the old wall switch permanently on (or remove it and use a battery button in its place).
This works well when you want color-changing bulbs or very granular per-bulb control but don’t want to rewire multi-way circuits.
Best Overall Smart Light Switches for 3-Way and 4-Way Circuits
Top pick (Wi-Fi or Matter): pros, cons, and ideal use cases
For a hub-free, budget-friendly wired 3-way solution, the TP-Link Kasa HS210 3‑Way Smart Switch Kit is a strong pick. It includes two matched Wi‑Fi switches designed to replace both ends of a 3-way. You wire them according to the included diagrams, connect them to the Kasa app, and then link them with Alexa or Google Home if you like.
Pros:
- No hub required; connects directly to Wi‑Fi.
- Kit includes both switches, avoiding compatibility guesswork.
- Good app experience for schedules and away modes.
Cons:
- Requires neutrals at both locations.
- Wi‑Fi only; no native HomeKit and adds load to your router.
You can see how TP-Link handles the 3-way kit wiring and features on the Kasa HS210 product page.
If you’re seeking Matter/Thread-based models, look for newer switches from brands like Wemo and Eve that advertise multi-way support under Matter; just confirm current firmware supports your platform before buying.
Best for budget-conscious users who still want 3-way support
Budget-focused homeowners tend to gravitate toward Kasa and some entry-level Leviton Wi‑Fi models. Key points:
- Choose a 3-way-capable on/off switch (like Kasa HS210) for hallways and staircases where dimming isn’t essential.
- Mix single-pole-only budget switches in other rooms to save money.
- Start with one problematic location (such as a dark stairwell) to gain confidence before expanding.
These options usually have plastic paddles, simple styling, and good-enough apps without advanced scene controls or energy monitoring. For many users, that’s a smart trade-off for lower cost.
Best for HomeKit and Apple-centric homes
Apple-centric homes benefit from switches that integrate cleanly with HomeKit and now increasingly with Matter over Thread. Popular options include:
- Lutron Caseta with the HomeKit-capable Caseta bridge.
- Wemo smart dimmers and switches with Thread/Matter (model and firmware dependent).
- Eve smart switches in regions where they’re available.
Lutron is especially attractive here: you get reliable local control via the bridge, excellent dimming, and flexible multi-way control using Pico remotes. Everything appears neatly in the Apple Home app, and you can create automations using HomeKit’s simple interface.
Best for hub-based systems (Zigbee/Z-Wave) and larger smart homes
If you’re already running SmartThings, Hubitat, or Home Assistant with a Zigbee/Z-Wave stick, a hub-based switch line makes sense:
- Z-Wave switches from brands like GE/Jasco, Zooz, and Leviton offer robust multi-way support with add-on switches.
- Zigbee switches exist as well, though selection may be smaller depending on your region.
- Hub-based systems often maintain local automations even without internet connectivity.
For larger homes, this approach keeps Wi‑Fi clear for laptops and media streaming while letting the hub manage dozens of switches efficiently.
Best Smart Dimmer Combos for Multi-Way Circuits
Leading 3-way smart dimmer kit with matching add-on/companion switch
Dimmer kits designed for multi-way circuits package a master dimmer with a dedicated companion switch. Examples include:
- Leviton Decora Smart dimmers with Decora coordinating remote.
- GE/Jasco Z-Wave or Zigbee smart dimmers with matching add-on switches.
These kits typically let you dim from any location, not just the master. The companion sends commands to the master over the traveler wire, which simplifies behavior and reduces flicker risk.
No-neutral smart dimmer options for older homes
If your boxes lack neutrals, look for specifically rated no-neutral dimmers. Common characteristics:
- Often limited to certain load ranges and dimmable LEDs.
- May require a minimum load (e.g., 25W) or a small bypass device at the fixture to avoid ghosting.
- Frequently work best in 2-wire configurations where line and load are in the same box.
Lutron Caseta is one of the more forgiving choices here, working in many 2-wire scenarios and supporting multi-location dimming with Pico remotes even in older homes.
Flicker-free performance: choosing dimmers that play well with LED bulbs
LED flicker is a common complaint after installing smart dimmers. To minimize it:
- Check the dimmer’s list of tested compatible bulbs on the manufacturer’s site.
- Use quality dimmable LEDs from well-known brands.
- Avoid mixing different bulb brands or models on the same dimmer.
- Use dimmer settings (if available) to adjust low-end trim so lights don’t dim below their stable range.
Higher-end dimmers often include more sophisticated electronics to handle low wattages and complex LED drivers, which pays off in fewer flicker issues.
Scene control, double-tap functions, and advanced dimmer features
Some smart dimmers offer bonus features beyond simple on/off and brightness:
- Double-tap actions – Double-tap up could trigger a “bright cleaning” scene; double-tap down could start a movie mode.
- Long-press actions – Hold to activate a specific scene or control another device entirely.
- Preset levels – Turn on always to 60% instead of full brightness.
- LED bar indicators – Show current brightness at a glance.
If you enjoy fine-tuned automation, consider a dimmer line that exposes these options in your chosen platform (SmartThings, Home Assistant, HomeKit, etc.).
Smart Switch vs Smart Dimmer vs Smart Bulb in 3-Way/4-Way Setups
Pros and cons of each approach for multi-way lighting
Smart switch (on/off):
- Pros: Works with most standard bulbs, family-friendly, looks like a normal switch.
- Cons: No dimming; you need dimmable fixtures if you want that option later.
Smart dimmer:
- Pros: Smooth dimming at the wall and via app/voice, can improve comfort and energy use.
- Cons: Requires dimmable bulbs and attention to compatibility; more expensive than on/off.
Smart bulbs:
- Pros: Per-bulb control, color, and tunable white options; no need to modify wiring.
- Cons: Switches must stay on; multi-way circuits require remotes/buttons instead of cutting power.
When it’s better to smarten the switch vs the bulb
Choose a smart switch or dimmer when:
- You just want reliable, normal-looking control.
- Multiple people use the space and expect a standard switch.
- The circuit is multi-way and you want everything to “just work” without training guests.
Choose smart bulbs when:
- You want color or tunable white lighting.
- You need granular control of individual bulbs in the same fixture.
- You’re renting and can’t change wiring.
Mix-and-match strategies: smart switch on one leg, smart buttons on others
A very practical compromise for multi-way circuits is:
- Install a smart switch or dimmer at the main power location.
- Replace other 3-way/4-way switches with wireless smart buttons or remotes that talk to your hub or ecosystem.
- Leave the fixture always powered from the smart switch, and use automations to mirror button presses.
This keeps wiring changes minimal and lets you customize each wall control without worrying about traveler wiring.
Wiring and Compatibility Checks Before You Buy
How to safely identify traveler wires, line, load, and neutral
To identify wires (with power safely off):
- Line (hot from panel) – Often black, feeds power into the switch box.
- Load – Goes from the switch to the light fixture.
- Traveler wires – Connect switches in multi-way circuits; often red and black.
- Neutral – Typically white, bundled in the back of the box.
A non-contact voltage tester can help confirm which conductor is hot when the breaker is on (only test if you’re comfortable and follow safety procedures). Many manufacturers also offer labeled diagrams in their manuals to match typical wiring layouts.
What to do if there’s no neutral in one or more boxes
If one box has a neutral and the other doesn’t, you usually want the smart master in the box with the neutral. Options include:
- Using a smart switch that only needs a neutral in one location with a low-voltage or wireless companion elsewhere.
- Choosing a no-neutral smart switch (where safe and supported) for that specific location.
- Having an electrician run a neutral if code and safety demand it, especially in complex 4-way circuits.
Don’t try to repurpose ground wires as neutral or tie wires together “until it works”. That’s unsafe and can create shock hazards.
Box size, switch style (toggle vs paddle), and faceplate considerations
Smart switches and dimmers are often deeper than traditional switches. Check:
- Box size and how many cables are already in there—crowded boxes can be tough.
- Whether you want traditional toggle style or modern paddle/rocker style.
- If the product includes matching wall plates or works with standard Decora plates.
Overfilled boxes can violate code and make it hard to tuck wires back in. If you’re struggling to fit everything safely, a slightly larger box (installed by a pro) may be worth it.
Voltage ratings, max load, and bulb type compatibility (LED, CFL, halogen)
Check the switch’s spec label or datasheet for:
- Voltage rating (most residential North American switches are 120V).
- Maximum load (e.g., 600W incandescent or 150W LED).
- Bulb type support – Some dimmers explicitly support LED/CFL/halogen, others are designed mainly for incandescent loads.
Never exceed rated loads, especially on dimmers. Overloading can cause overheating, flicker, or failure.
Step-by-Step Setup Guide for a 3-Way Smart Switch Upgrade
Pre-setup checklist: tools, turning off power, taking wiring photos
Before starting, gather:
- Non-contact voltage tester.
- Screwdrivers (flat and Phillips).
- Wire stripper/cutter.
- Wire nuts (usually included with the switch).
- Your phone for taking reference photos.
Turn off the breaker for the circuit and verify power is off. Take clear photos of both switch boxes before disconnecting anything so you can refer back if needed.
Installing the main smart switch at the line/load location
Most instructions will have you install the master at the box where line and load are together (often the box with the feed from the panel). General flow:
- Label line, load, travelers, and ground based on your photos and the instructions.
- Disconnect the old switch.
- Connect line to the smart switch’s line terminal.
- Connect load to the smart switch’s load terminal.
- Connect neutral (if required) to the neutral terminal or pigtail into the neutral bundle.
- Connect ground.
- Cap off or re-purpose traveler wires as directed by the manufacturer.
Carefully tuck the wires back and screw the switch into the box.
Adding and pairing the companion or wireless remote switch
For a wired companion:
- Follow the manufacturer’s diagram to connect travelers or signal wires between master and add-on.
- Cap any unused wires as instructed.
For a wireless remote:
- Mount the remote in a wall plate where the old switch was (you may need a blank or retrofit kit).
- Pair the remote to the master via app or button sequence.
Once both are in place, turn the breaker back on and test basic on/off from each location.
App setup: naming, rooms, and testing both switch locations
Next, open the manufacturer’s app:
- Add the new switch or dimmer according to the prompts.
- Give it a descriptive name like “Stairway Lights”.
- Assign it to the correct room so it’s easy to find in voice assistants.
- Test on/off and dimming, then test from both physical switch locations to confirm everything is in sync.
Troubleshooting common issues: ghost switching, flicker, and offline devices
If you run into problems:
- Ghost switching (lights turning on/off unexpectedly) – Double-check wiring and ensure any dumb switches have been replaced with proper companions or remotes.
- Flicker at low dim levels – Try different bulbs, adjust low-end trim if available, or confirm the bulb is on the compatibility list.
- Device offline in app – Check Wi‑Fi signal strength, move your router or add a mesh node, or verify the hub is powered and online.
Manufacturer support pages and communities can be very helpful for model-specific quirks; many issues are solved with a small wiring adjustment or setting change.
Automations and Smart Home Routines for Multi-Way Lighting
Schedules and sunrise/sunset automations for hallways and stairwells
Once installed, a smart 3-way or 4-way circuit shines with simple schedules:
- Turn on stairway lights at sunset and off at a fixed bedtime.
- Set hallway lights to a low level late at night for safe trips without harsh brightness.
- Use weekday vs weekend schedules for early-morning routines.
Most manufacturer apps support sunrise/sunset triggers so your lighting adjusts automatically as seasons change.
Motion-based automations for entryways and garages
Pair your smart switches with motion sensors to make high-traffic areas hands-free:
- Entryway lights turn on when someone comes in after dark and off after a few minutes of no motion.
- Garage or mudroom lights trigger when you open the door from the house.
- Basement stair lights come on when motion is detected at the top or bottom of the stairs.
Many platforms (SmartThings, Home Assistant, Apple Home) let you combine time, motion, and occupancy into smarter rules.
Voice control examples for Alexa, Google Assistant, and Siri
Once linked to your voice assistant, multi-way circuits behave like any other smart light:
- “Alexa, turn on the stairway lights.”
- “Hey Google, dim the hallway lights to 40%.”
- “Hey Siri, turn off all downstairs lights.”
Names matter here—use clear, simple naming in your apps so you and your family remember what to say.
Using multi-way smart switches in whole-home scenes (Goodnight, Away, Movie)
Scenes are where multi-way smart switches really pay off. Examples:
- Goodnight – Turn off all common-area lights, dim bedroom lights, leave a low-level nightlight in the hall.
- Away – Turn off interior lights, leave a porch light on, and enable randomization to simulate occupancy.
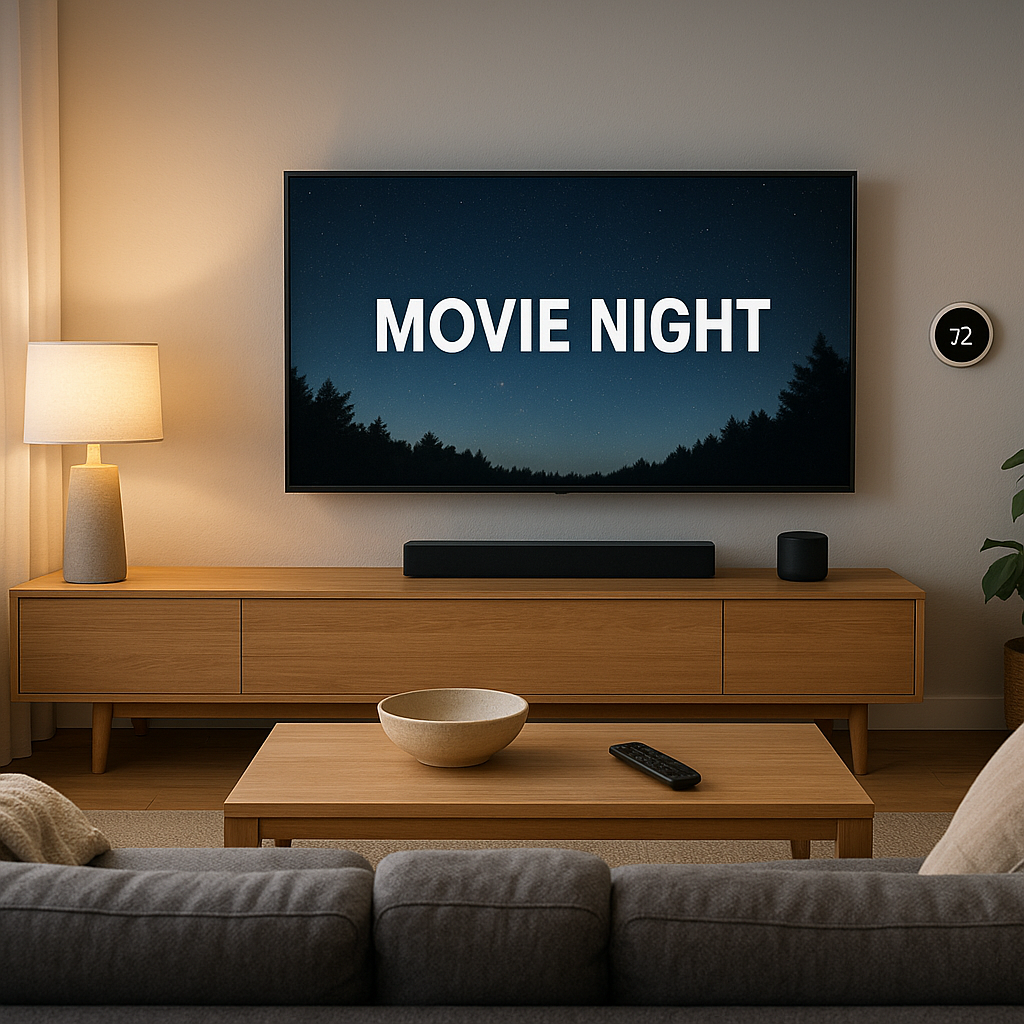
- Movie – Dim living room and hallway lights to a preset level to reduce glare.
Once your 3-way and 4-way circuits are smart, they become just as easy to include in scenes as single-pole switches.
Energy Savings and Safety Benefits of Smart Multi-Way Switches
Using energy monitoring (where available) to track lighting usage
Some smart switches include basic power monitoring, letting you see how often and how long circuits are used. Even without built-in monitoring, you can approximate savings by:
- Shortening schedules where lights were traditionally left on all night.
- Dimming lights to 70–80% instead of full brightness.
- Automatically turning off lights in low-traffic areas after a timeout.
Over time, these small optimizations can trim your electricity usage, especially in heavily used hallways and stairwells.
Vacation mode, randomization, and occupancy-style automations
Many apps and platforms offer vacation or “away” modes that:
- Randomly turn certain circuits on and off in the evening to mimic normal use.
- Combine multi-way circuits with single-pole ones for believable patterns.
- Use sunrise/sunset plus random offsets to avoid obvious patterns.
These features can make your home look lived in while you’re traveling, adding a layer of security beyond simple timers.
Integrating with security systems and smart sensors for safer pathways
Smart switches in 3-way/4-way locations are perfect for lighting safe paths in emergencies:
- Turn on stair and hallway lights automatically when a smoke or CO detector trips.
- Link exterior and entryway lights to door/window sensors or a security system alarm.
- Trigger lights when a smart lock is opened at night.
Many professional and DIY security systems detail how to integrate lighting; manufacturer support pages or resources like the SmartThings lighting guide can offer inspiration for more advanced setups.
Frequently Asked Questions About Smart 3-Way and 4-Way Switches
Can I mix smart and dumb switches in one 3-way circuit?
Sometimes. Some smart switches are explicitly designed to work with a traditional 3-way at the other location. Others require a branded add-on or wireless remote. If the manual doesn’t list “works with existing 3-way switch,” assume you need the matching companion to avoid erratic behavior.
Do I have to rewire all switch locations to go smart?
Usually not. Many systems let you install a single master switch at the line/load location and handle other locations with simple companions or wireless remotes. That keeps your existing cabling mostly intact and avoids opening every junction box.
Will smart switches work if the Wi-Fi or internet goes out?
Yes, the wall switch will still work locally for basic on/off and dimming. However, app control from outside the home and voice control via cloud assistants may stop until your network is back. Hub-based systems with local processing often maintain automations even without internet.
Are smart 4-way switch setups harder than 3-way to configure?
They’re more complex, but not necessarily harder if you follow the product’s instructions. Many manufacturers recommend putting the master at one end and using either add-on switches or wireless remotes at the other locations, effectively simplifying the traditional 4-way wiring.
Final Recommendations and Upgrade Paths
Best choices for renters vs homeowners
Renters are usually better off with smart bulbs, plug-in lamps, and wireless remotes that don’t alter hardwired circuits. If your landlord permits it and you’re comfortable, you can install smart switches and swap them back before moving out, but always keep the originals and document wiring.
Homeowners have more freedom to replace existing switches. Investing in a reliable multi-way-capable switch line (like Lutron Caseta, Kasa HS210, or a Z-Wave brand paired with a hub) can pay off as you expand room by room.
Starter kit recommendations for first-time smart lighting upgrades
A practical starting path looks like this:
- Choose one 3-way circuit that annoys you (often a dark stairway or entry hall).
- Buy a 3-way-capable switch kit or dimmer + companion pair that fits your wiring (neutral/no-neutral, Wi‑Fi vs hub).
- Install carefully using photos, labels, and the instructions.
- Set simple schedules and a couple of basic scenes.
Once you’re happy with that first upgrade, add more circuits using the same ecosystem so everything works together.
When to expand to whole-home smart lighting from a single 3-way project
After living with a smart 3-way switch for a few weeks, you’ll know if you like the app, the voice assistant integration, and the hardware feel. If it works reliably, that’s the time to:
- Add matching single-pole switches in frequently used rooms.
- Upgrade key 4-way locations (long hallways, multi-entry living spaces).
- Introduce sensors, scenes, and more advanced automations.
Starting with multi-way circuits may be slightly more work upfront, but it sets a strong foundation. Once those tricky locations are smart and stable, the rest of your home’s lighting upgrades feel much easier.