Tired of waving your arms so the lights don’t go out in the middle of a movie or video call? That “smart” motion sensor on the wall was probably designed for hallways, not for real-world living rooms and home offices.
mmWave presence sensors are one of the most useful upgrades you can make to your smart home lighting. Instead of only reacting to big movements, they can detect tiny motions like breathing or typing. That means your lights stay on while you’re actually in the room, and turn off soon after you leave—without huge timeouts that waste energy.
This guide walks through what mmWave presence sensors are, why they fix so many motion-sensor annoyances, how to choose and position them, and how to integrate them with your existing smart lighting platform.
What Is an mmWave Presence Sensor in a Smart Home?
How mmWave presence sensing is different from PIR motion sensors
Most traditional smart home motion sensors use PIR (passive infrared) technology. They watch for changes in heat patterns, like a warm body moving across a cooler background. If the heat pattern changes quickly enough, the sensor reports motion.
An mmWave presence sensor works differently. It uses millimeter-wave radar—radio waves in the 60–77 GHz range—to emit a signal and analyze the reflections from objects in the room. Because the wavelength is so small, the sensor can detect very fine movements:
- Slow shifts in posture on a sofa
- Hand movements while typing
- Breathing or slight head movement when reading
Unlike PIR, which often needs a noticeable walk across the room to trigger, mmWave presence can maintain a “someone is here” state based on tiny, continuous movements.
Why traditional motion sensors turn lights off too early
PIR motion sensors are great in places like corridors, entryways and stairwells where people are constantly moving through. They struggle in rooms where you spend time mostly sitting or lying down.
Common issues with PIR-based lighting include:
- Reading or working quietly: Once you sit down and stop walking around, the sensor sees no new motion.
- Watching TV: If the sensor faces away from you or the room is warm, it may not register subtle movements.
- Short detection windows: Many PIR sensors reset their timer only when they see new motion, so if nothing big happens in that period, the lights go off.
To avoid lights turning off, people often increase the “off” timeout to 20–30 minutes. That helps, but it also means lights stay on for a long time after the room is empty.
Basic components of an mmWave presence sensor setup
A typical mmWave presence sensor smart home setup for lighting includes:
- mmWave presence sensor: For example, Aqara FP2, Tuya-based modules, or ceiling-mounted sensors from brands like Zemismart.
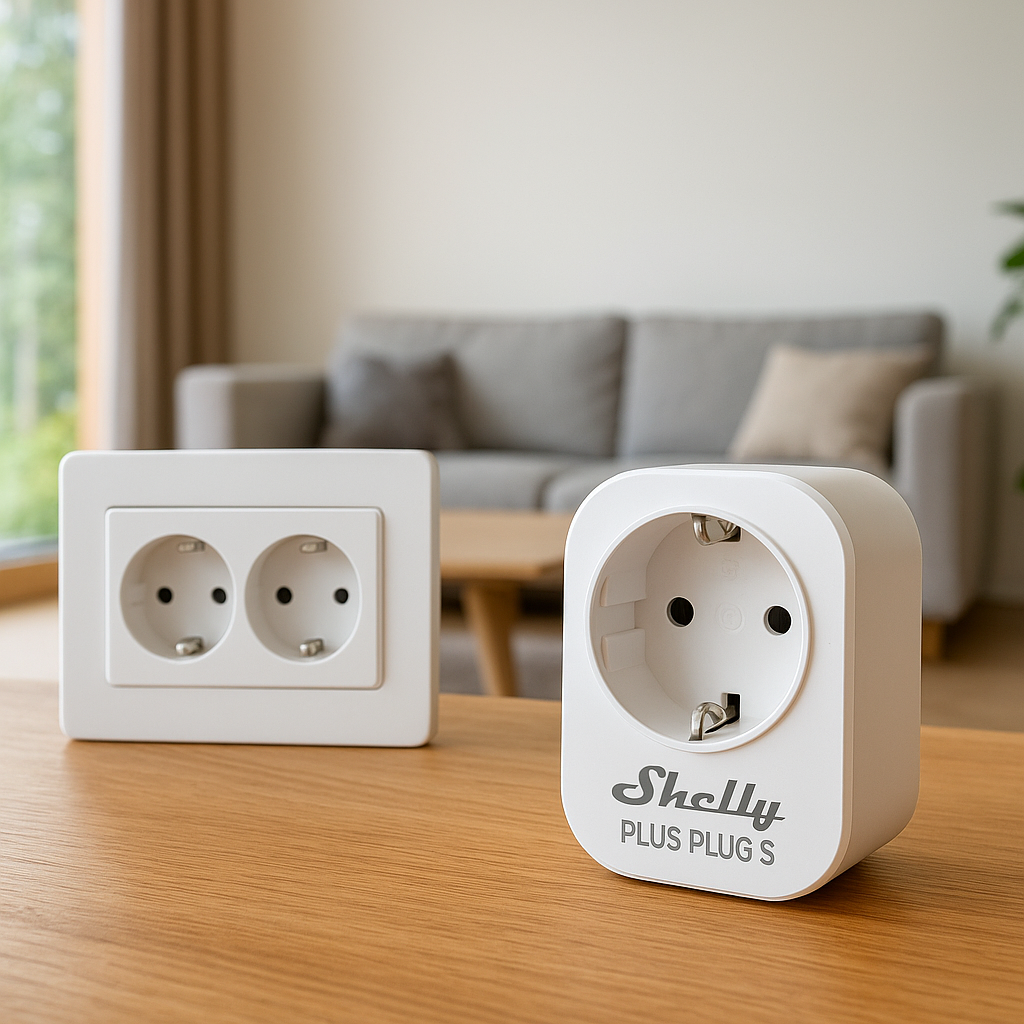
- Smart lighting device: This can be smart bulbs (Philips Hue, LIFX), smart switches (Lutron Caséta, Aqara, Shelly), or smart plugs controlling lamps.
- Smart home hub or platform: Such as Home Assistant, Hubitat, SmartThings, Apple Home, or a manufacturer’s own app.
- Automation rules: Logic that says “when presence is detected, turn lights on” and “when presence is gone for X minutes, turn lights off.”
The mmWave sensor provides a reliable “occupied vs. empty” signal. Your hub or platform uses that signal to control the lights.
Why Your Smart Lights Turn Off While You’re Still in the Room
Common problems with PIR motion-based lighting automations
Most people start with inexpensive PIR sensors and run into the same issues:
- Dead zones: The sensor can’t see you while you’re sitting on the sofa or at the desk.
- One-size-fits-all timeouts: A 5-minute timeout might work in a hallway but is awful for a home office.
- Limited configuration: Some battery PIR sensors only expose a simple motion event and a fixed cooldown, limiting fine-tuning.
- Temperature sensitivity: PIR can be less reliable in rooms where the background temperature is close to body temperature.
The result: you’re still in the room, but from the sensor’s perspective you “disappeared” a few minutes ago.
Edge cases: reading, working at a desk, watching TV and kids’ rooms
Certain activities are especially hard for PIR-based lighting:
- Reading on a chair or bed: You may only turn a page every couple of minutes. That’s not enough motion.
- Working at a desk: Typing and mouse movements are small and often outside the PIR’s field of view.
- Watching TV: In a dark room with a warm background, subtle movements are easily missed.
- Kids’ rooms: A child quietly playing on the floor or reading can get plunged into darkness, leading to frustration and unsafe stumbling.
These are exactly the cases where mmWave presence sensors shine, because they can track micro-movements over longer periods.
Balancing comfort vs. energy savings with occupancy-based lighting
There’s always a trade-off between comfort and energy savings. Long timeouts keep lights from turning off on you, but also keep them on in empty rooms. Very short timeouts save energy but create annoyance.
mmWave presence helps you escape this trade-off. Because it can maintain an accurate occupancy signal even when you’re mostly still, you can:
- Set shorter off-delays (e.g., 3–5 minutes) without fear of false “room is empty” events.
- Use different rules by room, like more aggressive energy saving in hallways and more comfort-focused rules in offices or bedrooms.
- Layer in dimming or scene changes before a full shut-off to make behavior feel natural.
Benefits of Using mmWave Presence Sensors for Smart Lighting
Fine-grained presence detection (small movements, breathing, typing)
The biggest upgrade you notice with mmWave is that you no longer have to exaggerate your movements to keep lights on.
Because mmWave can track fine motion, it’s ideal for:
- Home offices: Detecting head movements and typing while you’re on a long video call.
- Media rooms: Sensing slight position changes while you watch a movie.
- Bedrooms: Maintaining occupancy even when you’re lying down and barely moving.
Some advanced sensors, like the Aqara FP2, can even divide a room into multiple zones and detect presence in each, allowing targeted lighting per area.
Extended occupancy detection without long, wasteful timeouts
Because the sensor can maintain a continuous presence state, you don’t need a 20-minute countdown timer as a backup. Instead, you might configure:
- Office: Lights off 3–5 minutes after presence ends
- Living room: Dim after 5 minutes, off after 10 if still no presence
- Bathroom: Off 2–3 minutes after presence ends
That gives you quick shutoff when you truly leave while avoiding mid-activity blackouts.
Improved reliability for bedrooms, offices, media rooms and bathrooms
These rooms are where mmWave presence sensors earn their keep:
- Bedrooms: Detect when you’re still in bed, avoiding lights turning off while you’re reading or winding down.
- Offices: Keep the lights steady through long stretches of keyboard and mouse work.
- Media rooms: Eliminate the classic “wave at the sensor” moment in the middle of a film.
- Bathrooms: Detect presence even when you’re in the shower or at the sink without much movement.
Privacy advantages compared to cameras and audio-based detection
mmWave presence provides rich occupancy data without capturing images or audio. It does not record faces, voices, or identifiable visuals.
In many cases, mmWave can be a privacy-friendly alternative to cameras for occupancy detection. If you want to dive deeper into how this type of radar works, the millimeter wave scanner overview on Wikipedia explains the underlying technology in more detail (the principle is similar, although home sensors operate at much lower power and resolution).
Choosing the Right mmWave Presence Sensor for Your Smart Home
Key specs to compare: range, field of view, sensitivity and zones
When comparing mmWave presence sensors, pay attention to:
- Detection range: Typical ranges are 3–6 meters. Make sure it can cover the longest dimension of your room.
- Field of view: A wider FOV (e.g., 120°–150°) covers more of the room from a single mounting point.
- Sensitivity/threshold settings: Look for sensors that let you adjust sensitivity to avoid picking up motion from adjacent rooms.
- Zone-based detection: Some models support multiple zones, which is useful for different lighting per area (desk vs. sofa).
Hub and ecosystem compatibility (Home Assistant, Zigbee, Matter, Wi-Fi)
Check how the sensor connects:
- Zigbee or Thread/Matter: Good for low power and local control via hubs like Home Assistant, Hubitat, SmartThings, or Apple Home.
- Wi‑Fi: Easy to set up but can be more power-hungry and rely on cloud services unless the vendor supports local APIs.
- Proprietary hubs: Some brands require their own hub but may integrate with larger ecosystems via bridges.
If you’re using a DIY platform like Home Assistant, verify that models you’re considering are supported in its device list or community integrations.
Power options and installation style: ceiling, wall, USB, mains
mmWave sensors are often more power-hungry than simple PIR sensors, so many are wired rather than battery-powered. Common options include:
- Ceiling-mounted, mains-powered: Best coverage and a clean look, but requires wiring.
- Wall-mounted, mains-powered: Easier retrofits if you already have a power source nearby.
- USB-powered desktop units: Simple for home offices; you can place one behind a monitor or on a shelf.
Battery-powered mmWave sensors exist but usually trade some responsiveness or range to preserve battery life.
Recommended use cases: desk area, sofa/TV zone, bed, bathroom
For lighting control, good first placements include:
- Desk area: A USB-powered sensor aimed at your chair keeps task lighting and monitors on while you work.
- Sofa/TV zone: A wall or ceiling sensor covering the seating area ensures continuous presence detection during movies.
- Bed: A ceiling-mounted sensor can drive bedside lamps and subtle night lighting.
- Bathroom: A ceiling sensor can handle lights and fan control even when you’re showering behind a curtain.
Planning Your Sensor Placement to Keep Lights On When You’re Present
Mapping activity zones vs. sensor detection zones
Before mounting anything, sketch your room and mark:
- Activity zones: Where people actually sit, stand, or lie down (desk chair, sofa, bed, vanity).
- Sensor detection zones: The area your chosen sensor can cover based on range and field of view.
The goal is to overlap activity zones with strong detection areas. Avoid having your primary seating position right at the edge of the sensor’s range.
Positioning tips for home offices, living rooms and bedrooms
Some practical placement ideas:
- Home office: Place a sensor slightly off to the side and above monitor height, aimed at your chair. This reduces reflections from the monitor and captures subtle upper-body movement.
- Living room: Mount the sensor high on a wall or ceiling, angled towards the sofa, not the TV. This keeps presence tracking focused on people, not screen glare.
- Bedroom: Ceiling mounting above or slightly offset from the bed works well. Avoid aiming directly through walls into adjacent rooms.
Avoiding false triggers from hallways, pets and adjacent rooms
Because mmWave can see through some materials and around openings, you’ll want to avoid detecting motion where you don’t intend to:
- Angle away from doors and hallways so people walking past don’t constantly count as presence.
- Use sensitivity controls to limit range so nearby rooms and corridors are excluded.
- Consider pet height: Some sensors let you ignore motion near the floor to avoid cats and small dogs.
Testing detection coverage before permanently mounting the sensor
Before drilling holes or running cables, temporarily mount the sensor with tape or a tripod and:
- Walk and sit in your normal spots to confirm presence is detected.
- Check your hub’s sensor debug view to see when presence turns on and off.
- Close doors and move in adjacent rooms to see if they cause false presence.
Adjust position and sensitivity until coverage matches your expectations, then finalize the install.
Setting Up an mmWave Presence Sensor With Your Smart Lighting
Pairing the sensor with your hub or platform (Home Assistant, Hubitat, SmartThings, etc.)
Pairing steps vary by brand, but generally you will:
- Put the hub or app into “add device” mode.
- Power on or reset the sensor to start pairing.
- Wait for the device to appear and confirm that it exposes a presence entity (sometimes also motion, distance or zone entities).
If you’re using a platform like Home Assistant, check the vendor’s documentation or community forums for device-specific tips. For example, the Aqara integration page for Home Assistant provides details on supported devices and entities.
Connecting the sensor to smart bulbs, switches or smart plugs
Next, make sure your lighting devices are also visible to your hub or app:
- Smart bulbs should appear as light entities.
- Smart switches will control hard-wired fixtures.
- Smart plugs will control lamps or accent lighting.
Your automations will use the sensor’s presence entity as the trigger and the lights as actions.
Creating basic automations: turn on with presence, turn off with absence
A simple starting point for each room is:
- Automation 1 – Turn on: If presence becomes “detected,” turn the main light(s) on to a comfortable brightness.
- Automation 2 – Turn off: If presence is “clear” for X minutes, turn the lights off.
Start with conservative off-delays (5–10 minutes) while you test, then reduce them once you’re confident presence is reliable.
Using time conditions (day vs. night) and scenes for smarter behavior
To avoid harsh lighting at night and wasted energy during the day, add conditions:
- Daytime: Only turn lights on if ambient light is below a certain level (using a lux sensor if available).
- Evening: Use warmer, dimmer scenes for comfort.
- Night: Trigger a low-level nightlight scene instead of full brightness, especially in bedrooms and bathrooms.
Most hubs allow you to set different scenes or brightness levels based on time of day, presence, or both.
Advanced Automation: Combining mmWave Presence With Motion and Other Sensors
Hybrid approach: motion to turn lights on, mmWave to keep them on
A powerful pattern is to use two sensors together:
- Motion sensor (PIR): Triggers lights on quickly when someone enters the room.
- mmWave presence sensor: Maintains occupancy so lights stay on even during quiet periods.
This gives you the speed of PIR plus the reliability of mmWave, without relying on mmWave alone to catch fast entries.
Adding door, contact or CO₂ sensors for more reliable occupancy logic
For tricky spaces, extra sensors can boost accuracy:
- Door/contact sensors: Help determine if someone is likely still inside a room when the door is closed.
- CO₂ or air quality sensors: Slow changes in CO₂ levels can indicate longer-term occupancy in offices or bedrooms.
- Pressure mats or bed sensors: Useful in bedrooms to distinguish “in bed” vs. merely in the room.
Combining these signals, your hub can make smarter decisions, like assuming a bathroom is still occupied when the door is closed and mmWave presence is intermittently detected (e.g., someone in the shower).
Using multiple mmWave sensors to cover large or L-shaped rooms
In big or oddly shaped rooms, one sensor may not cover all activity zones properly. Consider:
- Placing one sensor near the desk and another near the sofa in an L-shaped living/office combo.
- Configuring occupancy so that if any zone shows presence, the main lights stay on.
- Linking specific lights to specific zones—for example, a reading lamp follows the presence near the reading chair.
Presence-based scenes: dimming instead of switching off immediately
Instead of a hard cutoff, you can create occupancy-based scene transitions:
- When presence clears for 2 minutes, dim lights to 30%.
- If presence remains clear for an additional 5 minutes, turn lights off.
- If presence returns during the dim period, restore the previous scene.
This feels less jarring, gives you a visual “heads up,” and still saves energy.
Tuning Sensitivity and Timeouts to Prevent Annoying Shut-Offs
Adjusting presence sensitivity and detection thresholds
Most mmWave sensors expose settings for sensitivity or thresholds. Use these to:
- Reduce sensitivity if the sensor is picking up motion from neighboring rooms.
- Increase sensitivity in bedrooms or offices where movements are very small.
- Fine-tune detection distance so the sensor focuses only on the intended zone.
Setting smart off-delays for different rooms and times of day
There’s no single perfect timeout. Consider:
- Bathrooms: Short delays (1–3 minutes) after presence ends.
- Offices and living rooms: Moderate delays (3–7 minutes) with optional pre-dimming.
- Bedrooms: Longer delays in the evening to avoid lights turning off while you’re still awake in bed.
You can also make timeouts longer in the evening and shorter during the day to balance comfort with savings.
Handling edge cases like someone sleeping, napping or meditating
Very still activities can still challenge some sensors. To handle these:
- Use a slightly higher sensitivity setting in bedrooms.
- Combine presence with a bed occupancy sensor or smart alarm state for deeper sleep automations.
- Allow longer delays for overnight automations, or use scheduled scenes (e.g., lights gradually dim and then off after a set bedtime).
Minimizing false positives from pets, fans or movement behind walls
mmWave can detect motion through thin walls and sometimes confuse pets for humans. To minimize false positives:
- Lower sensitivity in rooms where pets roam freely.
- Aim the sensor higher so it focuses on human torso height, not the floor.
- Avoid pointing directly at oscillating fans or large moving appliances.
- If your sensor supports it, use “human-only” detection or ignore small targets.
Troubleshooting Common mmWave Presence Sensor Issues
Lights still turn off while you’re in the room: what to check
If your lights still go off too soon:
- Verify in your hub that presence is actually being detected when you’re still.
- Increase sensitivity slightly and re-test.
- Make sure the sensor is aimed at your main seating/working area.
- Extend the off-delay while you fine-tune the settings.
Lights never turn off or stay on when the room is empty
If lights stay on forever:
- Check for false presence due to motion in adjacent rooms or hallways.
- Reduce detection distance and sensitivity.
- Confirm your automation uses absence (presence cleared) and an appropriate delay, rather than just motion events.
- Look for other automations or manual overrides that might be keeping lights on.
Dealing with interference, reflections and poor mounting locations
mmWave can be affected by highly reflective surfaces:
- Avoid mounting directly opposite large mirrors or metal cabinets.
- Shift the sensor a bit if you see erratic presence readings in your hub’s logs.
- Make sure the sensor is mounted firmly—vibration or wobble can cause false detections.
Firmware updates and vendor-specific configuration tips
Vendors frequently release firmware updates that improve detection algorithms and add new features. It’s worth checking:
- The manufacturer’s app for firmware updates.
- Release notes for changes related to presence accuracy, zone detection or sensitivity settings.
- User communities (Reddit, vendor forums) for recommended configuration profiles for your specific model.
Practical Room-by-Room Examples
Home office: never having to wave at your lights during calls
Place an mmWave sensor near your monitor, powered by USB. Create automations so:
- Task lighting and overhead lights turn on when presence is detected during working hours.
- Lights dim automatically after 10 minutes of absence and turn off at 15 minutes.
- If you re-enter, the last used scene (e.g., “Work Focus”) is restored.
Living room: watching TV without motion-based timeouts
Use a ceiling-mounted mmWave sensor aimed at the sofa. Combine it with a regular motion sensor near the entrance:
- Motion at the doorway turns on the main living room scene.
- mmWave presence keeps lights on while you sit.
- After presence ends, lights dim to a soft level, then turn off after a few more minutes.
Bedroom: gentle dimming and off after you fall asleep
Mount an mmWave sensor above the bed. Automate:
- At night, presence triggers warm, low-level lighting.
- If presence shows you’re still in bed but mostly still, after a set “wind-down” period lights slowly dim.
- Once presence indicates you’ve left the bed and room in the morning, lights turn off and perhaps trigger a “Good Morning” routine elsewhere.
Bathroom: balancing comfort, privacy and humidity/vent fan control
In a bathroom, a ceiling mmWave sensor can:
- Turn lights on when you enter, and keep them on even in the shower.
- Turn lights off a few minutes after presence ends.
- Work with a humidity sensor to run the fan longer if moisture remains high after you leave.
Privacy, Safety and Energy-Saving Considerations
What mmWave really detects and what it doesn’t
mmWave presence sensors detect motion and sometimes approximate distance or direction. They do not capture images or audio. They’re best thought of as very sensitive motion detectors, not cameras.
This makes them suitable for private areas like bedrooms and bathrooms where you might not want a camera but still want reliable occupancy detection.
Reducing standby power and optimizing light brightness for savings
To keep energy use in check:
- Use efficient LED bulbs and moderate default brightness levels.
- Set daytime automations to turn lights on only when ambient light is low.
- Use dimmed scenes instead of full brightness whenever possible.
- Group lights logically so not every fixture needs to be on when presence is detected.
Household acceptance: making automations predictable and intuitive
For automations to stick, everyone in the home has to trust them. A few tips:
- Explain how the new sensors work and what people should expect.
- Avoid overly aggressive timeouts in the first few weeks; you can tighten them later.
- Provide manual overrides—wall switches and voice control—so people feel in control.
- Document or label scenes and switches so behavior is easy to understand.
Conclusion: Making Smart Lights Truly Smart With mmWave Presence
Summary of key setup steps and best practices
mmWave presence sensors give your smart lights a much better understanding of whether a room is genuinely occupied. To get the most from them:
- Choose sensors with the right range, field of view, and ecosystem support.
- Plan placement around real activity zones, not just convenient walls.
- Start with simple “on when present, off after absence” rules, then add dimming, time-of-day conditions and scenes.
- Fine-tune sensitivity and timeouts to avoid both nuisance shutoffs and wasted energy.
When to upgrade from motion sensors to mmWave in your smart home
You don’t need to replace every motion sensor. Hallways and entryways are still great PIR use cases. But if you’re regularly frustrated by lights turning off while you’re still in the room—especially in offices, living rooms, bedrooms and bathrooms—mmWave presence sensors are a worthwhile upgrade.
Once your lighting responds naturally to how you actually live, your smart home starts to feel less like a collection of gadgets and more like an invisible assistant that simply does the right thing.
FAQ
Do mmWave presence sensors work through walls?
They can detect motion through some thin materials, which is why careful placement and sensitivity tuning are important. However, interior walls, furniture and doors reduce range significantly, so they’re not a reliable way to track presence across multiple rooms.
Are mmWave sensors safe for health?
Yes. Home-grade mmWave sensors operate at very low power levels, similar to or lower than Wi‑Fi devices. They are designed to meet safety regulations for continuous indoor use.
Will mmWave presence sensors replace all my motion sensors?
Not necessarily. PIR motion sensors are still great for simple “walk by, lights on” scenarios like corridors and stairways. mmWave is most valuable in rooms where people stay mostly still.
Can a single mmWave sensor cover an entire open-plan area?
It depends on the sensor’s range and your layout. For small open-plan spaces, one well-placed sensor may be enough. Larger or L-shaped areas usually benefit from two or more sensors covering different zones.
Do I need a smart home hub to use an mmWave presence sensor?
Some Wi‑Fi sensors can talk directly to a manufacturer app, but for deeper automation—especially mixing multiple brands and sensors—a hub or platform like Home Assistant, Hubitat, SmartThings or Apple Home is strongly recommended.