Under cabinet smart lighting is one of the easiest upgrades you can make to your kitchen. It instantly brightens dark countertops, makes chopping and cooking safer, and adds a polished, modern look. With motion activation, the lights simply come on as you walk in or start working – no switches, no apps, no mess.
The good news: you don’t need to open any walls or hire an electrician. With today’s plug-in and battery-powered smart lights, you can get motion-activated under cabinet lighting installed in under an hour using just basic tools.
This guide walks you through planning, choosing the right products, installing both plug-in and battery-powered options, connecting everything to your smart home, and keeping it all running smoothly.
Why Under Cabinet Smart Lighting Belongs in Every Modern Kitchen
Benefits of motion-activated under cabinet smart lighting
Motion-activated under cabinet smart lighting gives you light exactly where and when you need it, with zero effort. Some key benefits:
- Hands-free operation: Lights turn on as you approach the counter – ideal when your hands are wet, messy, or full of groceries.
- Better task lighting: Under cabinet lights shine directly on cutting boards, recipes, and appliances, reducing shadows from overhead fixtures.
- Automatic shutoff: Motion sensors turn the lights off after a set time, helping avoid leaving lights on all day.
- Low-glare night lighting: Dimmed motion-activated lights provide a gentle path for late-night snacks without blasting your eyes.
- Smart control options: Many systems also support app control, schedules, and voice commands.
How smart under cabinet lights improve safety, style, and energy use
Under cabinet smart lighting improves your kitchen in three big ways:
- Safety: Bright, focused light on countertops makes it easier to see what you’re doing when chopping, using knives, or working with hot pans. At night, low-level motion-activated lighting reduces trip hazards and avoids flipping on harsh overheads.
- Style: Continuous light strips or neatly spaced puck lights create a modern, “finished” look. Smart options let you tune color temperature or even use colored light for entertaining.
- Energy efficiency: LED under cabinet lights use a fraction of the energy of old halogens. Add motion control and auto-off timers, and the lights only run when needed.
Key differences between smart and traditional under cabinet lighting
Traditional under cabinet lighting is usually just a switch-controlled bar or puck light. Smart under cabinet lighting adds:
- Motion and ambient light sensing: Lights can turn on based on movement and time of day, or stay off when there’s already plenty of daylight.
- App-based control: Adjust brightness, set schedules, or group lights with other kitchen fixtures.
- Voice control: Use Alexa, Google Assistant, or Siri to turn lights on/off or change brightness while you cook.
- Automation: Tie under cabinet lights into routines like “Cooking,” “Cleanup,” or “Midnight Snack.”
Most importantly, you can get these smart features without hardwiring by choosing the right plug-in or battery-powered products.
Planning Your No-Hardwire Under Cabinet Smart Lighting Setup
Assessing your cabinets, outlets, and Wi-Fi coverage
Before you buy anything, do a quick survey of your kitchen:
- Cabinet layout: Measure the length of each cabinet run where you want light. Note any gaps, corners, or range hoods.
- Surface type: Check the underside of cabinets (wood, laminate, metal) and how flat or textured they are. This affects adhesive strength.
- Power outlets: Locate outlets near the cabinets. For plug-in lights, you’ll need at least one outlet per run, ideally hidden inside a cabinet or close to the backsplash.
- Wi-Fi signal: Use your phone to confirm you have strong Wi-Fi at the counters if you’re using Wi-Fi smart lights. If coverage is weak, consider moving your router or adding a mesh node.
Choosing between LED light strips, bars, and puck lights
Three common styles work well under kitchen cabinets:
- LED light strips: Flexible strips with adhesive backing. Best for continuous, even light along long cabinet runs. Great for modern kitchens and diffuse lighting.
- Light bars: Rigid fixtures, usually 12–24 inches long. They provide strong, even light and can daisy-chain together. Good if you prefer a more structured, fixture-like look.
- Puck lights: Small round lights spaced every 8–12 inches. They create pools of light and can look stylish under glass-front cabinets or for accent lighting.
For most task-focused installations, a continuous LED light strip or linked light bars provide the most consistent countertop illumination.
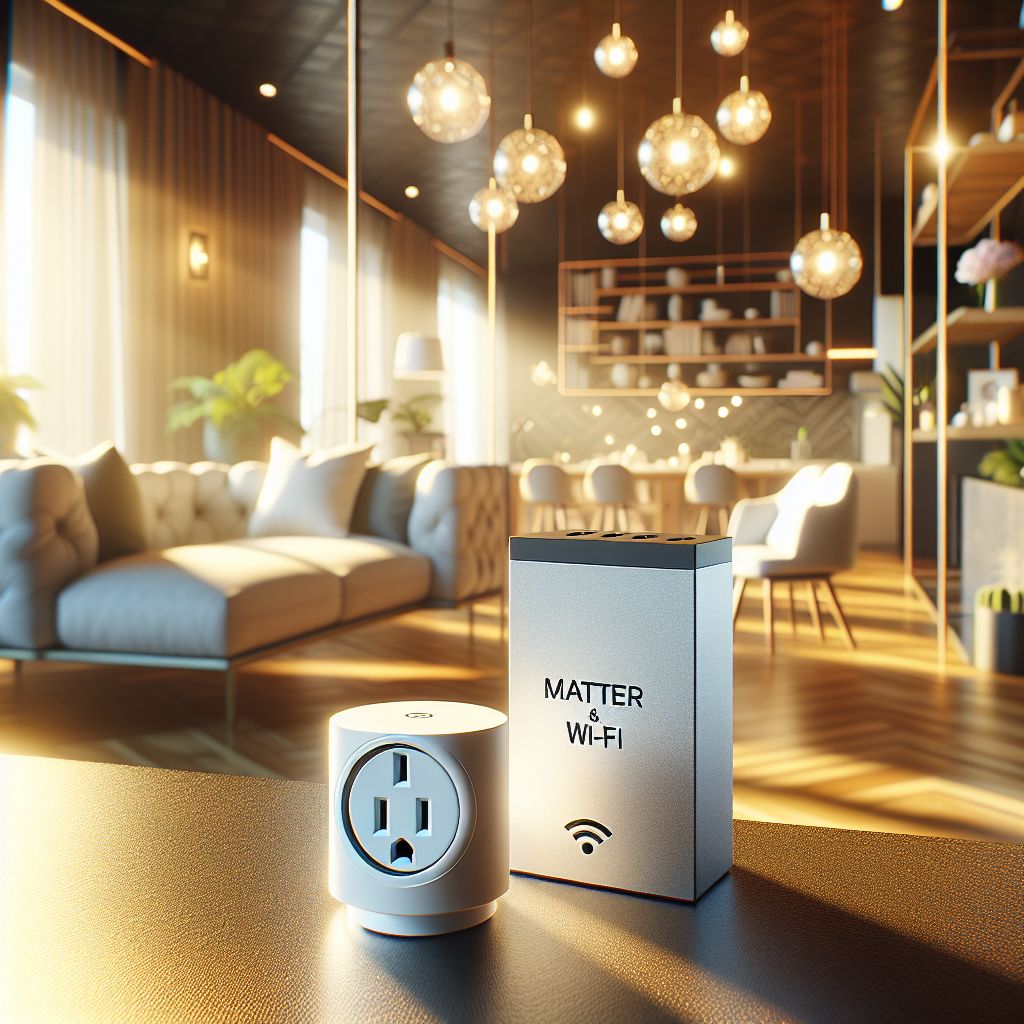
Battery-powered vs plug-in under cabinet smart lighting
Both battery-powered and plug-in systems avoid hardwiring, but they suit different kitchens:
- Plug-in:
- Best if you have an accessible outlet near each cabinet run.
- More brightness and usually higher quality LEDs.
- No battery changes; just set it and forget it.
- Good for daily cooking and main task lighting.
- Battery-powered:
- Ideal if there’s no outlet nearby or you’re renting and want a completely wire-free look.
- Easier and faster to install.
- Typically slightly less bright and need periodic battery replacement or recharging.
- Great for light cooking, accent lighting, or supplemental night lighting.
Picking the right motion sensor (built-in vs separate smart sensor)
You can get motion activation in two ways:
- Built-in motion sensors: Some under cabinet light kits have integrated PIR (passive infrared) sensors in the light bar or controller.
- Simpler setup – fewer devices.
- Usually offer basic sensitivity and timer options.
- Good for straightforward “on when I’m here” behavior.
- Separate smart motion sensors: A standalone sensor (e.g., Philips Hue Motion Sensor, Aqara Motion Sensor) that talks to your smart hub and triggers your lights.
- More flexibility in placement and detection coverage.
- Advanced automations (different actions at night vs day, gradual fade, etc.).
- Best if you already use a hub like Hue, SmartThings, or HomeKit.
Recommended Smart Lighting Products and Kits
Best plug-in under cabinet smart light kits with motion detection
Look for plug-in LED strip or bar kits that include:
- Warm to neutral white (2700K–4000K) for comfortable kitchen light.
- Included motion sensor or compatibility with your smart platform.
- Adhesive backing plus screw clips for long-term stability.
Examples of popular approaches include:
- Philips Hue Lightstrip Plus with a separate Hue Motion Sensor. The strip plugs into a wall adapter and connects to a Hue Bridge for smart control. The motion sensor can live on a nearby wall or cabinet side. You can see an example of the Lightstrip Plus kit on Philips’ site: Hue White and Color Ambiance Lightstrip Plus.
- Wi-Fi under cabinet bar kits from brands like Govee or TP-Link Tapo, which offer app control and in some models, motion built into the controller.
Best battery-powered motion-activated under cabinet lights
For wire-free setups, look for:
- Rechargeable (USB-C or micro-USB) bars or strips to avoid frequent battery purchases.
- Magnetic mounting for easy removal and charging.
- Built-in motion and light sensors so they only run when needed.
Common options include slim aluminum light bars with a front-facing diffuser and a PIR sensor on one end. These often offer multiple modes: always-on, motion-only, or off.
Add-on smart motion sensors that work with existing LED strips
If you already have LED strips or bars installed, you can add smart motion using:
- Smart plug + motion sensor: Plug your lights into a smart plug, and use a separate motion sensor to turn the plug on/off.
- Platform-specific sensors:
- Hue Motion Sensor (with Hue Bridge).
- Aqara Motion Sensor (with Aqara hub or compatible Matter setup).
- SmartThings or Home Assistant-compatible sensors.
This route is especially helpful if your existing lights are not “smart” but are plug-in and can be controlled by cutting power.
Step-by-Step: Installing Plug-In Under Cabinet Smart Lighting (No Hardwiring)
Tools and materials you’ll need
Most plug-in installations require only basic tools:
- Measuring tape and pencil.
- Scissors (for cut-to-length LED strips, if allowed by the product).
- Isopropyl alcohol wipes or mild cleaner (to prep surfaces).
- Adhesive-backed LED strips or bars, plus any included clips.
- Adhesive cable clips or plastic raceways for cable management.
- Optional: small screwdriver if your kit includes screw-in clips.
Measuring, planning cable runs, and locating power outlets
Plan your layout before peeling any adhesive:
- Measure each cabinet underside and mark where the light will start and stop.
- Decide where the cable will exit to reach the outlet – often down the back of the cabinet to the backsplash.
- Ensure your power adapter cable is long enough to reach from the end of the light run to the outlet without tension.
- If using multiple strips or bars, plan where connectors or extension cables will sit so they’re hidden behind cabinet lips.
Mounting the light strips or bars securely under cabinets
To mount strips or bars:
- Clean the underside of the cabinet with alcohol and let it dry completely.
- For strips, peel a short section of adhesive backing, align along your pencil line, and press firmly. Work in small sections to keep the strip straight.
- For bars, hold in place and mark screw hole positions if using clips, or use the included adhesive pads.
- Press along the full length for 20–30 seconds to help the adhesive bond.
Avoid placing strips too close to the front edge; 1–2 inches back usually hides the strip from view while still lighting the counter.
Hiding cables with clips, channels, and adhesive raceways
Neat cables make a big difference in how “finished” the project looks:
- Use small adhesive cable clips every 6–12 inches to keep power leads tucked under cabinets.
- For visible runs down the wall, use paintable plastic raceways sized to your cable.
- Follow existing cabinet lines or corners so cables visually disappear.
- Leave a small service loop (extra slack) near the light controller for future adjustments.
Positioning and mounting the motion sensor for reliable detection
Correct sensor placement makes or breaks motion activation:
- Mount sensors at or slightly below cabinet height, facing the area where you stand most often.
- Avoid pointing directly at windows, ovens, or other heat sources that could cause false triggers.
- Test detection by walking into the kitchen from different directions and adjusting the angle until it catches your movement smoothly.
- If using a separate smart sensor, mount it where it has a clear view of the room, not hidden behind plants or decor.
Step-by-Step: Installing Battery-Powered Motion-Activated Lights
When battery-powered under cabinet smart lighting makes sense
Battery-powered lights are the easiest way to get motion-activated under cabinet smart lighting with zero visible wires. They’re ideal if:
- Your cabinets are far from outlets.
- You’re in a rental and can’t add or move outlets.
- You just want quick, inexpensive motion-activated lighting for a specific zone.
Mounting options: adhesive vs screws vs magnetic strips
Most battery-powered bars offer multiple mounting methods:
- Adhesive pads: Fastest to install but may fail on textured or greasy surfaces. Good for testing placement.
- Screw mounts: More permanent and secure, especially for heavier lights or warmer environments.
- Magnetic strips: A metal plate adheres to the cabinet, and the light snaps on magnetically. This makes it easy to remove the light for charging.
For kitchens, a combination of magnetic mounting and a good cleaning of the surface usually gives the best long-term results.
Optimizing sensor range and avoiding false triggers
Battery-powered bars with built-in sensors need careful positioning:
- Angle the sensor toward where you stand while prepping or cooking, not toward the hallway.
- If you’re getting too many triggers from people just walking past the kitchen, rotate the light slightly or move it closer to the backsplash.
- Test different modes (e.g., daytime-only vs always-on motion) if your light supports them.
Managing batteries and expected runtime
Battery life depends on brightness, motion sensitivity, and how busy your kitchen is:
- Rechargeable bars typically last 2–4 weeks in a busy household on motion mode.
- AA/AAA-powered lights may last 1–3 months depending on use.
- Use lower brightness and shorter auto-off timers to extend runtime.
- Keep a charging rotation: charge one side of the kitchen while the other side stays lit, then swap.
Connecting Under Cabinet Lights to Your Smart Home System
Choosing Wi-Fi, Zigbee, Thread, or Bluetooth models
Different wireless technologies have pros and cons:
- Wi-Fi: Direct connection to your router. Easy setup, no hub required, but can crowd your network if you add many devices.
- Zigbee: Low-power mesh network usually managed by a hub (Hue Bridge, SmartThings, etc.). Great for reliability and large systems. For more background, see the Zigbee overview on Wikipedia.
- Thread: Modern, low-power mesh protocol used by Matter devices. Very reliable and future-friendly if you have a Thread border router (like newer Nest or HomePod devices).
- Bluetooth: Simple and hub-free for local control, but limited range and fewer automation options unless the lights also support a cloud link.
Pick a technology that matches your existing setup: if you already have Hue lights, staying in the Hue/Zigbee ecosystem will make things smoother.
Adding your lights and motion sensors to Alexa, Google, or HomeKit
Once your lights are powered and paired with their app or hub, link them to your voice assistant:
- Alexa: Enable the manufacturer’s skill (Hue, Govee, TP-Link, etc.), sign in, and run device discovery. Assign the lights to a “Kitchen” group.
- Google Home: Use the Google Home app to add a new device or link service. Add lights and sensors to a Kitchen room.
- Apple HomeKit: Scan the HomeKit code on compatible products or bridge. Name your lights clearly (e.g., “Under Cabinet Left”).
For separate motion sensors, make sure they appear as devices in your assistant’s app and can be used as automation triggers.
Creating automations: walk-in activation, night-lights, and scenes
Start with a few practical automations:
- Walk-in activation: When kitchen motion is detected, turn on under cabinet lights to a bright level, but only between certain hours.
- Night-light mode: Between, say, 11 p.m. and 6 a.m., motion sets the lights to a very low level instead of full brightness.
- Cooking scene: A scene that sets under cabinet lights to 100%, pendants to 70%, and overheads to neutral white.
- Cleanup scene: Slightly brighter overheads and under cabinet lights for spotting crumbs and spills.
Voice control examples for cooking, cleaning, and late-night snacks
Once set up, you can use simple voice commands such as:
- “Alexa, turn on the under cabinet lights.”
- “Hey Google, set kitchen under cabinets to 30%.”
- “Siri, turn on Kitchen Cooking.” (triggering a scene that brightens task lights)
- “Alexa, turn on Midnight Snack.” (a low, warm scene triggered by voice instead of motion)
Fine-Tuning Motion Detection, Brightness, and Color
Adjusting motion sensitivity and auto-off timers
Most motion sensors let you tweak sensitivity and delay:
- Set higher sensitivity if lights aren’t turning on reliably when you move around.
- Lower sensitivity if pets or hallway traffic are triggering lights too often.
- Choose an auto-off time that balances convenience and energy savings – 1–5 minutes is common for kitchens.
- Test with a typical cooking session and tweak until lights stay on comfortably while you work.
Setting brightness levels for day vs night use
Different times of day call for different brightness:
- Daytime: Moderate brightness (50–80%) to supplement natural light without overpowering it.
- Evening cooking: Higher brightness (80–100%) for clear visibility.
- Late-night: Very low brightness (5–20%) to avoid harsh glare.
Use your app or smart home routines to apply different levels based on time.
Using warm vs cool white for task lighting and ambience
Color temperature affects how your kitchen feels:
- Warm white (2700K–3000K): Cozy and inviting, good for evening and night use.
- Neutral white (3500K–4000K): Great all-purpose task lighting for chopping and cooking.
- Cool white (5000K+): Very crisp light, sometimes too clinical for home kitchens but useful if you want maximum clarity.
If your lights support it, use neutral white for cooking scenes and warmer white for ambient or night-light scenes.
Creating kitchen lighting scenes that include under cabinet lights
Under cabinet lights become much more useful when tied into broader kitchen scenes:
- Breakfast: Under cabinets at 50% neutral white, pendants at 40% warm white, overheads off.
- Cooking: Under cabinets at 100% neutral white, overheads at 80%, island lights at 60%.
- Entertaining: Under cabinets at 30% warm white for subtle glow, accent lights on, overheads dimmed.
- Night: Only under cabinets at 10% warm white, triggered by motion.
Safety, Cable Management, and Aesthetics
Keeping cables away from heat, moisture, and moving drawers
Even with no hardwiring, you still need to think about safety:
- Route cables away from stovetops, toasters, and other heat sources.
- Avoid running wires across areas that get frequent splashes or steam.
- Keep wires clear of drawer slides and hinges to prevent pinching.
- Use cable clips to secure loose runs and prevent snagging.
Using channels and diffusers for a professional look
Aluminum channels with plastic diffusers can transform bare LED strips into a built-in-looking fixture:
- They hide individual LED dots and create a more uniform line of light.
- They protect the strip from grease and dust.
- They often include mounting clips for extra security.
Choose a diffuser that fits your strip width and matches your cabinet color for the cleanest appearance.
Preventing glare and hotspots on glossy countertops
Glossy stone or quartz can reflect light harshly:
- Mount lights slightly toward the backsplash instead of directly over the counter edge.
- Use diffusers or frosted covers to soften the light.
- Lower brightness or switch to warmer white to reduce harsh reflections.
- Test at night and adjust positioning if you see bright streaks reflected on the surface.
Fire safety considerations with plug-in and battery-powered lights
LED under cabinet systems run cool, but basic precautions still apply:
- Use only the power adapter supplied with your lights.
- Do not cover power supplies with towels, cookbooks, or decor.
- For battery-powered lights, avoid mixing old and new batteries and replace damaged cells immediately.
- Check that products have appropriate certifications (UL, ETL, CE) for home use.
Troubleshooting Common Under Cabinet Smart Lighting Issues
Motion sensor not triggering or staying on too long
If your sensor isn’t behaving:
- Reposition it so it faces your main working area and is not blocked by cabinet trim.
- Check and adjust sensitivity in the app if available.
- Verify that the sensor has fresh batteries (for battery-powered models).
- Shorten the auto-off delay if lights stay on long after you leave.
Lights flickering, disconnecting, or not responding to the app
For unstable smart lights:
- Confirm the power adapter is firmly connected and not overloaded by too many strips.
- Restart the controller or unplug/replug the adapter.
- Update firmware in the manufacturer’s app.
- Check Wi-Fi signal strength near the controller; move your router or add a mesh node if needed.
Wi-Fi or hub connectivity problems in the kitchen
Kitchens have lots of metal and appliances that can interfere with wireless:
- Keep hubs and routers away from microwaves and large metal surfaces.
- Place your hub or router in a more central location if the kitchen is on the edge of coverage.
- For Zigbee or Thread devices, adding an extra powered device (like a smart plug) nearby can strengthen the mesh network.
Adhesive strips failing or lights sagging over time
If your lights start to peel off:
- Clean the surface thoroughly and let it dry before reinstalling.
- Use stronger double-sided tape (such as 3M VHB) under problem areas.
- Add a few screw-in clips or channel mounts along the run for long-term support.
Maintenance and Long-Term Tips
Cleaning under cabinet fixtures without damaging them
Under cabinet areas collect grease and dust over time:
- Turn lights off before cleaning.
- Use a slightly damp microfiber cloth, not harsh cleaners, on plastic diffusers and bars.
- For metal channels, a small amount of mild dish soap diluted in water is usually safe; avoid soaking.
- Never spray cleaner directly onto LED strips or controllers.
Replacing batteries and extending battery life
For battery-powered systems:
- Mark installation dates on a small label so you know how long batteries typically last.
- Use high-quality rechargeable batteries where possible.
- Reduce brightness and shorten the motion timeout to stretch runtime.
- If a light’s runtime suddenly drops, inspect for corrosion or damaged cells.
When to upgrade to brighter or more efficient LED options
You may want to upgrade if:
- Your current lights feel dim even at maximum brightness.
- Older strips show yellowing diffusers or uneven color.
- You want tunable white or color options for more flexible scenes.
- You’re standardizing on a single ecosystem (e.g., all Matter-compatible devices).
Expanding your setup to other areas: pantry, closets, and hallways
Once you have motion-activated under cabinet smart lighting dialed in, it’s easy to expand:
- Pantry: Motion-activated battery bars that turn on when you open the door.
- Closets: Slim bars or pucks that light shelves automatically.
- Hallways: Low-level motion strips along baseboards for safe nighttime walking.
Reusing the same brand and ecosystem simplifies control and keeps everything working together.
Final Checklist: From Dark Counters to Smart, Motion-Activated Lighting
Quick pre-purchase checklist
- Measured cabinet lengths and noted outlet locations.
- Decided between plug-in and battery-powered, or a mix.
- Chosen light style: strip, bar, or puck.
- Verified compatibility with your smart platform (Alexa, Google, HomeKit, etc.).
- Planned where motion sensors will be mounted.
Quick post-installation test routine
- Walk into the kitchen from multiple directions to test motion detection.
- Check for dark spots on the counter and adjust light placement if needed.
- Look for glare or reflections on glossy surfaces at night.
- Confirm automations and voice commands work as expected.
- Secure any loose cables or adapters.
Ideas for your next smart lighting upgrade in the kitchen
Once your under cabinet smart lighting is running smoothly, consider:
- Adding smart pendants or island lights that join your existing scenes.
- Installing toe-kick LED strips along the base of cabinets for floating effects.
- Syncing range hood or backsplash lights with your under cabinet system.
- Building a whole-home “Goodnight” routine that dims or turns off all kitchen lights automatically.
With a thoughtful plan and the right products, you can transform dark countertops into a bright, responsive workspace – all without touching your home’s wiring.
FAQ
Do I need an electrician to install under cabinet smart lighting?
No. The options in this guide are designed to avoid hardwiring. Plug-in and battery-powered kits can be installed by most homeowners with basic tools. If you ever decide to hardwire or add new outlets, that’s when an electrician is recommended.
Can I mix different brands of smart lights under my cabinets?
You can mix brands physically, but for the smoothest control and automations, it helps to keep most of your under cabinet smart lighting within the same ecosystem or at least compatible with the same platform (Alexa, Google Home, HomeKit, or Matter).
Will motion-activated lights turn on every time my pets walk by?
It depends on sensor placement and sensitivity. Point sensors higher and reduce sensitivity to avoid triggers from small pets. Some smart sensors also allow you to ignore small motion events.
How bright should under cabinet lights be for cooking?
For comfortable task lighting, aim for strips or bars that provide roughly 300–500 lumens per linear meter of cabinet. Many consumer kits fall within this range; you can fine-tune brightness in the app to what feels best in your space.
Can I use color-changing LED strips under cabinets?
Yes. RGB or RGBW smart strips work well under cabinets, especially for entertaining or accent lighting. Just make sure they also provide a good-quality white mode for everyday cooking and prep.