Headaches, brain fog, afternoon crashes, and allergy flare-ups are often blamed on stress or lack of sleep. But a big part of the problem can be right in front of you: the air in your home.
Smart air quality and CO2 sensors turn invisible problems into clear numbers and alerts. Once you can see what’s going on with CO2, particles, humidity, and chemicals in your air, it becomes much easier to fix them with simple habits and smart home automations.
This guide explains how to use smart air quality sensors at home to understand your symptoms, improve indoor air, and set up practical automations that actually make you feel better day to day.
Why Indoor Air Quality Can Cause Headaches, Fatigue, and Allergy Flare-Ups
Common indoor air pollutants that affect your brain and breathing
Indoor air can be 2–5 times more polluted than outdoor air, especially in well-sealed homes. Everyday activities and products create a mix of pollutants that accumulate over time.
Common indoor air pollutants include:
- Carbon dioxide (CO2): Builds up in closed rooms where people breathe but fresh air isn’t coming in.
- Particulate matter (PM2.5 and PM10): Tiny particles from cooking, candles, fireplaces, outdoor pollution, and dust.
- Volatile organic compounds (VOCs): Gases from cleaning products, paints, furniture, air fresheners, and fragrances.
- Biological pollutants: Dust mites, pet dander, mold spores, and pollen that get trapped indoors.
- Combustion byproducts: From gas stoves, fireplaces, and smoking (including vaping).
These pollutants can irritate your airways, strain your body, and increase inflammation. Over a day, that can translate into headaches, heavy eyes, and constantly feeling worn down at home.
For more background, the U.S. Environmental Protection Agency provides a good overview of indoor air issues in their Introduction to Indoor Air Quality.
How CO2, VOCs, and humidity levels impact headaches and tiredness
Three of the biggest factors linked to headaches and fatigue are CO2, VOCs, and humidity:
- CO2: When people exhale, CO2 levels rise. In a closed room, CO2 can climb quickly above 1,000 ppm (parts per million). Many people report headaches, sleepiness, and difficulty focusing as levels increase, especially above ~1,200 ppm.
- VOCs: Strong or continuous exposure to VOCs (from fresh paint, new furniture, strong cleaners, or scented products) can cause irritation, dizziness, and headaches, even when you can’t smell anything obvious.
- Humidity: Very low humidity (under ~30%) dries your eyes, nose, and throat, making headaches and sinus pain more likely. High humidity (over ~60%) encourages mold and dust mites, which can inflame your airways and drain your energy.
Smart sensors that track CO2, VOCs, and humidity allow you to spot patterns like: “Every afternoon the CO2 in my office hits 1,500 ppm” or “VOCs spike every time I use this particular cleaner.” Once you see these patterns, you can fix the underlying issue instead of just taking painkillers.
Allergy triggers at home: dust, pollen, pet dander, mold, and chemicals
Allergies and asthma often flare indoors because your home traps the things that bother you most:
- Dust and dust mites: Build up in carpets, bedding, and fabric furniture, contributing to sneezing and congestion.
- Pollen: Blows in through open windows and on clothing and pets, then settles in your home.
- Pet dander: Tiny protein particles from cats, dogs, and other animals that linger in the air and on surfaces.
- Mold spores: Thrive in damp areas like bathrooms, basements, kitchens, and around windows.
- Chemical irritants: Strong cleaners, air fresheners, and scented candles can inflame already-sensitive airways.
Smart air quality sensors don’t directly measure “cat dander” or “pollen,” but they do measure PM2.5, PM10, and humidity. These numbers, combined with your symptoms, can help you pinpoint which rooms and conditions trigger problems and where air purifiers, dehumidifiers, and better cleaning habits will have the biggest impact.
What a Smart Air Quality Sensor Actually Measures
Key metrics: CO2, PM2.5, VOCs, temperature, and humidity
Most health-focused smart air quality sensors report several core metrics:
- CO2: Indicates whether a room is poorly ventilated. Essential for understanding headaches and fatigue.
- PM2.5 and PM10: Fine and coarse particulate matter from smoke, cooking, dust, and outdoor pollution.
- VOCs (TVOC): A general measure of chemical gases in the air.
- Temperature: Affects comfort and sleep quality and interacts with humidity and VOC off‑gassing.
- Humidity: Key for mold growth, dust mites, and respiratory comfort.
More advanced devices may also track radon, formaldehyde, and ozone, but for most homes, CO2, PM2.5, VOCs, and humidity are the most useful starting points.
Understanding safe vs. concerning ranges for everyday living
Exact “safe” values can vary, but these everyday targets are a good reference:
- CO2:
- Good: < 800 ppm
- Watch: 800–1,200 ppm
- Concerning for comfort and focus: > 1,200 ppm
- PM2.5:
- Good: < 12 µg/m³
- Watch: 12–35 µg/m³
- High: > 35 µg/m³ (especially sensitive for asthma/allergies)
- TVOC: Each sensor uses its own scale, but most apps color-code “good/fair/poor.” Stay in the “good” band as much as possible.
- Humidity: Aim for 40–50% relative humidity. Try to stay within 35–55% overall.
- Temperature: Around 18–21°C (64–70°F) for sleep; 20–23°C (68–73°F) for daytime comfort.
Many smart sensors show color-coded “zones” and give clear text labels like “healthy,” “fair,” and “unhealthy,” so you don’t have to memorize these numbers—but it helps to know where your target is.
Which readings are most closely linked to headaches and fatigue
For headaches, brain fog, and tiredness, pay closest attention to:
- CO2: The main indicator of stuffy, poorly ventilated air.
- VOCs: Spikes after cleaning, painting, or using fragranced products can trigger headaches in sensitive people.
- Humidity: Very high or very low humidity can worsen sinus pressure and general fatigue.
PM2.5 is more tied to respiratory irritation, asthma, and long-term health, but you may notice that heavy cooking days or smoke from candles also correlate with feeling sluggish or congested.
Choosing the Right Smart Air Quality and CO2 Sensor for Your Home
Must-have features for health-focused monitoring
If your goal is reducing headaches, fatigue, and allergy symptoms, look for sensors with:
- Reliable CO2 monitoring: Prefer real CO2 (NDIR) sensors over “equivalent CO2” estimates.
- PM2.5 and TVOC tracking: These help you correlate symptoms with dust, smoke, and chemicals.
- Clear app with history: You want charts, trends, and export options—not just a single live number.
- Custom alerts: Ability to set thresholds (e.g., CO2 > 1,000 ppm) and receive push notifications.
- Automation support: Works with your preferred platform (HomeKit, Google Home, Alexa, Home Assistant, etc.).
- Local display (optional but helpful): A small screen or color LED makes it easy to see air quality at a glance.
Popular examples in this space include devices from brands like Airthings, Awair, Eve, and Aqara. Check the specs to confirm which pollutants are actually measured.
Connectivity: Wi‑Fi, Thread, Matter, and app integrations
Smart air quality sensors connect in different ways:
- Wi‑Fi: Easy setup, works with cloud apps, great for remote monitoring. Slightly higher power use.
- Thread: Low-power mesh network used by many modern devices; often integrates well with Apple Home and Matter.
- Zigbee/Z-Wave: Require a hub but are very reliable for whole-home systems and advanced automations.
- Matter support: Makes it easier to share sensor data across Apple, Google, and Alexa ecosystems without vendor lock‑in.
Pick a sensor that fits into your existing smart home first. If you already use Apple HomeKit, a HomeKit/Matter-compatible device is ideal. If you rely on Alexa routines, look for sensors that expose readings directly to Alexa.
Where to place sensors for bedrooms, home office, and living spaces
Placement matters as much as the device itself:
- Height: Place sensors at about breathing height when seated or sleeping—typically 2–5 ft (0.6–1.5 m) above the floor.
- Avoid direct airflow: Don’t place right next to open windows, vents, or fans, which can give misleading readings.
- Keep away from direct heat or steam: Avoid radiators, stoves, and showers.
- Bedrooms: Place near the bed but not directly under it—on a bedside table or wall nearby is ideal.
- Home office: Place near your desk in the area where you spend most of your day.
- Living room: Put the sensor in the main seating area, not hidden behind the TV or furniture.
For multi-floor homes, at least one sensor per floor is a good starting point if budget allows.
How to Set Up a Smart Air Quality Sensor at Home (Step-by-Step)
Initial placement, power, and app installation
Getting started usually takes 10–20 minutes:
- Unbox and power up: Plug in the sensor or insert batteries as instructed.
- Choose a location: Start with the room where you feel the worst (often bedroom or office).
- Download the app: Install the manufacturer’s app on your phone or tablet.
- Create an account: Sign in and follow the on-screen prompts to add the new device.
- Connect to Wi‑Fi or hub: Enter your Wi‑Fi details or pair with your smart home hub as required.
Let the sensor run for at least a few hours before making big decisions based on the readings. Some metrics, like VOCs, can fluctuate while the sensor “settles in.”
Calibrating CO2 and other readings for accurate data
Many sensors self-calibrate, but you can usually improve accuracy by:
- Placing in fresh air: Some CO2 sensors recommend an initial calibration in a well-ventilated area, assuming outdoor air is around 400–450 ppm.
- Following app instructions: Look for a “calibrate” or “baseline” option in the app and run it when prompted.
- Avoiding calibration during pollution peaks: Don’t calibrate right after cooking, cleaning, or with windows closed and lots of people in the room.
Recalibrate if the sensor’s CO2 reading always seems oddly high or low compared to outdoor conditions or another trusted device.
Creating user profiles and notification preferences
Most apps let you tailor alerts to your comfort level:
- Set CO2 thresholds: For example, alert at 1,000 ppm for a gentle reminder to open a window, and 1,400 ppm for a more urgent alert.
- Define quiet hours: Disable non-critical alerts overnight or during important calls, while keeping critical ones if you wish.
- Choose notification channels: Push notifications, email, or smart speaker announcements.
- Share with family: Add other household members to the app so everyone can see and respond to alerts.
Tailoring alerts prevents “notification fatigue” so you actually act on the warnings that matter.
Reading the Data: What Your Sensor Is Telling You About Your Symptoms
Linking headache and fatigue patterns to CO2 and VOC spikes
After a week or two, you’ll have enough data to start spotting patterns:
- Notice when you feel headaches, brain fog, or sleepiness.
- Check your sensor’s charts for those time periods.
- Look for recurring CO2 spikes or VOCs peaks around the same times.
Common findings include:
- CO2 rising steadily in the bedroom between midnight and 5 a.m., matching morning headaches.
- VOCs spiking after using a particular spray cleaner or lighting scented candles.
- CO2 and PM2.5 jumping in a small home office with the door closed all afternoon.
Once you see a clear link, you can create specific actions or automations, like opening a window before bed or switching to low-VOC products.
Using trends and historical charts to find problem rooms and times
Most apps show daily, weekly, and monthly views. Use them to answer questions like:
- Which room has the highest average CO2?
- What time of day do PM2.5 levels usually spike?
- Does humidity stay high overnight or only after showers/cooking?
If your device lets you export data, you can compare it directly with a symptom diary. Even without exporting, a quick scan of color-coded charts often reveals the worst times and rooms at a glance.
Setting healthy baseline targets for your home’s air quality
Once you know your “normal,” set realistic goals:
- CO2: Try to keep main living areas under 1,000 ppm most of the day and bedrooms under ~1,200 ppm overnight.
- PM2.5: Aim to stay in the “good” range except for short spikes while cooking.
- VOCs: Use the app’s “good” zone as your baseline. If you’re often in “fair” or “poor,” reduce chemical sources.
- Humidity: Adjust your humidifier or dehumidifier to stay in the 40–50% range where possible.
These baselines help you tune automations and know when something is off, such as a new mold issue or a malfunctioning ventilation system.
Smart Automations to Improve Air Quality and Reduce Symptoms
Automating fans and HVAC when CO2 levels rise
One of the most effective uses of a smart air quality sensor is ventilation control. Example automations:
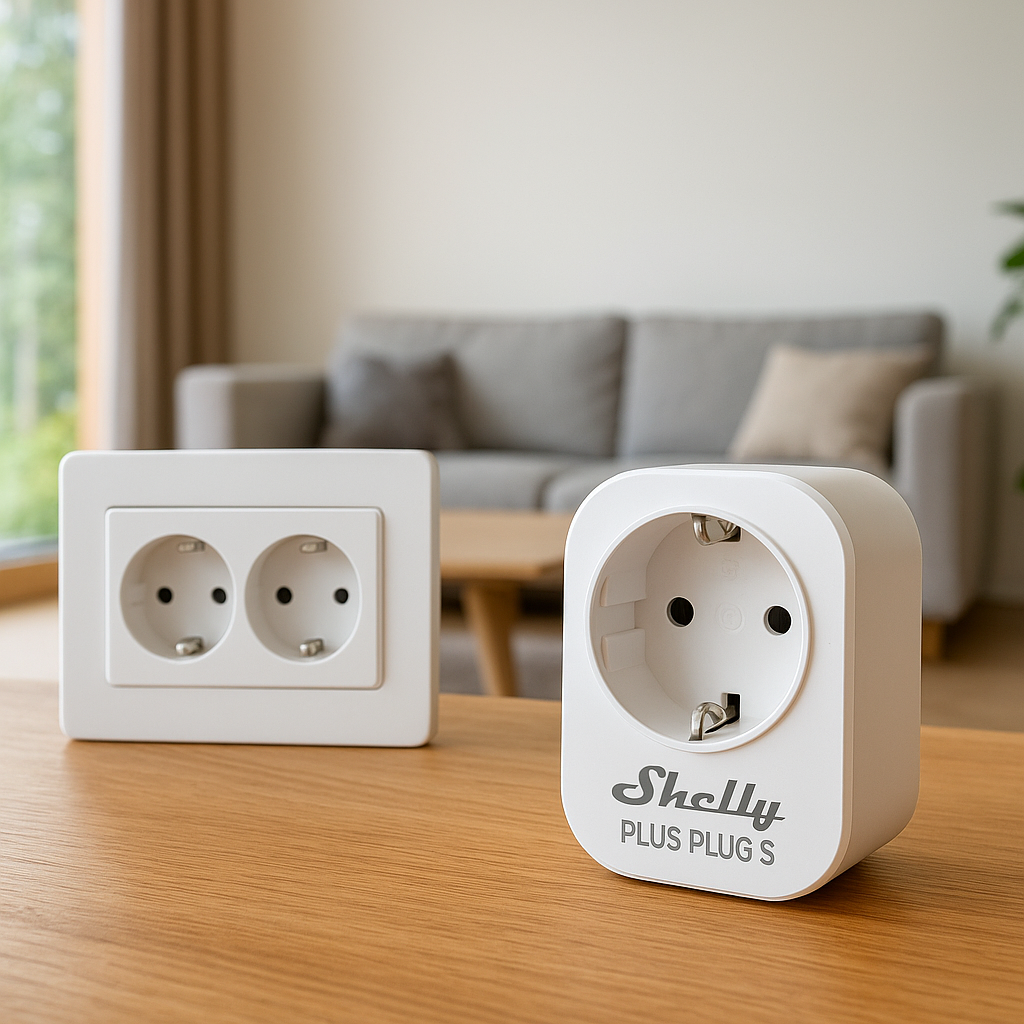
- Living room: If CO2 > 1,000 ppm, turn on the HVAC fan or a smart plug-connected window fan for 15 minutes.
- Bedroom at night: If CO2 > 1,200 ppm between midnight and 6 a.m., slightly boost the HVAC fan or crack a motorized window.
- Home office: If CO2 > 1,200 ppm, send a notification and turn on a desk fan near a window.
These small bursts of fresh air often make a noticeable difference in how alert you feel.
Triggering smart windows, vents, or air purifiers when PM2.5 or VOCs spike
PM2.5 and VOC spikes are perfect triggers for air purifiers and vents:
- Cooking: If PM2.5 or VOCs exceed your chosen threshold in the kitchen, automatically turn on the range hood and a nearby smart air purifier.
- Cleaning: After VOCs spike from cleaning products, run a purifier on high for 30–60 minutes.
- Road pollution or wildfire smoke: Use indoor and outdoor sensors together—if outdoor PM is high, keep windows closed and run purifiers instead of ventilating.
Look for air purifiers that integrate with your smart ecosystem or can be controlled via a smart plug and routines.
Using humidity readings to control dehumidifiers and reduce mold/allergy risk
Humidity-based automations protect against mold and dust mites:
- Bathroom: If humidity > 60%, turn on the exhaust fan and keep it running until it drops below 55%.
- Basement: If humidity > 55%, start a smart plug-connected dehumidifier.
- Bedroom in winter: If humidity < 35%, run a humidifier for a set period to ease dry throat and sinus discomfort.
These automations quietly maintain a healthy range without you having to constantly check the app.
Room-by-Room Tips: Bedrooms, Home Office, Kids’ Rooms, and Kitchen
How to use sensors in bedrooms to wake with fewer headaches
Bedrooms are often the most revealing place to use a smart air quality sensor:
- Place the sensor near the bed, away from direct vents.
- Track CO2 and humidity over several nights.
- If CO2 climbs steadily above 1,200–1,500 ppm, set an automation to boost ventilation or open a window slightly.
- If humidity is too low, consider a humidifier with a humidity-based automation to prevent dry air headaches.
Even a small change—like cracking the door or running the HVAC fan on low—can significantly reduce morning grogginess if CO2 was the culprit.
Reducing afternoon fatigue in a home office with CO2-based automations
Many people report a “3 p.m. crash” when working from home. A sensor on or near your desk can reveal whether CO2 is to blame. Try:
- Setting a rule so that if CO2 stays above 1,000 ppm for more than 15 minutes, a notification reminds you to open a window or take a short walk.
- Turning on a fan that pulls in outdoor air when CO2 crosses a set threshold.
- Logging how you feel before and after these quick ventilation breaks.
This combination of awareness and light automation often gives more sustainable energy than yet another coffee.
Keeping kids’ rooms and nurseries safer with smart alerts
Children can be more sensitive to poor air. In kids’ rooms:
- Place a sensor away from cribs but within the main breathing zone.
- Enable alerts for very high CO2 and humidity above 60% to catch ventilation and mold risks early.
- Use gentle night-time automations, like a quiet fan or slight HVAC boost if levels get too high.
- Watch for PM2.5 spikes after playtime activities like crafts, candles (for older kids), or nearby vacuuming.
Smart alerts give you an extra safety net without constantly checking on the room yourself.
Tackling cooking fumes and humidity in the kitchen with targeted monitoring
Kitchens are usually the worst room for PM2.5 and VOC spikes. With a sensor in or near the kitchen:
- Turn on the range hood whenever the sensor detects a PM2.5 spike, not just when you see smoke.
- Use an automation to run a purifier on high during and after cooking.
- Monitor humidity if you do a lot of boiling or steaming and ventilate accordingly.
Over time, you’ll learn which cooking methods or appliances cause the biggest spikes and can adjust how you ventilate or where you place purifiers.
Everyday Habits That Work With Your Smart Sensors (Not Against Them)
Ventilation routines based on sensor alerts
Use your sensors to build simple routines:
- Open windows or doors when CO2 or VOC alerts trigger, especially in bedrooms and offices.
- Do a “fresh air flush” each morning or evening: open windows on opposite sides of the home for 5–10 minutes.
- Pair short breaks (stretching, water, stepping outside) with times when the sensor shows CO2 is high.
These habits turn abstract numbers into daily actions that keep your air fresher with minimal effort.
Cleaning and product choices that cut VOCs and allergy triggers
Your sensor will quickly show which products cause VOC spikes. Use that feedback to:
- Switch to low-VOC or fragrance-free cleaners and detergents.
- Avoid heavy use of air fresheners, incense, and scented candles.
- Vacuum with a HEPA filter and dust regularly to reduce particles and allergens.
- Wash bedding in hot water to reduce dust mites.
If you’re curious about what VOCs actually are, the Volatile organic compound article on Wikipedia offers a deeper technical overview.
Seasonal adjustments for pollen, heating, and closed-window months
Indoor air challenges change with the seasons:
- Spring/summer: Pollen is high. Use the sensor to balance open-window ventilation with keeping outdoor particles out. Consider running purifiers more often when pollen counts are high.
- Winter: Windows stay closed and heating dries the air, raising CO2 and lowering humidity. Expect more CO2 alerts and consider a humidifier in bedrooms.
- Transitional seasons: Great time to ventilate more and reset your home’s overall air quality.
Review your automations every few months so they match the current season rather than sticking to a “one size fits all” setup.
Integrating Air Quality Sensors With Your Smart Home Ecosystem
Connecting to Alexa, Google Home, and Apple Home for voice alerts
Many sensors can report data to major voice assistants:
- Alexa: Use routines to say things like “The CO2 in the office is high, maybe open a window” when thresholds are exceeded.
- Google Home: Ask “What’s the air quality in the bedroom?” and get a quick status.
- Apple Home: View air quality in the Home app and create automations that trigger based on CO2, PM2.5, or VOC values (with compatible devices).
Voice alerts are especially helpful if you tend to ignore phone notifications while working or cooking.
Using Home Assistant or other hubs for advanced automations
If you want more control, platforms like Home Assistant, Hubitat, or openHAB let you:
- Combine data from multiple sensors to make smarter decisions (for example, only ventilate if indoor air is worse than outdoor).
- Build complex rules: “If CO2 > 1,200 ppm and window is closed and temperature is above 18°C, open motorized window.”
- Log all data locally and build custom dashboards matching your symptoms and goals.
This level of integration takes more setup time but can produce a very responsive, energy-efficient system.
Combining air quality sensors with smart thermostats and smart blinds
Air quality sensors become more powerful when combined with:
- Smart thermostats: Use CO2 and humidity data to decide when to run the fan or slightly adjust temperature for comfort.
- Smart blinds or shades: Reduce heat gain from sun (which can affect VOC off‑gassing) or open blinds to encourage natural ventilation at certain times.
- Door and window sensors: Only run purifiers or dehumidifiers when doors and windows are closed, to save energy.
This creates a home that quietly maintains comfortable, clean air with minimal manual intervention.
Troubleshooting: When Your Sensor Readings Don’t Match How You Feel
Common setup mistakes that lead to misleading data
If the numbers don’t match your experience, check for:
- Bad placement: Too close to windows, vents, heaters, or purifiers.
- Obstructions: Sensor hidden behind furniture or in a corner with poor airflow.
- Direct sunlight: Can heat the device and skew temperature and humidity readings.
- Not enough time: Judging air quality based on only a few hours of data.
Move the sensor to a more central, open location in the room and give it a day or two before re-evaluating.
When to move, recalibrate, or add an extra sensor
You may need to adjust your setup if:
- One room feels bad but the sensor elsewhere looks fine—move the sensor to that room for a few days.
- Readings seem consistently off (for example, CO2 never drops near outdoor levels)—run a calibration if available.
- Your home layout is complex or multi-level—adding an extra sensor can reveal issues that a single device can’t see.
Think of sensors as movable tools: it’s fine to rotate them through rooms to troubleshoot specific problems.
When to talk to a doctor or professional about persistent symptoms
Smart sensors are great for spotting environmental triggers, but they’re not medical devices. Consider getting professional help if:
- Headaches, fatigue, or breathing issues persist even when your readings look healthy.
- You suspect serious mold, structural, or ventilation problems—call a qualified inspector or HVAC professional.
- You or a family member has asthma or other chronic conditions—share your air quality logs with your doctor.
Use your data as a conversation starter, not a substitute for medical or building expertise.
Buying Guide and Example Setups for Different Budgets
Entry-level setup: One sensor and basic fan/AC automation
If you’re just starting and want to see if air quality is an issue:
- Buy a reliable smart sensor that measures at least CO2, PM2.5, and humidity.
- Place it in your bedroom or home office—where symptoms are worst.
- Connect it to your voice assistant or app and set simple CO2 and humidity alerts.
- Use a smart plug on a fan or portable AC, triggered when CO2 or temperature rise.
This small setup often reveals big, easy wins like opening windows more strategically or adjusting fan use.
Mid-range setup: Whole-apartment coverage with alerts and routines
For a typical apartment or small home:
- Use 2–3 sensors: bedroom, living room, and home office or kids’ room.
- Set room-specific alerts and automations (for example, kitchen purifier on PM spikes, bathroom fan on humidity spikes).
- Integrate with your thermostat so CO2 or humidity can nudge the fan or temperature.
- Review weekly charts to fine-tune thresholds and identify any persistent problem spots.
This level of coverage gives you a fairly complete picture of your indoor air day and night.
Advanced setup: Multi-room sensors, purifiers, and deep automation
If you’re serious about optimizing comfort and symptoms:
- Place sensors in all major rooms, plus the basement or attic if used often.
- Use air purifiers with smart controls in bedrooms, office, and living room.
- Integrate with Home Assistant or a similar hub for advanced rules, combining indoor and outdoor data.
- Automate dehumidifiers, bathroom fans, window actuators, and blinds based on multiple metrics (CO2, PM2.5, VOCs, humidity, time of day, season).
This kind of system can quietly maintain comfortable, cleaner air while you simply go about your day.
Conclusion
Smart air quality and CO2 sensors give you something you’ve never really had before at home: clear visibility into the invisible factors that drive headaches, fatigue, and allergy flare-ups. By watching CO2, PM2.5, VOCs, and humidity—and turning that data into simple automations—you can often feel a noticeable improvement with just a few targeted changes.
You don’t need a complex system on day one. Start with a single sensor in the room where you feel the worst, learn what your air is doing, and build from there. Over time, your smart home can become an active partner in keeping your air cleaner and your body more comfortable.
FAQ
Where should I put my first smart air quality sensor?
Start in the room where you spend the most time and feel the worst—usually your bedroom or home office. Place the sensor at about breathing height, away from vents, windows, and direct sunlight, and let it run for at least a week before making big decisions.
Do I really need CO2 monitoring, or is PM2.5 enough?
For symptoms like headaches and fatigue, CO2 is crucial. PM2.5 is important for respiratory health, but CO2 is more directly tied to stuffy air and difficulty focusing. If you can only afford one sensor, choose one that measures real CO2 as well as particles and humidity.
How quickly should I expect to feel a difference after improving air quality?
Some people notice changes within days—especially with better bedroom ventilation or humidity control. Others may see more gradual improvements over a few weeks as they tweak automations, replace products that cause VOC spikes, and fine-tune ventilation habits.
Can smart air quality sensors replace an air purifier?
No. Sensors measure air quality; purifiers actively clean it. Ideally, you use a sensor to decide when and where to run a purifier, and how hard. This saves energy and extends filter life while keeping your air healthier.
Are battery-powered air quality sensors accurate enough?
Many battery-powered sensors are accurate for home use, especially for trends and alerts. Plug-in models sometimes offer more sensors and features, but battery units are great for moving around the house to diagnose specific rooms. Check reviews that focus on accuracy and stability over time.