Automating your kitchen lights and exhaust fan can make cooking feel smoother, cleaner, and safer. Instead of fumbling for switches with messy hands, your lights and fan can simply come on when you start cooking—and turn themselves off when you’re done.
This guide walks through how to automate an existing kitchen exhaust fan and lights using smart plugs, switches, sensors, and timers. You’ll see what’s safe to do yourself, where you may need an electrician, and how to build practical automations in Alexa, Google Home, and Apple Home.
By the end, you’ll understand how to automate your kitchen exhaust fan and lights in a way that fits your home, your cooking habits, and your budget.
Why Automate Your Kitchen Lights and Exhaust Fan?
Benefits for air quality, safety, and comfort
Cooking generates smoke, grease, steam, and odors that build up quickly—especially in smaller or tightly sealed homes. An automated exhaust fan can:
- Clear smoke and steam faster, reducing lingering smells and greasy buildup.
- Help remove fine particles and gases released during high-heat cooking. (See more about cooking emissions in this overview of indoor air pollutants.)
- Lower humidity during boiling or simmering, which helps prevent mold in nearby cabinets and walls.
- Improve comfort by removing hot air from above the stove, making the kitchen less stuffy.
Automated lighting helps with safety and visibility. Task lighting above your stove and counters reduces the chance of cutting accidents and helps you spot boiling-over pots or splatters more quickly.
Energy savings and lower utility bills
Fans and lights that stay on longer than needed waste energy. Automation keeps them running only when they’re useful. For example:
- Motion and presence sensors can turn lights off automatically when the kitchen is empty.
- Humidity or temperature-based automations can let the fan run just long enough to clear steam or smells, then shut down.
- Schedules can prevent fans from accidentally running for hours if someone forgets to turn them off.
Each device might not use a lot of power on its own, but over a year, smarter control can noticeably reduce your electricity use.
Hands-free convenience when your hands are busy cooking
Cooking often means wet, greasy, or flour-covered hands. Grabbing a switch isn’t always ideal. Automation lets you:
- Trigger lights and the exhaust fan simply by entering the kitchen or turning on the stove-area light.
- Use voice commands like “Alexa, start cooking” to turn on a scene that sets up lights and fan for you.
- Rely on routines to turn everything off after a set time, so you don’t need to remember once you sit down to eat.
Can You Automate an Existing Kitchen Exhaust Fan?
Safety check: hardwired vs. plug-in fans and electrical load limits
Before deciding how to automate your exhaust fan, you need to know what type you have:
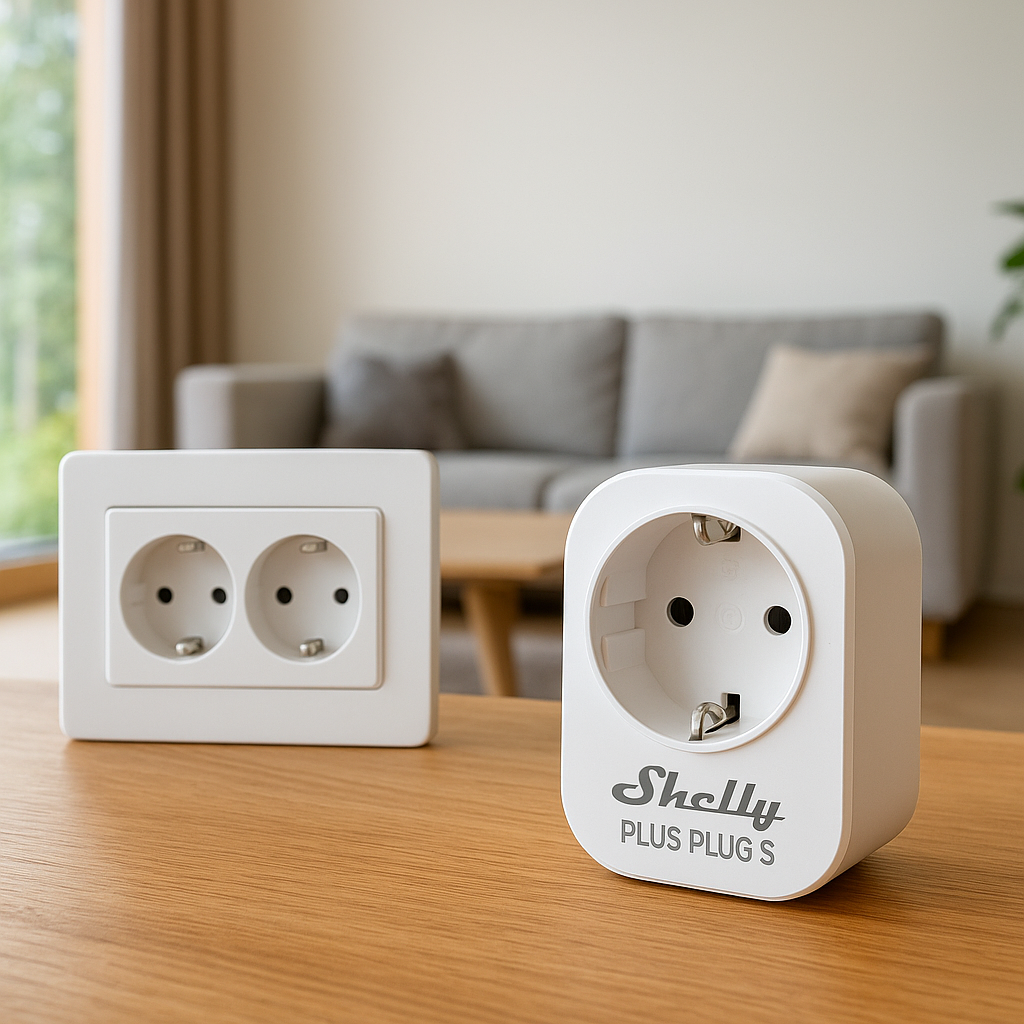
- Plug-in range hood or exhaust fan: Plugs into a standard outlet. These are usually the easiest to automate with a smart plug, as long as the plug supports the fan’s power draw.
- Hardwired range hood or built-in fan: Directly wired into your home’s electrical system and usually controlled by a wall switch or a switch on the hood. These typically require a smart switch or professional installation.
Check the fan’s label for its wattage or current (amps). Compare that to your smart plug or smart switch rating. Many smart plugs are rated for 10–15 amps at 120V. Do not exceed the device’s rating, and avoid using low-cost, uncertified plugs for motors or high loads.
When you can use a smart plug vs. when you need a smart switch or professional install
A smart plug is usually safe and simple if:
- The fan plugs into a regular outlet.
- The total power draw is below the smart plug’s rating.
- The plug is UL/ETL certified and rated for motor loads or appliances.
Use a smart switch or call an electrician if:
- The fan is hardwired and controlled by a wall switch.
- You want the entire range hood (fan + lights) to be controlled together.
- You’re not comfortable working with electrical wiring.
A qualified electrician can replace a standard wall switch with a compatible smart switch or relay module, ensuring it’s grounded correctly and meets code.
Compatibility considerations with range hoods and built‑in lighting
Many modern range hoods include multiple fan speeds and built-in lighting with their own buttons. A smart plug or switch can typically only turn power on or off, not change speeds directly. Practical options include:
- Leaving the hood set to your most-used fan speed and letting the smart plug/switch control on/off.
- Automating only the hood’s lights via a smart switch while keeping fan speed manual.
- Using a smart relay (installed by a pro) that can be wired to specific fan or light circuits.
If your hood has electronic touch controls, cutting power might reset settings. Test what happens if you unplug it and plug back in. If it doesn’t resume operation automatically, you may need a different strategy (e.g., smart switch on the wall control instead of the hood’s power).
Choosing the Right Smart Plugs, Sensors, and Timers
Picking a smart plug that’s safe for fans and kitchen appliances
Look for smart plugs that are:
- Certified: UL or ETL listed for safety.
- Rated for at least 10–15A: to handle the fan plus a safety margin.
- From reputable brands: such as TP-Link Kasa, Amazon Smart Plug, or Meross.
- Compatible with your ecosystem: Alexa, Google Home, Apple HomeKit, or Matter.
Avoid tiny, no-name plugs intended only for lamps or phone chargers. Fans use motors, which can draw higher startup currents.
Motion, door, and presence sensors for detecting kitchen activity
To detect when someone starts cooking, you can combine different sensors:
- Motion sensors: Detect movement in the kitchen. Good examples include Philips Hue Motion Sensor or Aqara Motion Sensor.
- Door sensors: On pantry or kitchen doors to infer that someone entered to cook.
- Presence sensors: Some newer sensors can tell if someone stays in the room, not just passes through. Useful to keep lights and fan on while you stand at the stove.
For reliable detection, you’ll usually pair at least motion + another signal (like time of day or stove light state) instead of using motion alone.
Temperature, humidity, and air-quality sensors for cooking detection
Environmental sensors can help your system recognize active cooking:
- Temperature sensors: The air above the stove or near the hood will warm up during cooking.
- Humidity sensors: Boiling water or simmering sauces raise humidity quickly.
- Air quality & VOC sensors: Some sensors detect smoke, particles, or volatile organic compounds released by frying and searing.
Devices like Aqara Temperature & Humidity Sensor, Eve Room, or standalone Wi-Fi humidity sensors integrate with major platforms. Set automations like: “If humidity rises by 10% in 5 minutes, turn on fan.”
Using smart timers, routines, and automations in popular ecosystems
All major platforms support routines and timers:
- Alexa: Create Routines that respond to motion, voice commands, or schedules and control smart plugs and lights.
- Google Home: Use Automations (in the Google Home app) based on presence, time, and device states.
- Apple HomeKit: Use the Home app to create automations that respond to accessory states, time, or sensor readings.
Most allow you to add delays—for example, “Turn off exhaust fan 10 minutes after no motion is detected.”
Basic Setup: Automate Kitchen Lights with Motion Sensors
Ideal locations for motion sensors in the kitchen
Placement matters more than the brand. Aim to:
- Point a sensor toward the main walkway into the kitchen so it notices you entering.
- Place another near the stove or prep area so the lights stay on while you cook.
- Mount sensors at about 6–7 feet high, angled down slightly to reduce false triggers from pets.
- Avoid pointing directly at windows or reflective surfaces that might cause false motion from sunlight.
Step-by-step: pair lights and sensors in your smart home app
The exact steps vary, but the flow is similar across systems:
- Install and power on your smart bulbs or smart switches controlling kitchen lights.
- Add them to your ecosystem (Hue app, Alexa, Google Home, or HomeKit).
- Add your motion sensor to the same ecosystem.
- Create a new automation or routine, for example:
- IF motion is detected in Kitchen
- THEN turn on Kitchen Ceiling Lights and Under-cabinet Lights
- Add a second action or a separate routine to turn lights off after X minutes with no motion.
Setting different brightness levels for day, night, and cooking
You don’t always want full brightness. Use time-based conditions:
- Daytime: Turn on just task lighting or set main lights to 70–100% brightness.
- Evening: Use warmer, dimmer lighting (around 40–60%) to be easier on the eyes.
- Late-night snack: A special “night mode” automation that keeps lights at 5–20% so you don’t wake everyone up.
Many platforms support “scenes” (like Cooking, Dinner, Night Light) that bundle brightness and color settings, which you can trigger from motion or voice.
Basic Setup: Automate the Exhaust Fan with a Smart Plug or Switch
Wiring and safety tips (and when to call an electrician)
If your fan is plug-in, wiring is simple: you’re just adding a smart plug between the fan and outlet. Even then:
- Ensure the plug’s rating meets or exceeds the fan’s power draw.
- Avoid daisy-chaining power strips, extension cords, and smart plugs.
- Use only indoor-rated devices in dry locations away from direct steam.
If the fan is hardwired and controlled by a wall switch:
- Turn off power at the breaker before touching anything.
- If you’re not confident working with electrical, hire an electrician.
- Ask the electrician to install a compatible smart switch (e.g., Lutron Caseta, TP-Link Kasa, or other brand that supports your ecosystem).
For more on how range hoods are typically installed and wired, see the overview of kitchen hoods.
Connecting your exhaust fan to a smart plug or smart switch
For a plug-in fan:
- Plug the smart plug into the wall outlet.
- Plug the fan into the smart plug.
- Set the fan to your desired speed and leave its physical switch in the ON position.
- Add the smart plug to your app and name it “Kitchen Exhaust Fan.”
For a wall-switch-controlled fan:
- Have the electrician replace the existing switch with a smart switch.
- Pair the new switch with your smart home system.
- Name it clearly (e.g., “Range Hood Fan”).
Creating a simple schedule for typical cooking times
As a first step before advanced triggers, you can create a schedule:
- Turn on the exhaust fan automatically around breakfast and dinner times.
- Turn it off after 30–45 minutes.
- Adjust for weekends if your cooking schedule changes.
This isn’t as precise as sensor-based control, but it’s an easy way to avoid forgetting to run the fan.
Advanced Setup: Turn the Exhaust Fan On Automatically When You Start Cooking
Using motion + kitchen light state to infer cooking activity
One simple approach for how to automate kitchen exhaust fan behavior is to combine motion with light usage:
- IF motion is detected in the kitchen
- AND the stove or under-cabinet lights are turned on
- AND time is between, say, 5 a.m. and 10 p.m.
- THEN turn on the exhaust fan.
This avoids turning the fan on every time someone just walks through the kitchen with the lights off, and it relies on the fact that most people turn on bright task lighting when they actually cook.
Using temperature or humidity rise to trigger the fan
For more precise control, place a temperature/humidity sensor near (but not directly above) the stove. Then create an automation like:
- IF humidity rises more than 8–10% within 5–10 minutes
- OR temperature rises by more than 2–3°C (4–6°F) quickly
- THEN turn on exhaust fan to clear steam and heat.
To prevent rapid on/off cycling, add a condition that the fan must stay on for at least 10–15 minutes once triggered, and only turn off when levels drop back down or no motion is detected.
Example automation recipes for Alexa, Google Home, and HomeKit
Here are simplified examples (actual menus differ by app):
- Alexa: Create a Routine named “Cooking Started.” Trigger: motion from “Kitchen Motion Sensor,” condition: “Kitchen Lights” are on. Action: turn on “Kitchen Exhaust Fan” and “Stove Light.” Add another Routine: “Cooking Finished” that turns the fan off 15 minutes after no motion.
- Google Home: Automation: “When ‘Kitchen Motion Sensor’ detects motion and ‘Kitchen Ceiling Light’ is on, then turn on ‘Range Hood Plug.’” Add a second condition that time is between certain hours.
- Apple HomeKit: Automation: “When ‘Kitchen Ceiling Light’ turns on, and time is between 4 p.m. and 9 p.m., then turn on ‘Exhaust Fan Switch’ and set a timer to turn it off after 20 minutes unless motion is still detected.”
Coordinating Lights and Fan for a Seamless Cooking Routine
Turn on task lighting and fan together when cooking starts
Create a “Cooking” scene that:
- Sets stove/under-cabinet lights to bright white.
- Turns on the exhaust fan.
- Optionally dims nearby dining lights slightly.
You can trigger this scene via motion + time of day, or with a simple voice command. This keeps things consistent every time you cook.
Keep the fan running after you stop cooking (auto-off delay)
Odors and humidity remain after you turn off the stove. Add an auto-off delay so the fan continues working a bit longer:
- “Turn off fan 10–20 minutes after the last detected motion” or
- “Turn off fan when humidity returns to within 5% of baseline.”
This way, the fan doesn’t stop the moment you walk away, but it also doesn’t run for hours.
Night mode automations for low light and quieter ventilation
At night you probably want softer light and less noise. Create a “Night Cooking” mode:
- Task lights at 20–40% brightness.
- Fan on low speed only (if your hood supports multiple speeds).
- Automatically shorter fan runtime—for example, 5–10 minutes after motion stops.
Trigger this based on time (e.g., 10 p.m.–6 a.m.) combined with kitchen motion or a specific nightlight scene.
Voice and App Control for Manual Overrides
Setting up voice commands like “start cooking” or “clear the air”
Even with full automation, you’ll sometimes want manual control. Create scenes and name them naturally:
- “Start cooking” – turns on bright task lights and the exhaust fan.
- “Clear the air” – starts the fan on higher speed for 20–30 minutes.
- “Kitchen off” – turns off all kitchen lights and the fan.
Map these scenes to voice assistants so they’re easy to trigger without pulling out your phone.
Quick-control scenes in your smart home app
Pin key scenes to the top of your app or add them as widgets on your phone:
- One-tap buttons for “Cooking,” “Night Snack,” and “All Off.”
- Favorite devices list including “Kitchen Exhaust Fan” and main kitchen lights.
This helps when automations don’t quite do what you expect and you need quick manual control.
Handling guests and non-technical family members
Keep things simple for others:
- Leave physical switches in familiar places and working normally.
- Label wall switches or range hood buttons if their behavior changed.
- Explain that lights and fans may turn on/off automatically, but they can always use the switch if needed.
Good automations feel natural, not confusing. If someone constantly fights the automation, adjust your routines.
Safety, Noise, and Maintenance Considerations
Avoiding overloads and using certified smart devices
Always match your smart hardware to the job:
- Use UL/ETL-certified smart plugs and switches rated for motors and the correct amperage.
- Do not use smart dimmers on fans unless specifically rated for that use.
- Keep smart devices away from direct heat, steam, and splashes.
If something gets unusually warm to the touch or behaves unpredictably, stop using it and investigate.
Dealing with fan noise and quiet hours
Exhaust fans can be loud, especially at higher speeds. To keep everyone happy:
- Use lower fan speeds for routine cooking and reserve high speed for heavy smoke.
- Add a quiet-hours condition (e.g., after 10 p.m., fan only runs on low and for shorter periods).
- Allow manual override so someone can easily shut the fan off if it’s disturbing.
Cleaning filters and ensuring sensors keep working reliably
Automation won’t help if your hood can’t move air. Regularly:
- Clean or replace grease filters according to the manufacturer’s guidance.
- Wipe down motion and temperature/humidity sensors so grease and dust don’t block them.
- Check sensor batteries every few months and replace when low.
Troubleshooting Common Automation Problems
Fan or lights not turning on when you start cooking
If devices don’t turn on as expected:
- Verify that the smart plug/switch shows online in the app.
- Check that motion or environmental sensors are actually triggering (most apps show a history or live state).
- Make sure conditions like time of day or “light must be on” are set correctly.
- Test each piece separately using manual controls, then retest the automation.
Automations triggering at the wrong time
If your fan or lights turn on when you’re just walking through:
- Narrow the trigger conditions—e.g., require both motion and lights on, or motion plus elevated humidity.
- Limit automations to certain times of day, such as typical cooking hours.
- Adjust sensor sensitivity or reposition sensors to avoid hallways or frequently used doorways.
Improving sensor placement and Wi‑Fi reliability
Unreliable automations often come down to placement and connectivity:
- Move sensors to locations with clear line of sight to the area you care about.
- Avoid placing Wi‑Fi or Zigbee hubs inside metal cabinets or very close to your microwave.
- Add a mesh Wi‑Fi node or Zigbee/Z-Wave repeater if your kitchen is far from your main router.
Example Automation Blueprints You Can Copy
Basic: motion + time of day to control lights and fan
Goal: Lights and fan turn on in the evening when you enter the kitchen to cook.
- IF Kitchen Motion Sensor detects motion
- AND time is between 5 p.m. and 9 p.m.
- THEN turn on Kitchen Ceiling Lights and Exhaust Fan.
- THEN turn both off 15 minutes after no motion.
Intermediate: temperature or humidity-based exhaust control
Goal: Fan comes on only when there’s steam or heat.
- IF Kitchen Humidity rises above 65% or increases more than 10% in 10 minutes
- THEN turn on Exhaust Fan.
- AND keep fan on until humidity drops back below 60% or 20 minutes have passed.
Advanced: multi-condition routine combining sensors, timers, and scenes
Goal: Create a smart, flexible cooking routine.
- IF motion is detected in the kitchen
- AND Kitchen Task Lights turn on
- AND time is between 4 p.m. and 10 p.m.
- THEN activate “Cooking” scene (bright lights + fan on).
- IF no motion for 10 minutes
- THEN dim lights to 30% and start a 10-minute timer.
- IF still no motion when timer ends
- THEN turn off lights and fan.
Final Tips for a Smarter, Safer, and Fresher Kitchen
How to fine-tune automations over the first few weeks
Expect to tweak your automations. For the first couple of weeks:
- Use your app’s history (if available) to see when automations ran.
- Adjust motion timeouts, humidity thresholds, and schedules based on real use.
- Listen to feedback from household members about what feels annoying or helpful.
The best setups are the ones you barely notice because they match your habits.
Expanding to other smart kitchen ideas (plugs, leak sensors, alerts)
Once your lights and exhaust fan are automated, you can expand further:
- Smart plugs on countertop appliances like kettles or coffee makers with safe auto-off timers.
- Leak sensors under the sink or dishwasher that send alerts if water is detected.
- Smart smoke or air quality alerts that trigger the fan and send a notification to your phone if something is burning.
Start small, build confidence, and gradually turn your kitchen into a space that works with you, not against you.
FAQ
Can I automate my kitchen exhaust fan without replacing my range hood?
Yes, in many cases you can. If your hood plugs into an outlet, a properly rated smart plug can automate on/off. If it’s hardwired, a smart wall switch or relay (often installed by an electrician) can give you app and voice control without replacing the hood itself.
Is it safe to use a smart plug with a kitchen exhaust fan?
It can be safe as long as the plug is certified, correctly rated for the fan’s power and motor load, and used in a dry area away from steam. Always check the fan’s wattage and use a smart plug from a reputable brand that supports that load.
Will automating my fan void the warranty on my range hood?
Usually, simply controlling power through a smart plug or switch will not void the warranty, but any electrical modifications might. Check your hood’s manual or the manufacturer’s website, and when in doubt, consult an electrician or the manufacturer’s support.
Do I need a smart hub to automate my kitchen?
Not always. Many Wi‑Fi smart plugs and switches work directly with Alexa or Google Home. However, Zigbee or Thread-based sensors often require a hub, and Apple HomeKit setups typically use a HomePod, Apple TV, or iPad as a home hub for advanced automations.
What’s the easiest first step to automate my kitchen?
A great starter project is adding a motion sensor to your main kitchen light, so it turns on when you walk in and turns off after a few minutes of no activity. Once that feels natural, you can add a smart plug or switch for the exhaust fan and build more advanced routines.