Smart lighting can make a tiny apartment feel calmer, bigger, and more flexible. It can also cause fights if one roommate keeps shouting at a voice assistant at midnight or if the hallway light shuts off while someone’s in the shower.
This guide walks through smart lighting ideas for small apartments, with a focus on scenes, layouts, bulbs, and switches that work in studios and shared rentals. You’ll learn how to layer light, avoid glare, share control fairly, and build renter-friendly automations that don’t annoy roommates or guests.
Why Smart Lighting Matters in Small Apartments (Especially With Roommates)
Common lighting problems in studios and shared rentals
Small apartments tend to have three lighting issues: few fixtures, harsh overhead lights, and no separation between different activities. In a studio, one bright ceiling light might be doing everything: cooking, working, relaxing, and trying to help you fall asleep. In shared places, that same light might wake up someone you share a room or wall with.
Common problems include:
- Single blinding ceiling light: Great for cleaning, awful for movie nights or winding down.
- Limited outlets and fixtures: You can’t add ten lamps, so each one has to do more.
- Roommate conflicts: One person wants cozy dim light, the other wants daylight-bright for studying.
- Odd layouts: Long, narrow rooms or loft beds make it hard to get even lighting.
- Renter limits: No rewiring, no big holes, and maybe no replacing landlord fixtures.
How smart lighting scenes fix glare, clutter, and control fights
Smart lighting scenes let you change multiple lights at once with one tap or button press. That means you can have:
- Brighter, cooler light for work without permanently living in a hospital-bright room.
- Soft, warm light for evenings without needing separate lamps for every mood.
- One-touch shared settings everyone understands: “Movie”, “Dinner”, “Study” instead of random dimmers.
- Less clutter because you can reuse the same lamps and fixtures for multiple purposes.
Scenes also reduce control fights. If you agree on a few presets, no one is constantly fiddling with brightness and color. You can even give each roommate their own scenes in bedrooms while sharing different ones in common areas.
Key goals: comfort, privacy, quiet controls, and energy savings
In a small apartment, smart lighting should aim for:
- Comfort: No glare on screens, no harsh light before bed, and smooth dimming.
- Privacy: Bedroom scenes that don’t leak too much light into shared spaces.
- Quiet controls: Taps and soft clicks instead of loud voice commands at night.
- Energy savings: Turn off lights automatically when everyone leaves or when the sun is bright enough.
Keep those four goals in mind as you choose bulbs, layouts, and control options.
Planning Your Smart Lighting Layout in a Small Space
Map the zones: sleep, work, living, cooking, and entry
Even in a single-room studio, you can think in zones instead of square footage. Sketch your floor plan (or just imagine it) and mark:
- Sleep zone: Bed or loft, plus any nearby nightstand or wall light.
- Work/study zone: Desk, dining table, or kitchen counter where laptops appear.
- Living zone: Sofa, TV, or reading chair.
- Cooking zone: Kitchen ceiling light, under-cabinet lights, or counter lamps.
- Entry/hallway zone: The first light you use when you come home, plus any narrow hallways.
Each zone should have at least one controllable light. In tiny apartments, one lamp might serve multiple zones (like a floor lamp shared by the sofa and desk). That’s fine—your scenes will handle the difference.
Choosing which fixtures get smart bulbs vs. smart plugs vs. switches
You don’t need every bulb to be smart. Prioritize:
- Smart bulbs for lamps and fixtures where you want dimming and color temperature (or color) control. Great for bedside lamps, floor lamps by the sofa, and kitchen fixtures if your landlord allows bulb swaps.
- Smart plugs for plug-in lamps or string lights that only need on/off control. These are cheap and very renter-friendly.
- Smart switches or dimmers for fixed ceiling lights you use all the time, especially in kitchens, living rooms, and hallways.
A simple approach:
- Make the main room lights smart via bulbs or switches.
- Add one or two smart lamps in key spots (bed and sofa/desk).
- Use smart plugs for accent lights, like shelves or LED strips.
Avoiding over-automation in tiny spaces (when ‘smart’ becomes annoying)
Because everything is close together, too many automations can feel chaotic. Signs you’ve gone too far:
- Lights changing multiple times when you walk from bed to kitchen.
- Roommates startled by lights turning on and off unexpectedly.
- Confusion about which app or button controls what.
To keep things friendly:
- Automate mostly shared, practical things (hallways, bathroom at night, entryway).
- Make personal, “fancy” automations opt-in for each bedroom.
- Always keep a simple physical way to turn lights on and off.
Best Smart Bulbs for Small Apartments and Shared Rooms
Color vs. white-only bulbs: when each makes sense
Color bulbs are fun, but you probably don’t need them everywhere.
- Color bulbs: Good for living room lamps, accent lights behind TVs, or a desk lamp you use for streaming or gaming ambience.
- Tunable white bulbs (warm to cool white): Best for bedrooms, kitchens, and work areas where you care more about brightness and clarity than color effects.
- Fixed white bulbs: Cheapest option for spots that just need dimming and schedules, like hallways or closets.
In a small apartment, starting with mostly tunable white bulbs plus one or two color bulbs for fun is often the most practical mix.
Brightness and color temperature tips for small rooms
Small spaces can feel either cave-like or washed out. Look at two specs:
- Lumens (brightness): 800 lumens is roughly a 60W traditional bulb. That’s a good baseline for most table and floor lamps.
- Color temperature (Kelvin): Lower numbers are warmer; higher are cooler. For example, 2700K is cozy, 4000K is neutral, 5000K+ feels like daylight.
General guidelines:
- Bedrooms and living areas: 2700–3000K in the evening, 3000–3500K in the morning.
- Work/study spots: 3500–4000K during the day to help focus.
- Kitchens and bathrooms: Around 3000–4000K so colors look accurate.
If you’re curious about color temperature and how it affects mood, the overview on color temperature in lighting is a good quick reference.
Quiet, cool, and compact bulbs that won’t drive roommates crazy
Most modern smart bulbs are silent, but a few cheaper models can hum or buzz, especially when dimmed. In a quiet apartment, that’s noticeable.
To keep the peace:
- Avoid mixing old dimmers with new smart bulbs unless they’re specifically compatible.
- Choose LED bulbs with good heat management so they don’t get too hot in small enclosed fixtures.
- Stick with standard A19 bulbs for most table and floor lamps; they fit well and are easy to reuse in your next place.
Smart Switches, Dimmers, and Buttons That Roommates Actually Like
When to use smart switches instead of (or with) smart bulbs
Smart switches are ideal for fixtures everybody uses and expects to work from the wall, like the main ceiling light.
Use smart switches when:
- You have multiple bulbs on one switch (like track lighting or multi-bulb ceiling fixtures).
- You want traditional wall control that still works if Wi-Fi is down.
- Roommates often forget and flip the physical switch, cutting power to smart bulbs.
You can also combine a smart switch powering non-smart bulbs in the ceiling with smart bulbs in lamps. Scenes then control both together.
Battery remotes and wireless dimmers for renters (no rewiring)
If you can’t replace switches, battery-powered remotes and wireless dimmers are your best friends. Examples include:
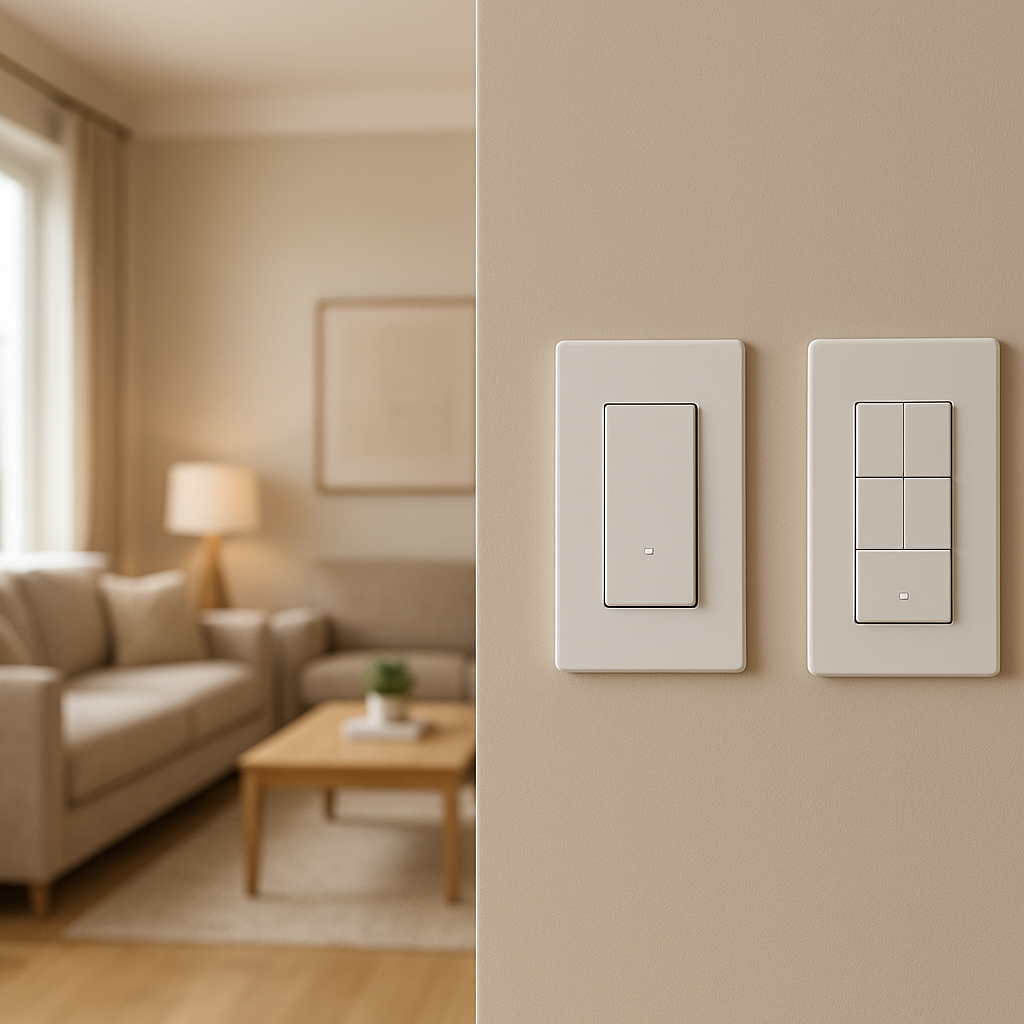
- Magnetic or adhesive wireless dimmer switches that stick to the wall.
- Small scene buttons you can place on nightstands or coffee tables.
- Multi-button remotes where each button triggers a different scene (e.g., “Bright”, “Chill”, “Movie”).
These give you wall-style control without opening up the electrical box—perfect for rentals.
Designing wall controls that still work for guests and technophobes
Every shared apartment has at least one person who doesn’t want to fuss with apps. Plan for them.
- Keep at least one intuitive wall control per room that works just like a normal switch: on, off, maybe dim.
- Use clear labels near multi-button remotes: “Main light”, “Cozy”, “TV time” instead of symbols or blank plates.
- Avoid hiding controls behind furniture or inside drawers. If guests have to ask how to turn off a light, it’s too complicated.
Core Smart Lighting Scenes for Small Apartments
“Morning wake-up” scenes that are gentle and roommate-friendly
In small apartments, a harsh light flip can wake everyone. Set up a wake-up scene that:
- Gradually brightens bedroom lights from very dim warm white to medium, neutral white over 10–20 minutes.
- Leaves common-area lights off, so you don’t flood the whole apartment.
- Optionally turns on only a bedside lamp on weekdays, never the overhead light.
If you share a room, use individual lights or smart plugs for each side of the bed so one person can wake up without blasting the other.
“Work/study focus” scenes for desk corners and dining tables
For work or study, you want bright, even light on your workspace, not in your eyes.
- Turn on a desk or table lamp to 80–100% brightness at a neutral or cool white.
- Dim overhead lights slightly to reduce glare on screens.
- Turn off colorful accent lights so the space feels focused, not distracting.
If you share a space, agree on quiet hours when this scene is fair game, and consider keeping bedroom scenes independent so others can stay in “relax” mode.
“Movie night” and “gaming” scenes that reduce glare on screens
Nothing ruins movie night faster than a bright ceiling light reflecting off the TV.
- Turn off or dim direct overhead lights near the screen.
- Turn on bias lighting behind the TV or a floor lamp behind the sofa at low brightness.
- Use warm or softly colored light (amber/blues at low brightness) that doesn’t wash out the picture.
Set this scene to a button on the coffee table so anyone can enable it without pulling out their phone.
“Wind-down” and “sleep” scenes for studios and loft beds
In a studio, your bed is basically in the living room, so the shift to sleep mode has to be clear:
- Dim bedroom-adjacent lights to 10–20% and shift to warm white (around 2200–2700K).
- Turn off kitchen and desk lights entirely.
- Optionally, turn on a very dim nightlight in the bathroom or hallway.
For loft beds, a small, low-brightness smart bulb or LED strip under the loft can be part of the wind-down scene so you’re not climbing a ladder in the dark.
Roommate-Proof Lighting Scenes for Shared Spaces
Creating separate scenes for each bedroom vs. common areas
Think of your apartment as two systems:
- Private scenes: Per bedroom, controlled by each person.
- Shared scenes: Living room, kitchen, hallways, bathroom.
Make a rule: no one edits someone else’s bedroom scenes without asking. Shared scenes can be adjusted together, but private spaces stay under each person’s control.
Setting scene schedules that don’t wake up night-shift roommates
Schedules are convenient, but they can wake the wrong person.
- Keep scheduled bright scenes limited to personal bedroom lights, not the entire living room.
- Use time-based or presence-based rules so entry and hallway lights come on softly at night instead of full brightness.
- Turn off any loud voice assistant alarms in shared rooms; keep alarms on phones or in bedrooms.
Shared controls: scene buttons everyone understands at a glance
In common areas, simple buttons beat complex apps.
- Mount a small remote labeled with 3–4 scenes: “Bright”, “Chill”, “TV”, “Off”.
- Use icons or colors on stickers if text labels don’t fit.
- Explain once how they work and avoid changing functions weekly.
This way, anyone can set the vibe without grabbing a phone or asking, “Which app is it again?”
Voice, App, and Manual Control: Making It Simple for Everyone
Pros and cons of voice control in small, thin-walled apartments
Voice control is handy when your hands are full, but it has drawbacks in close quarters.
- Pros: Great for quick commands when cooking or entering the apartment loaded with groceries.
- Cons: Shouting at 1 a.m. can wake roommates; microphones may pick up commands from other rooms.
Use voice for shared actions like “Turn off all lights” when leaving, but rely on buttons and apps at night or in bedrooms.
Grouping lights in the app so roommates aren’t confused
Group your devices in the app according to rooms and zones, not just product names.
- Create groups like “Living room main”, “Sofa lamp”, “Desk”, “Bedroom A”, “Bedroom B”.
- Use plain-language names that match what people say out loud.
- Avoid reusing names like “Lamp” in multiple rooms; add the room name.
Labeling scenes clearly: no cryptic names like “Scene 3”
Good names make smart lighting feel simple:
- Use action or mood names: “Get ready”, “Study”, “Game night”, “Late snack”.
- Avoid personal or confusing in-jokes that guests won’t understand.
- Keep the same scene names across the app and physical buttons to avoid mismatch.
Using Sensors and Automations Without Annoying Anyone
Motion sensors in hallways and bathrooms vs. bedrooms
Motion sensors shine in transition areas but can be frustrating in places where people sit still.
- Good spots: Entryway, hallway, bathroom, closet, and maybe kitchen.
- Avoid bedrooms and living room seating areas unless you pair motion with other rules, because people reading or watching TV might trigger unwanted changes.
Set different rules for day and night. For example, hallway motion could turn lights on bright in the day, but very dim at night.
Preventing lights from turning off while someone is still in the room
Nothing is more annoying than a bathroom light going off mid-shower.
- Increase timeout durations in bathrooms and kitchens (e.g., 10–20 minutes).
- Use occupancy sensors that detect presence, not just motion, if available.
- Provide a manual override button that keeps the light on until turned off.
Quiet nighttime automations for late arrivals and bathroom trips
Nighttime automations should be subtle:
- Use very low brightness (1–10%) warm light in hallways or bathrooms after a certain hour.
- Turn on only path lights, not overhead living room lights.
- Avoid voice announcements or chimes tied to automations in the middle of the night.
Renter-Friendly Installation Tips (No Drilling, No Landlord Drama)
Stick-on mounts, magnetic remotes, and command strips
You can create a “built-in” feel without permanent changes.
- Use adhesive or magnetic mounts for switch-style remotes.
- Mount small remotes near existing light switches so people instinctively reach in the right place.
- Route cables for LED strips or plug-in lamps with removable cable clips.
Choosing gear that’s easy to remove and take with you
Focus on devices you can easily pack when you move:
- Smart bulbs with standard bases (E26/A19).
- Smart plugs and plug-in lamps instead of hardwired fixtures.
- Wireless remotes and buttons you can re-stick in your next home.
This keeps your investment safe even if your rental is temporary.
Safety basics: wattage limits, surge protection, and code compliance
Even with plug-and-play devices, basic electrical safety still matters.
- Match bulb wattage (or LED equivalent) to the fixture’s maximum rating.
- Don’t overload power strips or extension cords with multiple smart plugs.
- In older buildings, consider a simple surge protector for your smart hub and Wi-Fi router.
For a broader look at home electrical safety standards, the National Electrical Code overview gives useful background, though you should always follow local regulations and your landlord’s rules.
Budget-Friendly Smart Lighting Kits for Small Apartments
Starter setups under $100 (bulbs + remote or button)
You can make a big difference with a small budget. A typical under-$100 kit might include:
- Two or three tunable white smart bulbs for the main room.
- One smart plug for a floor or table lamp.
- One wireless dimmer or scene button for the living area.
This is enough to create basic scenes like “Bright”, “Relax”, and “Movie” in a studio.
Gradual upgrade plan: what to buy first, second, and third
A simple upgrade path:
- First: Smart bulbs for your most-used lamp and main ceiling light (if allowed).
- Second: A scene button or remote so you’re not dependent on your phone.
- Third: Smart plugs or additional bulbs for secondary lamps, plus one motion sensor for the hallway or bathroom.
Example shopping lists for studios vs. 2-bedroom apartments
Studio apartment kit:
- 3 tunable white smart bulbs (overhead, sofa area, bedside).
- 1 smart plug for a small accent lamp or LED strip.
- 1 wireless dimmer/scene button mounted near the door.
2-bedroom roommates kit:
- 2–3 smart bulbs for the living room and kitchen.
- 2 smart bulbs or lamps (one per bedroom).
- 2 wireless remotes (one in the living room, one shared for hall/bath).
- 1 motion sensor for the hallway or entry.
Example Smart Lighting Layouts and Scene Recipes
Studio apartment: single-room layout with 4–6 scenes
Devices:
- Ceiling fixture with 1–2 smart bulbs.
- Floor lamp by sofa/desk with smart bulb.
- Bedside lamp with smart bulb or smart plug.
Scenes:
- Bright day: All lights 80–100%, neutral white.
- Work: Ceiling and floor lamp bright; bedside off.
- Relax: Floor lamp and bedside at 30–40%, warm white; ceiling off.
- Movie: Only a dim floor lamp or LED strip behind TV.
- Sleep: Only bedside at 5–10% warm white, auto-off after 15–30 minutes.
Roommates in a 2-bedroom: shared living room + private room scenes
Shared living room:
- Overhead light on smart switch or bulbs.
- Floor lamp behind sofa on smart plug.
- Small table lamp near TV on smart bulb.
Shared scenes:
- Guests: All living room lights bright and neutral.
- Chill: Overhead at 40%, lamps at 50% warm.
- TV: Overhead off, lamps dim and warm.
Each bedroom has its own “Morning”, “Study”, and “Sleep” scenes that don’t touch shared lights.
Long, narrow apartment: hallway, kitchen, and living area strategies
For railroad-style layouts:
- Put a motion sensor in the entry/hallway to gently light the path when anyone walks through.
- Use linked scenes so “Evening” dims the living room and kitchen together, but keeps the hallway at low brightness for safety.
- Place one scene button at each end of the apartment so you can turn most lights off as you move through.
Privacy, Boundaries, and Rules Around Smart Controls
Agreeing on who can change scenes and automations
Before you hook everything up, talk about control:
- Decide who is the “admin” for the system (creating scenes, adding devices).
- Agree that shared scenes are group decisions, not solo experiments.
- Set expectations about when it’s okay to change brightness or color in common rooms.
Using separate user accounts or home profiles for roommates
Most platforms allow multiple users or household profiles. Use them so:
- Each roommate has access to their own bedroom devices.
- Everyone can control shared rooms but not remove devices by accident.
- Voice profiles (if used) respond differently to each person’s requests when possible.
What to do when smart lighting causes conflicts (and how to fix it)
If smart lighting becomes a source of tension:
- Temporarily turn off complex automations and go back to simple scenes.
- Ask what specifically bothers people: brightness, timing, colors, or noise.
- Adjust scenes so everyone has at least one favorite scene they enjoy in shared spaces.
Maintenance and Troubleshooting in a Shared Apartment
What to check when a scene stops working or lights won’t respond
When a scene misbehaves, go step-by-step:
- Check that power is on at the physical switch or plug.
- Open the app and see which lights are “offline”.
- Toggle one light at a time from the app to find the problem device.
- Power-cycle the bulb or plug (off for 10 seconds, then on) and retry.
Wi-Fi, hubs, and Bluetooth: keeping connections stable in dense buildings
Apartment buildings are full of overlapping Wi-Fi networks, which can cause drops.
- Place your smart home hub or main speaker away from the router if they interfere, but still central in the apartment.
- If your lights support it, use a mesh or hub-based system (like Zigbee or Thread) so bulbs talk to each other instead of directly to Wi-Fi.
- Avoid stuffing hubs in cabinets or metal TV stands—they block signals.
Creating a simple “lighting reset” cheat sheet for everyone
Print or share a short note that says:
- How to turn lights on/off manually in each room.
- Which button or remote controls which scenes.
- Basic troubleshooting steps (“If a light is stuck, flip the switch off for 10 seconds”).
Keep it on the fridge or in a shared notes app so nobody feels locked out of the system.
Final Checklist: Smart Lighting Ideas for a Small, Quiet, Happy Apartment
Quick scene checklist for bedrooms, living areas, and entryways
At minimum, aim for:
- Bedroom: “Wake-up”, “Relax”, “Sleep”.
- Living area: “Bright”, “Chill”, “TV/Movie”.
- Entry/hallway: “Welcome home” and a low-brightness night path.
Roommate-friendly rules to keep automations under control
Agree on a few ground rules:
- No surprise changes to shared scenes without a quick group message.
- Keep nighttime automations dim and quiet.
- Always maintain a physical way to turn every light on and off.
How to expand your setup when you move to a bigger place
When you upgrade to a larger home, your existing devices can come with you:
- Reuse smart bulbs in new lamps and fixtures.
- Move remotes and scene buttons to new rooms and relabel them.
- Copy your favorite scenes, then tweak brightness and color for larger spaces.
Conclusion
Smart lighting ideas for small apartments don’t have to be complicated or expensive. By mapping zones, choosing a few key smart bulbs and switches, and building clear, roommate-friendly scenes, you can make a tiny place feel more flexible and comfortable. Start simple, keep controls obvious, and layer in automations slowly. Your lights should quietly support how you live together—not become another thing to argue about.
FAQ
Do I need the same brand of smart bulbs throughout my apartment?
Using one brand keeps things simpler, especially for scenes and updates, but it’s not required. Most ecosystems (like Alexa, Google Home, or Apple Home) can control multiple brands. If you mix brands, try to keep them grouped by room so colors and brightness behave consistently.
Will smart lighting work if my Wi-Fi goes out?
Basic on/off from physical switches will still work for smart switches. Many bulbs and hubs also keep last-used settings when offline. Remote app control may stop until Wi-Fi is back, so always have a manual backup like a switch or button.
Can my landlord say no to smart bulbs or plugs?
Most landlords don’t mind smart bulbs or plugs because they’re removable and don’t change wiring. Always check your lease, avoid altering permanent fixtures without permission, and keep original bulbs to swap back when you move out.
Are motion sensors worth it in a small studio?
They can be, especially for entryways and bathrooms. Just be careful not to put them where they’ll constantly trigger while you’re sitting still. In a studio, one well-placed motion sensor for the entry or hallway is usually enough.
How many smart scenes are too many?
If people can’t remember which scene does what, you have too many. Aim for 3–5 core scenes per main area. You can always add more later, but starting simple keeps everyone comfortable and less confused.