Apartment and rental living doesn’t have to mean weak security. Modern smart window and glass break sensors give you an extra layer of protection without a single screw hole or wire run through a wall. Most options are peel-and-stick, battery-powered, and easy to take with you when you move.
This guide walks through the best smart window sensors for apartments, what to look for as a renter, and how to install and use them without risking your security deposit. You’ll see real device examples, renter-friendly mounting tips, and ways to connect sensors to your existing smart home setup.
Why Renters Need Smart Window and Glass Break Sensors
Common apartment break-in methods and why door sensors aren’t enough
Many renters start with a smart lock or a door contact sensor and stop there. The problem is that a lot of apartment intrusions don’t happen straight through the front door.
Common entry points include:
- Ground-level or basement windows that can be quietly forced open.
- Balcony and fire escape doors that feel “hidden” and are often left unlocked.
- Sliding glass doors that can be lifted off their tracks or bypassed with simple tools.
- Glass panels near doors where an intruder breaks glass and reaches in to unlock a deadbolt.
A door contact sensor only triggers when the door opens. If someone breaks a nearby pane or slides a window open that has no sensor, your system stays silent. That’s where window contacts and glass break detectors fill the gap, alerting you while there’s still time to act.
Benefits of window and glass sensors for renters (peace of mind, insurance, safety)
For renters, smart window and glass sensors add several layers of value beyond just an alarm sound.
- Early warning and peace of mind: Get an instant alert if a window is opened while you’re sleeping, traveling, or at work.
- Insurance documentation: Some insurers offer discounts for monitored intrusion sensors, and app logs can help show timelines of events after a break-in.
- Personal safety: Knowing that any opened window or broken glass will trigger a notification can make solo living or first-floor living feel much safer.
- Awareness, not just burglary: Sensors can let you know if kids or roommates are opening balcony doors or windows in risky ways.
Renter-specific challenges: no drilling, no wiring, and lease restrictions
Most leases limit any permanent changes to walls, windows, and frames. That usually means no drilling, no visible cables, and often no hardwired devices tied into the building’s electrical system.
As a renter, you need:
- Peel-and-stick or clamp-on hardware that can be removed without damage.
- Battery-powered or USB-rechargeable devices that don’t require opening walls.
- Flexible mounting options for metal, vinyl, and older wooden frames.
- Equipment you can easily take with you to your next apartment.
The good news: most modern smart window and glass sensors are designed with these exact constraints in mind.
Key Features to Look For in Smart Window Sensors for Apartments
Truly renter-friendly installation: peel-and-stick, magnetic, and clamp-on designs
The first thing to check is how the sensor physically mounts.
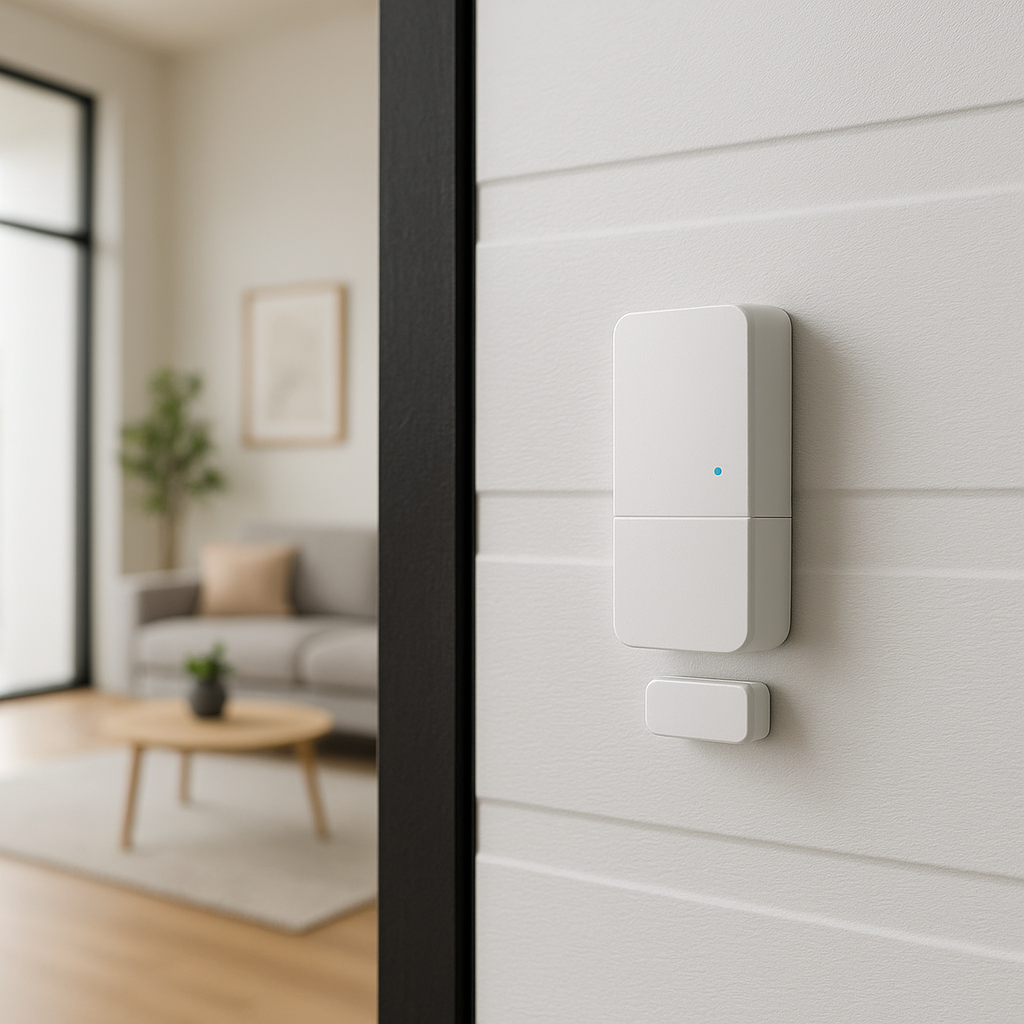
- Peel-and-stick contact sensors: These come in two parts (sensor and magnet) and attach directly to the window frame and sash with adhesive pads. Common on brands like Ring, Aqara, Wyze, and SimpliSafe.
- Magnetic or clip-on sensors: Some third-party sensors clip around the window track or frame, useful where you can’t stick anything to painted surfaces.
- Clamp-on designs: A few specialized devices clamp to metal frames or rails, ideal for rental units with aluminum sliders or older apartment windows.
Look for sensors marketed specifically as “no-drill” or “adhesive mount” and confirm that the adhesive backing is removable or replaceable.
No-drill, no-hardwire power options: battery life and USB-rechargeable units
Next, look at how the sensor is powered and how often you’ll need to touch it.
- Standard coin-cell batteries (CR2032/CR2450): Very compact, often 1–2 years of battery life for low-traffic windows.
- AA/AAA battery sensors: Slightly bulkier but easier batteries to replace, often 2–3+ years of life.
- USB-rechargeable glass break sensors: Great for larger rooms or open spaces; you’ll recharge them like a smart speaker every 6–18 months depending on use.
For high or hard-to-reach windows, prioritize long battery life and an app that shows battery status so you don’t discover a dead sensor after you need it.
Connectivity and compatibility: Wi-Fi, Zigbee, Z-Wave, Thread, and Matter support
How your sensors talk to the rest of your smart home matters even more in an apartment, where Wi-Fi congestion and building layouts can be tricky.
- Wi-Fi sensors: Connect directly to your router; no hub needed. Good for small apartments, but each sensor uses a bit of Wi-Fi bandwidth.
- Zigbee or Z-Wave: Use a hub (like a smart home hub or security base station). These are usually more power efficient and can cover larger units with less interference.
- Thread and Matter: Newer ecosystems that aim for better reliability and cross-brand compatibility. Many upcoming window sensors will support Matter over Thread so you can use them across ecosystems with less hassle. You can read more about Matter objectives from the Connectivity Standards Alliance at the official Matter overview.
If you already own a smart hub, check for compatible sensors instead of creating a whole new ecosystem just for windows.
App features that matter for renters: remote alerts, schedules, and zone control
The app experience can make the difference between sensors you trust and sensors you ignore.
- Instant push notifications: Alerts for open/close events or glass break detection, even when you’re off-site.
- Modes and schedules: For example, Arm Away (all windows armed), Arm Home (balcony doors armed, bedroom windows off), and auto-arm at night.
- Zones or rooms: Group sensors by area so you can arm only vulnerable windows, balconies, or the side facing a fire escape.
- Event history: A log of when windows were opened, useful for tracking patterns or confirming alarms.
Smart home ecosystem integration: Alexa, Google Home, HomeKit, and smart hubs
Most renters already own at least one smart device, like an Echo or Google Nest speaker. Look for window and glass break sensors that integrate with:
- Amazon Alexa: Use routines like “If glass break detected, turn on living room lights and announce an alert on Echo speakers.”
- Google Home: Trigger smart lighting, broadcast alerts to Nest speakers, or log events.
- Apple HomeKit: For iPhone and HomePod households, HomeKit-compatible contact sensors and glass sensors allow automation without extra cloud accounts.
- Security hubs: Systems like Ring Alarm, Abode, or SimpliSafe have their own sensors and sometimes support select third-party devices.
Check compatibility before you buy; mixing incompatible ecosystems quickly becomes frustrating.
Privacy and data security concerns in rented spaces
Because you share walls, networks, and sometimes hardware with others, pay attention to how your data is handled.
- Secure accounts: Enable two-factor authentication on any app controlling your sensors.
- Local vs. cloud processing: Some platforms process events locally, while others rely on cloud services. Local-first designs reduce exposure if your accounts are compromised.
- Minimal shared access: If you share access with roommates, use separate accounts or guest access where possible rather than sharing logins.
Because these are just contact and acoustic sensors, they’re less invasive than cameras, but you should still treat the apps and accounts as part of your overall digital security.
Best Smart Window Sensors for Apartments (No Drilling Required)
Compact contact sensors that work with sliding and casement windows
Contact sensors are the standard choice for windows. The key for apartment use is finding models that fit cramped or awkward frames.
- Low-profile contact sensors: Brands like Aqara, Eve, and Ring offer very slim magnets that fit next to sliding window tracks or narrow casement windows.
- Reversible orientation: Look for sensors that can be mounted horizontally or vertically depending on your sash layout.
- Gap tolerance: Check the maximum gap between sensor and magnet (often 0.5–1 inch). Sliding windows sometimes have a larger gap when closed, so that spec matters.
For renters with unusual windows, consider buying one sensor to test on your frames before committing to a large kit.
Stick-on vibration and shock sensors for single-pane and double-pane glass
Vibration (shock) sensors stick directly to the glass instead of the frame. They trigger when they feel a strong impact or repeated tapping.
- Single-pane windows: Simple vibration sensors work well because the glass flexes more clearly.
- Double-pane or insulated glass: Look for models that allow you to adjust sensitivity so normal vibrations don’t cause false alarms.
- Use as a backup: These can back up contact sensors in rooms where intruders might try to break glass instead of opening the window.
Shock sensors are especially helpful if your windows don’t close perfectly or have shifting frames that make contact sensors unreliable.
Clamp-on and frame-mount options for metal and vinyl window frames
If your landlord doesn’t want anything stuck to painted surfaces, clamp-on solutions can be a workaround.
- Track-mounted sensors: Some third-party contact sensors are designed to sit in the track of a sliding window or door, detecting movement without adhesive.
- Clamp-on frames: A few niche brands sell mounts that clamp around metal window frames and hold standard contact sensors.
- Custom brackets: For DIY-savvy renters, 3D-printed or off-the-shelf brackets can position a contact sensor close enough to the sash without touching paint.
These solutions require a bit more planning but can be ideal in historic buildings or highly restrictive leases.
Battery life, range, and reliability comparison for small apartments vs. large units
How your sensors perform depends a lot on your building size and construction.
- Studios and one-bedroom units: Wi-Fi or Zigbee sensors connecting directly to a central hub or router usually work fine. Battery drain is low because distances are short.
- Large or multi-level apartments: Zigbee or Z-Wave sensors with repeaters (like smart plugs) can maintain a stable mesh network, reducing dropouts.
- Heavy construction: Concrete and brick walls can cut your signal; plan to place your hub more centrally or add a repeater in between.
Before permanent mounting, test sensors by temporarily taping them in place, then opening/closing windows to check if the app reliably records every event.
Best Smart Glass Break Sensors and Detectors for Renters
How acoustic glass break sensors work (and when to choose them)
Acoustic glass break sensors listen for the specific sound pattern of breaking glass. They typically analyze both the low-frequency thump of impact and the high-frequency shatter.
They’re a good choice when:
- You have several windows in a single room and don’t want multiple stick-on vibration sensors.
- Your living room has a large balcony door or picture window that’s hard to mount contacts on.
- You want coverage even if an intruder breaks glass but doesn’t fully open the window.
One acoustic sensor can often cover a whole room of windows if placed correctly.
Peel-and-stick standalone glass break detectors vs. hub-based devices
Acoustic glass break sensors come in two main styles:
- Standalone smart detectors: These connect via Wi-Fi or Bluetooth directly to an app. They’re great if you don’t want a full alarm system.
- Hub-based sensors: Systems like Ring Alarm or Abode have glass break sensors that pair to the main hub, benefiting from longer battery life and tighter integration with other security sensors.
Standalone detectors are easiest for minimalist setups, while hub-based devices are better if you’re already invested in a security ecosystem.
Multi-room coverage: where to place sensors in studio, one-bedroom, and larger apartments
For acoustic sensors, placement is everything.
- Studios: One glass break sensor on the opposite wall from your main windows often covers the whole space. Mount it about 6–12 feet from the glass.
- One-bedroom units: Prioritize rooms with large or easily accessible windows: living room and any ground-level bedrooms.
- Larger apartments: Aim for one sensor per major window cluster (living room, balcony area, back bedroom). Doors with big glass panels may need their own coverage.
Most manufacturers list a maximum range (for example, up to 15–25 feet). Don’t expect one sensor in a hallway to cover every room behind multiple doors.
Avoiding false alarms from TV, music, and kitchen noises
Older glass break detectors had a reputation for false alarms from loud TV scenes or clattering dishes. Newer models use smarter filtering, but placement still matters.
- Keep sensors away from speakers: Don’t mount them right next to a soundbar or subwoofer.
- Avoid echo chambers: Highly reflective surfaces (tile kitchens, bare walls) can confuse very cheap detectors.
- Use test modes: Many sensors and alarm systems have a test mode that logs triggers without sounding sirens, so you can fine-tune placement.
For a more technical overview of how glass break detectors analyze sound, the Glass break detector entry on Wikipedia provides helpful background.
Apartment-Friendly Installation: Mounting Without Drilling or Damage
Using 3M-style adhesive strips, nano tape, and renter-safe mounting pads
Most modern window sensors ship with adhesive pads, but you can often upgrade them for easier removal.
- Command/3M-style strips: Replace the included tape with pull-tab strips so you can remove sensors cleanly later.
- Nano gel tape: Provides a strong hold on glass or metal; pick variants labeled as removable and test on an inconspicuous area first.
- Adapter plates: Mount an adapter plate with removable strips, then attach the sensor to that plate. When moving out, you only remove the plate.
Always clean surfaces with isopropyl alcohol before sticking anything to improve grip without sanding or roughing the surface.
Recommended sensor placement on different window types (sliding, casement, tilt-and-turn)
Correct placement ensures the sensor knows when the window truly opens.
- Sliding windows: Put the sensor on the fixed frame and the magnet on the sliding sash, near the bottom or side where they can align closely.
- Casement (crank) windows: Mount along the side where the sash meets the frame when closed, ensuring the magnet passes directly by the sensor.
- Tilt-and-turn windows: These can be tricky; mount the sensor where the sash is closest to the frame in the fully closed position and make sure the magnet moves far enough away in both tilt and turn modes to trigger.
For glass vibration sensors, stick them a few inches from a corner of the glass pane, not right on the edge or in the exact center.
Tips for ensuring reliable signal through concrete, brick, and steel construction
Many apartment buildings use dense materials that block wireless signals.
- Centralize your hub or router: Place it closer to the middle of your apartment, not hidden in a closet or at one extreme corner.
- Use repeaters: Zigbee or Z-Wave plugs and bulbs act as repeaters to bridge long distances or tricky walls.
- Check signal indicators: Some apps show signal strength per sensor; move the hub or sensor slightly until readings improve.
Before final mounting, test sensors by walking around with your phone open to the app and triggering them to ensure instant, reliable updates.
How to remove sensors without peeling paint or damaging frames
When it’s time to move out, gentle removal is key.
- Warm the adhesive: Use a hair dryer on low for 20–30 seconds to soften glue.
- Pull tabs, don’t pry: If you used Command-style strips, pull the tab straight down, not out, to release the adhesive.
- Clean residue: Remove leftover stickiness with adhesive remover or a bit of rubbing alcohol on a soft cloth.
Always support the frame while removing sensors so you’re not flexing old paint or brittle wood.
Monitoring, Alerts, and Integrations for Renters
Self-monitored vs. professionally monitored options when you don’t control the building
Renters often lean toward self-monitoring because they don’t have authority over shared building entrances or common areas.
- Self-monitored setups: Your phone receives alerts and you decide whether to call neighbors, building management, or the police.
- Professionally monitored systems: A central station calls you and can contact emergency services if needed. Works well if you mainly monitor your unit interior.
If your building already has a lobby security system, your smart window sensors simply add personal coverage inside your own leased space.
Setting up push notifications, SMS, and email alerts for window events
Most sensor apps let you choose how you’re notified.
- Push notifications: Best for day-to-day alerts like “bedroom window opened.”
- SMS alerts: Useful as a backup if your phone’s data connection is unreliable.
- Email logs: Handy for long-term tracking or sharing proof of events with landlords or insurance.
Set high-priority alerts (glass break, unexpected window opening) to bypass Do Not Disturb while leaving low-priority notices muted at night.
Integrating window sensors with smart lights, sirens, and cameras for layered security
Window and glass sensors become much more effective when paired with other devices.
- Smart lights: Trigger living room lights or a hallway light strip to turn on if a window opens after midnight.
- Indoor sirens: A small plug-in siren can sound if glass breaks, drawing attention and often scaring off intruders.
- Cameras: Use window contact events to start recording or send camera snapshots to your phone.
Layered responses – light, sound, and video – are especially valuable in dense apartment buildings where neighbors can quickly notice unusual activity.
Quiet modes and schedules to prevent nighttime or pet-triggered false alarms
Sharing walls makes loud sirens and constant alerts a bigger problem, so configure quiet times carefully.
- Night modes: Use chime-only or notification-only modes after certain hours instead of blaring sirens.
- Pet-friendly settings: If vibration sensors pick up pets bumping into windows, lower sensitivity or arm specific sensors only when you’re fully away.
- Guest or cleaning modes: Temporarily disarm window sensors in rooms being cleaned to avoid repeated alerts.
Security Without Violating Your Lease or Building Rules
What to check in your lease before installing smart sensors
Before sticking anything to windows, skim your lease for:
- Alterations clauses: Look for language about “no drilling,” “no modifications to windows or frames,” or “no added security hardware.”
- Alarm rules: Some buildings forbid loud sirens that can be heard in hallways; focus on app alerts and smart lights instead.
- Wireless equipment: A few rentals restrict installing network gear in common areas but usually allow devices inside your unit.
If in doubt, a quick email to your landlord explaining that sensors are peel-and-stick and removable can avoid misunderstandings later.
Handling Wi-Fi restrictions, shared networks, and guest networks in apartments
Shared or building-provided Wi-Fi can complicate smart device setup.
- Guest networks: If you control the router, put smart devices on a guest or IoT network for isolation from laptops and work devices.
- Building Wi-Fi: If you’re stuck with a shared network, look for sensors that connect via a hub rather than each one connecting directly to Wi-Fi.
- Hotspots: In rare cases, people use a dedicated mobile hotspot for security devices if building Wi-Fi is unreliable.
Always secure your Wi-Fi with a strong password; if your network is compromised, your sensors can’t be fully trusted.
Storing and sharing video or sensor logs while respecting roommate privacy
If you share your apartment, talk openly about what’s being monitored.
- Define boundaries: Focus window and glass sensors on points of entry, not on private interior areas.
- Share access carefully: Use separate accounts or shared access features instead of one login, so you can see who changed settings.
- Limit retention: Keep logs and video clips only as long as needed. Many apps let you auto-delete older events.
Clear expectations help avoid conflicts if a sensor log is later used to question someone’s movements inside the apartment.
Budget and Value: Best Options for Different Apartment Scenarios
Best entry-level kits for studio and one-bedroom apartments
If you’re getting started, you don’t need a huge system.
- Basic starter kits: Look for a bundle with 3–4 contact sensors, an optional keypad or hub, and maybe a motion sensor.
- Wi-Fi-only sets: Great for small spaces with few devices; easier to install and manage.
- Hub-based starter systems: If you plan to add more gear later, consider a hub-based kit that can grow with you.
Most studios can cover all windows and balcony doors with just 2–4 window sensors and one acoustic glass break sensor.
Value picks for renters planning to move within 12–24 months
If you know you’ll move soon, portability matters more than heavy investment.
- Platforms with easy re-pairing: Choose sensors that reset and pair quickly to new Wi-Fi or hubs.
- Neutral adhesives and brackets: Use removable strips or clip-on mounts so you leave zero damage behind.
- Cross-platform support: Devices that work with Alexa, Google Home, and Matter give you flexibility if your next place has a different setup.
A small, flexible kit you can reinstall in an hour at your new home offers better value than a complex system tailored only to your current floor plan.
Premium smart security ecosystems that move with you to your next home
Some renters want a more “set it and forget it” system with professional-level features.
- Modular alarm systems: Platforms that support a wide range of sensors (window, glass break, motion, leak) and optional professional monitoring.
- Integration depth: Premium systems often integrate tightly with smart locks, doorbells, and cameras, so you can manage everything in one app.
- Transferable equipment: All hardware stays yours; you simply change addresses and Wi-Fi details in the app when you move.
If you expect to move from apartment to apartment and eventually to a house, investing once in a robust ecosystem can save money long term.
Setup Walkthrough: From Unboxing to First Alert
Pre-setup checklist: Wi-Fi, hubs, apps, and firmware updates
Before sticking anything to windows, run through a quick checklist:
- Confirm your Wi-Fi name and password, and that 2.4 GHz is available if your sensors need it.
- Download the manufacturer’s app and create your account.
- If you have a hub, plug it in and connect it to your router.
- Check for firmware updates on the hub or any existing devices.
Getting software updated first reduces setup glitches and pairing issues.
Step-by-step pairing process for common brands and platforms
While details vary slightly, most sensors follow this basic process:
- Open the app and choose “Add device” or “Add sensor.”
- Select the sensor type (window/door, glass break, or vibration).
- Pull the battery tab or press the pairing button on the sensor.
- Wait for the app to find and register the device, then name it (for example, “Living Room Left Window”).
- Assign the sensor to a room or zone.
Repeat for each sensor; naming them clearly now makes it much easier to understand alerts later.
Testing your sensors safely on windows and glass
Before you finalize mounting, test function and placement.
- Contact sensors: Temporarily tape them in place, then open and close the window to confirm the app logs every event.
- Vibration sensors: Gently tap the window frame or use the built-in test mode if provided.
- Acoustic glass break sensors: Many apps include test sounds or test modes; you can also lightly clink a set of keys near the glass to ensure the sensor “hears” the sound.
Only commit to permanent adhesive once every sensor consistently responds.
Tuning sensitivity and alert rules for your specific apartment layout
Once everything is in place, you’ll want to fine-tune behavior.
- Adjust sensitivity: If vibration sensors trigger from passing traffic or slamming doors, reduce their sensitivity in the app.
- Set per-sensor modes: You might arm balcony doors 24/7, but only arm bedroom windows at night or when away.
- Test with real life: Live with the system a few days and note any nuisance alerts, then tweak rules so you pay attention when it truly matters.
Moving Out: How to Take Your Smart Sensors with You
Safely removing sensors and adhesive without leaving marks
When your lease ends, you’ll want your gear and your deposit.
- Switch your system to disarmed mode and label each sensor with masking tape (“Bedroom window,” etc.).
- Warm the adhesive with a hair dryer and gently twist or slide sensors off rather than prying straight out.
- Pull removable strip tabs straight down and clean any residue with rubbing alcohol.
Inspect each area in good light; if needed, lightly clean the frame or glass so it matches surrounding surfaces.
Resetting devices and updating locations in your smart home apps
Before setting up in a new place, reset everything logically.
- Rename sensors generically (for example, “Window Sensor 1”) or remove them from rooms in the app.
- Update your address in any professionally monitored systems.
- If moving far away or to a new Wi-Fi network, factory-reset sensors that require it before re-pairing.
This keeps your device list tidy and avoids confusion like “Kitchen window opened” when you no longer live in that kitchen.
Reinstalling sensors in your new apartment and re-optimizing placement
Once you’re in your new place, treat it like a fresh install.
- Decide which windows and glass doors are the highest risk in the new layout.
- Test wireless range again; you may need to move the hub or add a repeater in a larger or denser building.
- Only then apply new adhesive strips or brackets and name sensors based on their new locations.
Because your system is modular, you can keep tweaking and improving coverage with each move.
Frequently Asked Questions About Smart Window Sensors for Apartments
Are landlords allowed to say no to window or glass sensors?
Landlords can restrict permanent modifications, but most have no problem with removable smart sensors that don’t damage surfaces. If your lease is strict, choose peel-and-stick or clamp-on options and mention that everything is fully removable. When in doubt, ask for permission in writing.
Will window sensors work with security bars, storm windows, or double glazing?
Yes, but placement matters. For security bars, mount contacts on the window frame and sash rather than on the bars themselves. With storm windows or double glazing, you may need to mount the magnet on the moving sash and the sensor on the closest stationary frame layer. Always test that the sensor detects open/close reliably before final mounting.
Can I use these sensors on balcony doors and sliding glass patio doors?
Absolutely. Balcony and patio doors are some of the most important places to add contact sensors and glass break detectors. Just make sure the magnet can line up with the sensor when the door is fully closed, and test that the app triggers every time you open the door. For large glass doors, combining a contact sensor with an acoustic glass break sensor offers stronger protection.
What happens to my sensors if the power or Wi-Fi goes out?
Battery-powered sensors will keep working and usually store events locally until the hub or Wi-Fi returns. You may not receive remote notifications during an outage, but doors and windows can still trigger local alarms or automations depending on your setup. If outages are common in your building, consider a hub with battery backup and plan for local sound or light alerts that don’t rely on the internet.
Smart window and glass break sensors give renters a practical way to raise their security level without drilling into walls or negotiating complex changes with a landlord. With peel-and-stick hardware, long-lasting batteries, and flexible integrations, you can build a setup that fits your current apartment and follows you easily to the next one.