Syncing smart lights with your TV used to mean buying a pricey Philips Hue Sync Box or a full-blown TV lighting kit. The good news: you can get convincing, immersive lighting without that extra hardware, using devices and apps you may already own.
This guide walks through practical ways to sync smart lights with your TV using a PC, phone apps, audio-reactive effects, and budget DIY hardware. We’ll also cover brand-specific tips, troubleshooting, and how to make the whole setup as hands-free as possible.
Why Sync Smart Lights with Your TV?
The benefits of bias lighting and ambient TV backlights
Before you start trying to sync smart lights with your TV, it helps to understand basic bias lighting. Bias lighting is a soft light placed behind your screen that reduces the contrast between a bright display and a dark room. It’s not just about looks; it can make watching more comfortable.
- Less eye strain: A dim light behind the TV prevents your eyes from constantly adjusting between a bright screen and a pitch-black wall.
- Better perceived contrast: Whites look brighter and blacks look deeper when your eyes aren’t overwhelmed by a high-contrast dark room.
- Cleaner-looking setup: A light strip or light bars behind the TV can make the whole area feel more finished and modern.
If you’re curious about the science, bias lighting is a long-standing technique in video production; the basic concept is explained well on the bias lighting page on Wikipedia.
Immersion, eye comfort, and mood: what synced lighting actually does
Synced lighting goes a step beyond static bias lighting by changing color and brightness to match what’s on your screen or what you’re hearing.
- Immersion: A bright explosion on screen spills orange and yellow light onto your wall. A quiet night scene shifts the room into dark blues. It makes the content feel larger than the physical TV.
- Eye comfort: Even when lights are moving, they still prevent that “bright rectangle in a black void” feeling.
- Mood: You can tune how intense the effects are. Some people prefer subtle color shifts; others want a full-on light show for gaming or action movies.
Why you don’t need a Philips Hue Sync Box for great results
The Hue Sync Box is convenient, but it’s not the only way to sync smart lights with TV content:
- PC-based software can analyze what’s on screen and control your lights in real time.
- Mobile screen-grabber or camera-based apps can watch your TV and drive compatible lights.
- Audio-reactive modes respond to the soundtrack, which works surprisingly well for concerts and action-heavy shows.
- DIY HDMI setups using capture cards and open-source software can mimic Ambilight-style systems at a fraction of the price.
You trade some ease of use for cost savings and flexibility, but most people can get 70–90% of the effect without buying an official sync box.
How Screen-Synced Smart Lighting Works (In Simple Terms)
Screen grabbing vs HDMI capture vs audio-based effects
Almost every way to sync smart lights with TV content falls into one of three buckets:
- Screen grabbing (software-based): An app on your PC (or sometimes phone) takes snapshots of what’s on the screen, figures out the dominant colors, then sends those colors to your lights.
- HDMI capture (hardware-based): A box or capture card sits between your source (console, streaming stick, Blu-ray) and the TV. It reads the video signal directly and controls the lights.
- Audio-based effects: The app or device listens to sound via a microphone or audio stream and changes lights based on volume and frequency instead of exact screen colors.
In this article we’re avoiding expensive HDMI sync boxes, but we’ll still touch on lower-cost capture methods later.
Latency, color accuracy, and brightness explained
Three things decide whether your setup feels smooth or distracting:
- Latency (delay): How long it takes for the lights to react after something changes on screen. Under ~100 ms feels almost instant. Beyond ~300 ms, the effect can feel slightly behind.
- Color accuracy: Some systems average the whole screen and miss details. Others split the image into zones and match each zone’s dominant color. More zones usually mean better realism but need more processing power.
- Brightness: Lights that are too bright or saturated can be harsh. You want a level that supports the picture rather than overpowering it.
Limitations when you avoid a dedicated sync box
Skipping official hardware saves money, but you may run into a few trade-offs:
- More setup complexity: You may be running PC software, screen mirroring, or DIY capture instead of plug-and-play HDMI.
- App juggling: You might need to open a specific app on your phone or PC each time you start watching.
- DRM restrictions: Some streaming apps block screen capture, which breaks screen-grabber methods.
- Slightly more lag: Software-only solutions may be a touch slower than hardware that reads HDMI directly.
Check Your Current Setup: TV, Streaming Devices, and Smart Lights
Smart TV vs streaming stick vs PC/console: why it matters
The devices you use to watch content strongly influence your best sync method:
- Smart TV apps (Netflix, Disney+, etc. built into the TV): Hardest to sync via software because you can’t easily access the video signal. Phone camera-based or audio-reactive lighting is often the easiest workaround.
- Streaming sticks/boxes (Roku, Fire TV, Apple TV, Chromecast): Since they plug into HDMI, they’re great for hardware/HDMI-based solutions. For software-only approaches, you may need a PC in the mix (e.g., casting from PC).
- PC or gaming console connected to TV: Easiest way to get high-quality syncing. PC software can see everything on-screen, and games or local media players are usually not DRM-blocked.
Compatible smart lights and ecosystems (Hue, Govee, Wiz, Nanoleaf, LIFX, etc.)
Not every smart light system supports screen-sync effects equally well. Here’s a quick overview:
- Philips Hue: Very flexible, especially with a Hue Bridge. Works with official Hue Sync apps on PC, plus some third-party tools.
- Govee: Many Govee TV kits have built-in camera or HDMI solutions, plus mobile apps that can react to content.
- Wiz: Budget-friendly; supports dynamic scenes and simple music modes, but fewer advanced sync options.
- Nanoleaf: Great for decorative wall panels and light bars. Some apps allow screen mirroring from a PC or phone.
- LIFX: Bright, colorful bulbs with third-party tools for PC-based screen syncing.
Check your brand’s app to see if there’s a “Sync”, “Screen”, or “Music” mode before you start buying more hardware.
Wi‑Fi, Zigbee, and Matter: what you need to know before you start
The underlying protocol doesn’t change the basic sync concepts, but it does affect reliability:
- Wi‑Fi lights (Govee, Wiz, many Nanoleaf and LIFX devices) talk directly to your router. Make sure your Wi‑Fi is strong near the TV.
- Zigbee lights (Hue, some older ecosystems) use a hub/bridge. This can reduce latency and improve stability if the hub is centrally located.
- Matter & Thread devices are just starting to support more advanced effects. For now, stick with each brand’s native app for screen sync.
Whatever you use, a solid home network is as important as the lights themselves for responsive effects.
Method 1 – Use a PC or Laptop to Sync Smart Lights with Your TV
When the PC method is ideal (gaming, Plex, local media)
A PC or laptop is the most flexible way to sync smart lights with your TV, especially if you:
- Game on PC and use your TV as a big monitor.
- Watch downloaded or local content via Plex, VLC, or Kodi.
- Stream from services that block screen capture on phones but work fine on desktop.
If your PC is near the TV, this method is often the best balance of cost and quality.
Step-by-step: connect your PC to the TV (HDMI/DisplayPort)
To get started:
- Connect your PC or laptop to the TV using HDMI (or DisplayPort to HDMI adapter).
- Set the TV as your primary or secondary display in your computer’s display settings.
- Choose the correct input on your TV and confirm the picture looks right.
- If gaming, enable your TV’s game mode to minimize input lag.
Once your PC is driving the TV, any screen-sync software on the PC can accurately analyze the video.
Recommended software for light syncing (Hue Sync app alternatives, open-source tools)
Depending on your lights, consider:
- Philips Hue: The official Hue Sync desktop app (Windows/macOS) works without a Hue Sync Box if you have a Hue Bridge.
- Open-source tools (various brands): Projects like Hyperion, Prismatik, or ScreenBloom can capture the screen and send data to compatible lights (often Hue, LIFX, or DIY LED strips).
- LIFX and others: Look for community-made “screen sync” companion apps for Windows or macOS that support your brand.
Always download software from trusted sources and check active documentation or GitHub pages for compatibility.
Configure your lights, zones, and scenes for best effect
Most sync tools let you tell the software where your lights are relative to the TV:
- Assign light strips to the top, bottom, left, or right edges of the screen.
- Group bulbs or light bars behind the TV into a single “entertainment area” or zone.
- Set a maximum brightness so flashes don’t overwhelm the room.
- Choose between subtle, moderate, and intense effect modes.
Spend a few minutes mapping each light correctly. It’s the difference between “random color party” and “convincing ambient glow”.
Pros, cons, and performance tips for the PC-based method
Pros:
- Great color accuracy and responsiveness.
- Works with many light brands and DIY setups.
- Excellent for gamers and Plex/home media users.
Cons:
- Requires your PC to be on whenever you watch.
- More configuration than hardware boxes.
- Not ideal if you mostly use smart TV apps directly.
Performance tips: Use a wired Ethernet connection if possible, close heavy background apps, and keep your light hub or Wi‑Fi router away from other interference sources.
Method 2 – Use Mobile Apps That Mirror or Grab Your Screen
How phone camera/screen-grabber apps sync lights to TV content
Some mobile apps sync lights by either:
- Screen mirroring: The app reads what’s on your phone or tablet display (for example while casting or mirroring to the TV) and updates the lights accordingly.
- Camera capture: You point your phone camera at the TV; the app analyzes the image and sends matching colors to your lights.
This can work even with a plain smart TV, as long as the camera can see the screen or you’re streaming through the phone itself.
Example setups with Govee, Nanoleaf, and generic smart light apps
A few practical examples:
- Govee: Some Govee kits support “DreamView” or camera-based sync. The camera mounts on top or bottom of the TV and watches the screen while the Govee Home app controls the lights.
- Nanoleaf: On PC, the Nanoleaf Desktop app can mirror the screen to panels. On mobile, music/reactive modes can approximate TV sync when the microphone hears the TV audio.
- Generic Wi‑Fi bulbs: Third-party apps sometimes allow screen capture from your phone or tablet and then broadcast colors via local network to any supported bulbs.
Always check your light brand’s app store listing to see if screen or camera sync is supported.
Reducing delay and improving color accuracy with app settings
To get the best results from mobile-based syncing:
- Place the phone or camera directly facing the TV with minimal glare.
- Increase your TV’s brightness a bit so the camera can clearly read colors.
- Turn off overhead lights that might confuse the camera.
- In the app, lower effect “smoothness” or “transition” time if the lights feel sluggish.
- Reduce the number of zones if your phone struggles; fewer regions mean less processing.
When this approach works well—and when it’s frustrating
Camera and screen-grabber apps are great if you:
- Don’t want to run a PC all the time.
- Have a smart TV that you can’t easily connect to HDMI capture.
- Are okay with “good enough” sync for casual viewing.
They can be frustrating if your phone battery drains quickly, you need a tripod or awkward mount, or you watch in a bright room that confuses the camera.
Method 3 – Use Audio-Reactive Lighting for Movies and TV
Turn sound into color: music mode and microphone-based effects
Many smart light apps include a Music or Audio mode. Instead of reading the screen, the lights react to sound:
- Your phone’s microphone listens to the TV.
- Or a light strip/controller with a built-in mic reacts directly to audio.
The colors often follow volume spikes, bass hits, or specific frequency ranges. It’s less accurate than full video sync, but far easier to set up.
Best content types for audio-reactive lighting (concerts, action, games)
Audio-reactive lighting shines with:
- Concerts and music videos: The beat and lighting changes on stage match nicely with room lighting.
- Action movies: Explosions and loud sequences create dramatic pulses of light.
- Games: Especially racing or rhythm games, where sound is tightly linked to on-screen action.
For dialogue-heavy dramas, you may prefer a calmer preset scene or subtle bias lighting instead.
Tuning sensitivity so your room isn’t flashing nonstop
Most apps let you adjust sensitivity and effect style. To avoid a constant strobe:
- Lower sensitivity so only louder moments trigger big changes.
- Choose smoother modes rather than harsh strobe or pulse effects.
- Reduce maximum brightness for a more relaxed glow.
- Position the microphone closer to the TV speakers than to other noise sources in the room.
Budget-Friendly Hardware Alternatives to a Hue Sync Box
HDMI splitters, capture cards, and DIY Ambilight-style setups
If you’re comfortable with a bit of DIY, you can build an Ambilight-style system using:
- An HDMI splitter that sends one output to your TV and another to a USB capture card.
- A small PC, Raspberry Pi, or media box running software like Hyperion or similar tools.
- Addressable LED strips mounted behind the TV, or compatible smart lights controlled by the software.
The capture card sees the video signal, the software analyzes it, and then it drives the LEDs around your TV in real time.
Light strips vs light bars vs bulbs behind the TV
Regardless of method, you’ll usually choose one of these:
- Light strips: Great for outlining the back of the TV and giving even coverage. Ideal for most setups.
- Light bars: Stand behind or beside the TV, casting light onto the wall. Good if you can’t stick anything to the TV.
- Bulbs: Place in lamps behind the TV or in the corners of the room for a more indirect effect.
For tight budgets, a single light strip can do more than two or three separate bulbs.
Example low-cost build ideas and what they can (and can’t) do
A simple budget setup might be:
- One Wi‑Fi RGB light strip behind the TV.
- Phone app with camera-based or audio-reactive mode.
- Static warm bias lighting scene for everyday watching.
Or, a more advanced DIY build:
- HDMI splitter + basic capture card.
- Raspberry Pi running open-source Ambilight software.
- Addressable LED strip around the TV edges.
These won’t be as plug-and-play as a commercial kit, and some 4K HDR sources may be tricky, but they can deliver very immersive effects at a fraction of the price.
Recommended Configurations for Popular Smart Lighting Brands
Philips Hue without the official sync box (PC and mobile options)
Without a Hue Sync Box, you still have strong options:
- Use the Hue Sync desktop app on Windows/macOS with a PC or laptop connected to your TV.
- Create an Entertainment Area in the Hue app, grouping the light strip and bars around the TV.
- For mobile content, mirror your phone to the TV and use a third-party Hue screen-sync app if available in your region.
Philips’ own support pages explain the desktop app setup in detail; you can find instructions on the Hue Sync desktop support page.
Govee Immersion and related TV light kits
Govee offers several kits that avoid the need for a separate sync box:
- Govee Immersion TV backlight: Includes a camera that mounts to the TV and a light strip. The camera watches the screen and syncs colors via the Govee Home app.
- Some kits combine light bars and strips, all controlled together for a fuller effect.
These kits are relatively budget-friendly and give you a ready-made camera-based setup without extra capture cards or PCs. A good starting point is the Govee Immersion kit listed on the company’s product page, such as the one at Govee Immersion TV LED Backlights.
Wiz, Nanoleaf, and LIFX: getting basic TV sync effects
For other brands:
- Wiz: Use dynamic scenes or music-reactive mode. Place a microphone-equipped device near the TV for better responsiveness.
- Nanoleaf: Use the Nanoleaf Desktop app (for panels and light bars) to mirror PC content, or mobile music modes for audio-reactive lighting.
- LIFX: Look for third-party apps that support screen capture on PC, or use LIFX’s own effects and music visualization for simpler setups.
You might not get frame-accurate sync, but you can still create a strong sense of ambiance that follows what you’re watching.
Step-by-Step Setup: From Unboxing to First Movie Night
Positioning and mounting lights behind and around the TV
Regardless of brand, follow these steps:
- Clean the back of the TV or the wall so adhesive strips stick well.
- Mount light strips around the edges, about 2–4 cm in from the edge for even glow.
- Place light bars at the left and right of the TV, slightly behind or angled toward the wall.
- Aim to avoid hotspots—light should bounce off the wall, not shine directly into your eyes.
Creating a “Movie Night” automation or scene
Once lights are in place:
- Create a scene called “Movie Night” with your preferred brightness (often 20–40%) and a neutral or slightly warm color temperature.
- In your smart home platform (Hue app, Google Home, Alexa, HomeKit, etc.), link this scene to a voice command like “Movie time”.
- If your system supports routines, have the scene also dim ceiling lights and turn off any bright lamps.
Then, when you’re ready to sync, you just activate the scene and start your chosen sync method (PC app, mobile app, or audio mode).
Testing with trailers and demo videos to fine-tune colors
Before a full movie night, test and tweak:
- Search YouTube for “HDR demo” or “4K nature trailer” to get colorful content.
- Watch for lag—if lights are obviously late, reduce effect smoothing or quality in your sync app.
- Adjust brightness and saturation until the TV remains the star, not the lights.
- Save your final settings as a preset in your sync software for future use.
Performance and Troubleshooting Tips
Fixing lag and out-of-sync colors
If the lights feel behind or inaccurate:
- Reduce the number of zones or lower the resolution in the sync app.
- Make sure your PC or phone isn’t overloaded with other tasks.
- Move your Wi‑Fi router or hub closer, or switch to Ethernet where possible.
- Turn off VPNs or bandwidth-heavy downloads while watching.
What to do when apps disconnect or lights stop responding
For flaky connections:
- Check that all devices (phone, PC, lights) are on the same Wi‑Fi network.
- Restart your light hub/bridge and router.
- Update firmware on your lights and the app itself.
- If a specific bulb keeps dropping, try moving it closer to the hub or router, or add a repeater device if your ecosystem supports it.
Dealing with DRM and streaming app limitations
Some mobile apps can’t capture content from services like Netflix or Disney+ due to DRM. To work around this:
- Use a PC browser or desktop app with a screen-sync tool.
- Switch to camera-based or audio-reactive sync on your phone instead of screen capture.
- Consider a DIY HDMI capture setup if you want pure video-based syncing from streaming sticks or consoles.
Safety, Power, and Cable Management
Avoiding overloaded outlets and unsafe power strips
Sync setups can add a lot of plugs: TV, soundbar, console, lights, hubs. To keep things safe:
- Use a quality surge protector with enough capacity for your gear.
- Avoid daisy-chaining cheap power strips.
- Check the total wattage of your lights and devices against the strip’s rating.
Using smart plugs and cable channels for a clean setup
Smart plugs and basic cable management can make the area behind your TV much neater:
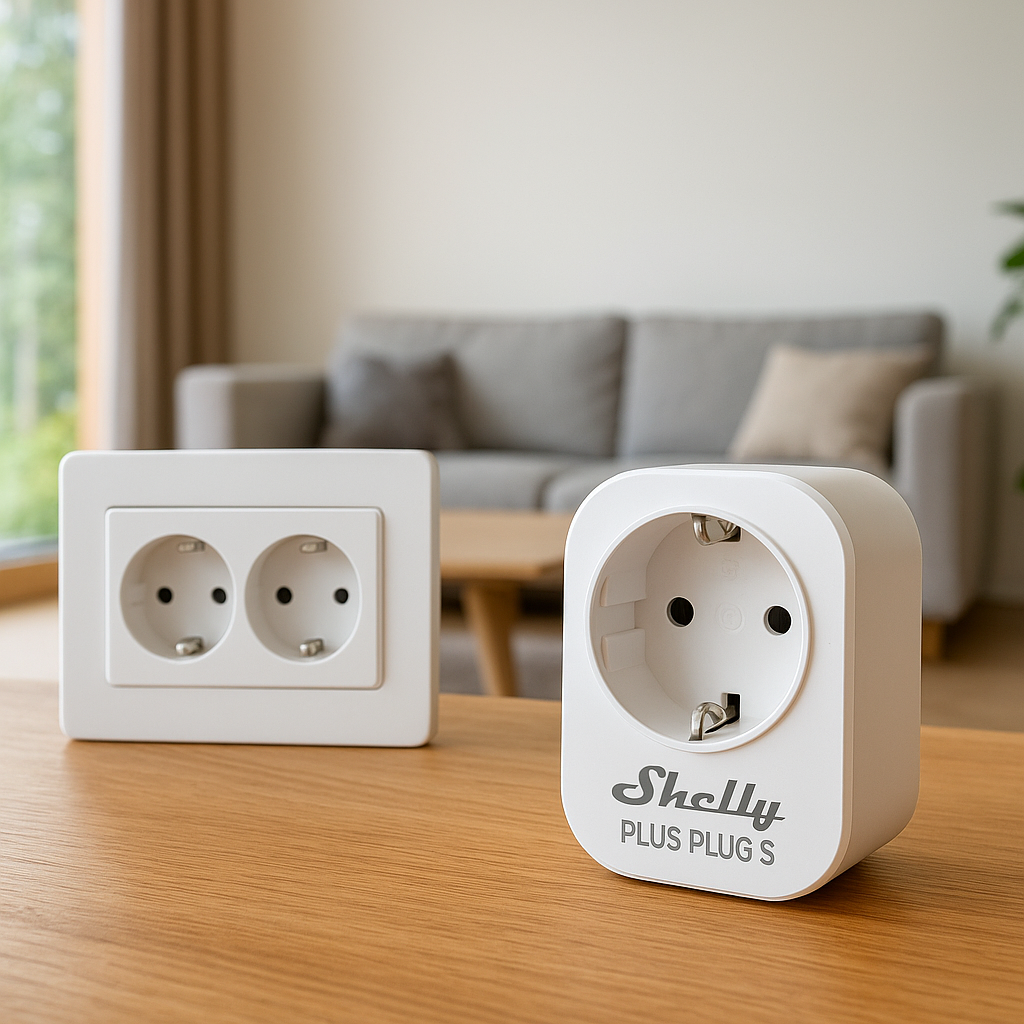
- Plug non-smart lights into a smart plug so they can join your “Movie Night” scene.
- Use adhesive cable clips or channels to route power cords along the back of furniture or walls.
- Label power bricks for quick troubleshooting later.
Heat, ventilation, and safe mounting behind the TV
LED strips don’t get very hot, but you should still:
- Avoid covering TV ventilation openings with strips or tape.
- Leave a small gap around vents and inputs.
- Use the included mounting hardware or appropriately rated tape—no improvised solutions near hot components.
Automations: Make TV Sync Lighting Hands-Free
Turn on bias lighting automatically when the TV powers on
Some smart plugs and TVs support power or status detection:
- Use a smart plug for the TV or for the backlight and create an automation: when power draw increases (TV on), turn on bias lighting.
- If your TV integrates with your smart home (e.g., via Alexa or Google Home), trigger a scene when the TV switches to a specific input.
Link lighting scenes to streaming devices or voice commands
For smoother movie nights:
- Create routines such as “When I say ‘Alexa, movie time’, set lights to Movie Night scene and turn on Fire TV.”
- On Chromecast or Apple TV, pair automations with your smartphone assistant to dim lights when you start playback.
- Use widgets or quick actions in your lighting app to start sync modes with one tap.
Quiet hours and dimming rules for late-night watching
To avoid disturbing others or your own sleep:
- Set time-based rules that lower brightness and reduce color changes after a certain hour.
- Switch to warmer colors at night to reduce blue light exposure.
- Create a “Late Night” variant of your Movie Night scene with gentle, mostly static lighting.
When You Might Actually Want a Dedicated Sync Box
Signs your DIY setup isn’t cutting it
You might eventually decide a dedicated box is worth it if:
- You’re constantly troubleshooting lag or disconnects.
- Family members avoid using the effects because they’re too fiddly.
- You want consistent syncing from every HDMI source, including consoles and streaming sticks, without a PC.
Cost comparison: DIY vs Hue Sync Box and other kits
Roughly speaking:
- DIY/PC-based: Can be very cheap if you already own a PC and lights; you might just need a strip and some software.
- Camera-based kits: Mid-range pricing, but mostly plug-and-play for a single TV.
- Dedicated sync boxes: Higher initial cost, but offer a polished experience and fewer compatibility headaches.
If you value your time and want something that “just works” from any HDMI device, the extra cost may be worth it.
How to upgrade later without redoing your entire setup
Plan ahead so upgrading is painless:
- Stick to popular ecosystems (Hue, Govee, Nanoleaf, LIFX) with proven TV solutions.
- Mount strips and bars in ways that make them easy to reuse with new controllers or boxes.
- Keep your scenes and automations organized; you can often reassign them to new devices with minimal changes.
Summary: Best Ways to Sync Smart Lights with Your TV on a Budget
Quick recommendations by device type (smart TV, PC, streaming stick)
If you want to sync smart lights with TV content without a Philips Hue Sync Box:
- Smart TV only: Use camera-based or audio-reactive mobile apps and a simple light strip behind the TV.
- PC + TV: Run screen-sync software (Hue Sync or open-source tools) and connect the PC via HDMI. This gives the best overall results.
- Streaming stick/console: Consider a camera-based kit like Govee Immersion or a DIY HDMI capture setup if you’re comfortable tinkering.
Choosing the right method for your room and viewing habits
Think about what you actually watch and how much setup you’re willing to manage:
- If you mostly binge series and don’t want to fuss, bias lighting plus occasional audio-reactive effects may be plenty.
- If you’re a gamer or home theater enthusiast, a PC-based or DIY capture solution will reward the extra effort.
- If family simplicity is key, a camera-based kit or eventual upgrade to a dedicated sync box might be the best long-term path.
Start simple with a single strip and basic effects. You can always add more lights, automations, and hardware over time as you refine your dream movie-night setup.
Conclusion
Creating immersive, synced lighting around your TV doesn’t have to be expensive or complicated. By combining the gear you already own—PCs, phones, and smart lights—with a bit of thoughtful setup, you can build a system that looks great, feels comfortable on the eyes, and fits your budget. Experiment with the methods that make the most sense for your living room, then refine your scenes and automations until movie night is as simple as pressing play.
FAQ
Do I need the same brand of smart lights throughout the room for TV sync?
No, but it’s simpler. Using one ecosystem (all Hue, all Govee, etc.) means one app controls everything, and sync tools usually expect one brand’s API. Mixed brands can work, but you might need multiple apps or more advanced software on a PC or hub.
Will syncing lights with my TV cause input lag for gaming?
Screen-sync software runs separately from the video output, so it usually doesn’t add lag to the game itself. What you may notice is a slight delay in the lights reacting, especially with mobile or Wi‑Fi-based systems. Enabling your TV’s game mode helps keep gameplay responsive.
Can I sync smart lights with built-in TV apps like Netflix without extra hardware?
Directly, not usually. Smart TVs don’t expose their video feeds to external apps. You can still use camera-based or audio-reactive mobile apps pointed at the screen, or use a PC or streaming stick where screen capture or HDMI capture is possible.
Is audio-reactive lighting good enough, or do I really need video sync?
For many people, audio-reactive lighting is enough to create a fun, immersive atmosphere, especially for music and action-heavy content. Video sync is more precise and impressive, but it also requires more setup. Try audio modes first; you can always upgrade later.
Will smart light syncing affect my TV’s warranty or safety?
Using light strips and bars behind your TV won’t affect the TV’s electronics as long as you avoid covering vents and use proper mounting and power strips. You’re not modifying the TV itself, just adding lighting around it, so standard TV warranties are typically unaffected.