Great automations start with great sensor placement. You can buy the best motion, presence, contact, or leak sensors on the market, but if they’re in the wrong spot, you’ll get missed triggers, random lights turning on, and alerts you stop trusting.
This smart sensor placement guide walks room by room through where to put the most common sensors, how high to mount them, and what to avoid. The goal: fewer blind spots, fewer false alarms, and automations that feel natural instead of annoying.
Why Smart Sensor Placement Matters More Than You Think
How sensor placement affects reliability and false alarms
Sensors don’t “see” the way people do. A motion sensor might detect movement across its field of view very well but barely notice motion straight toward it. A presence sensor may track micro-movements accurately but struggle if it’s pointing at a fan or curtains. Where you place each sensor directly affects:
- Reliability: Will it trigger every time you walk in, sit down, or open a door?
- Latency: How quickly do lights turn on or alerts fire?
- False alarms: Does it react to your pets, TV, or street traffic?
- Coverage: Are there dead zones where motion or leaks go undetected?
Good placement makes your smart home feel responsive and predictable. Poor placement forces you to add delays, workarounds, and manual overrides.
Common coverage mistakes in DIY smart homes
Several mistakes show up again and again in DIY installations:
- Pointing motion sensors at windows, causing triggers from sunlight changes, tree shadows, or passing cars.
- Mounting too high or too low, so the sensor only catches part of the room or misses typical walking paths.
- Placing leak sensors in the wrong “direction”, so water can flow past them without touching the probes.
- Putting sensors behind decor, like curtains, plants, or TV cabinets, where detection is blocked.
- Ignoring pets, leading to motion alerts and lights turning on all night.
Most of these can be fixed just by rethinking sight lines and where problems are most likely to start.
Matching sensor types to real-world use cases
Every sensor has strengths. You’ll get better results if you choose sensors by job, not just by what’s on sale:
- Motion sensors: Quick triggers when someone walks into an area. Great for hallways, staircases, and bathrooms.
- Presence sensors (e.g., mmWave like Aqara FP2): Detect people sitting still. Ideal for living rooms, offices, and bedrooms.
- Contact sensors: Know when doors, windows, gates, or cabinets are opened or closed.
- Leak sensors: Detect water where it should never be: under sinks, by water heaters, near washing machines.
Plan the use case first (e.g., “automate night lights in the hallway” or “catch fridge leaks early”), then pick the sensor and placement to match.
Understanding Different Smart Sensor Types (Motion, Presence, Contact, Leak, and More)
Motion vs. presence sensors: what’s the difference and when to use each
Motion sensors (often PIR sensors like the Philips Hue Motion Sensor or Aeotec Multisensor) detect movement across their field of view. They’re fast and energy-efficient, but they usually stop reporting once you sit still.
Presence sensors, especially mmWave-based models such as the Aqara FP2, are designed to notice micro-movements like breathing and typing. They can reliably keep lights on when you’re working at a desk or watching a movie.
- Use motion in transition spaces: hallways, stairwells, entryways, bathrooms.
- Use presence where people are mostly stationary: offices, living rooms, bedrooms.
- Combine both in tricky rooms: motion to turn lights on, presence to keep them on.
Contact sensors for doors, windows, cabinets, and gates
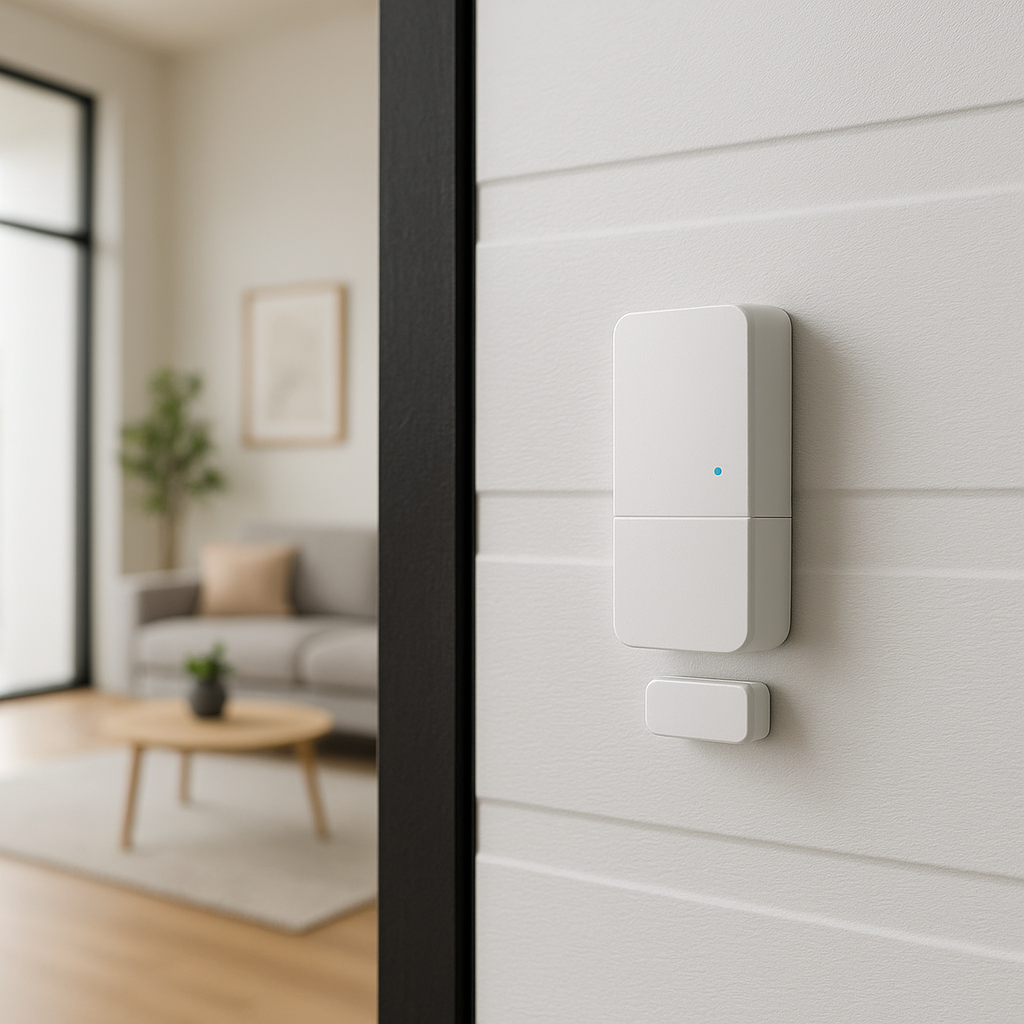
Contact sensors use a magnet and a switch to tell if something is open or closed. They’re simple but extremely flexible:
- Exterior doors: Arm alarms, lock doors at night, and trigger welcome lighting.
- Windows: Alert when left open or opened while you’re away.
- Cabinets and drawers: Child safety, medicine cabinets, cleaning supplies, or tool storage.
- Gates and garage doors: Confirm they’re closed without visually checking.
Many popular models (e.g., Aqara Door and Window Sensor, Sonoff SNZB-04) are tiny and can be stuck on with adhesive for rental-friendly installs.
Leak and flood sensors for pipes, appliances, and basements
Leak sensors sit on the floor and detect water bridging two or more metal contacts. They’re crucial in places where a slow leak can go unnoticed for months, such as behind a washing machine or under a sink.
Good examples include the Shelly Flood, Aqara Water Leak Sensor, or the Fibaro Flood Sensor. Many can also monitor temperature, which helps detect frozen pipes.
Complementary sensors: temperature, humidity, vibration, and occupancy
Beyond the basics, a few extra sensor types can level up your automations:
- Temperature sensors: Improve thermostat control, protect wine storage, or keep server closets cool.
- Humidity sensors: Run bathroom exhaust fans, control dehumidifiers, or protect instruments.
- Vibration or tilt sensors: Detect garage doors moving, mailboxes being opened, or appliances finishing a cycle.
- Occupancy/combined sensors: Devices like the Aeotec Multisensor or Aqara FP2 bundle multiple measures into one device.
These often don’t need perfect placement, but positioning them thoughtfully can still improve accuracy and response times.
General Best Practices for Smart Sensor Placement
Ideal sensor mounting height and orientation
Height matters more than most people realize:
- Motion sensors: Typically 6–8 ft (1.8–2.4 m) high, angled slightly downward, covering the main walking paths. Check your device’s datasheet for the ideal height.
- Presence sensors: Mount at about chest to head height, facing the seating or working area, not the floor.
- Contact sensors: Align magnet and sensor so the manufacturer’s mark lines up; mount on the moving part (door) and frame (fixed side).
- Leak sensors: Flat on the floor, with probes touching where water will naturally pool.
For motion and presence sensors, try to have people walk across their field of view, not directly toward or away from them.
Avoiding heat sources, reflective surfaces, and moving objects
PIR motion sensors detect changes in infrared radiation. Heat sources or reflective surfaces can confuse them:
- Avoid pointing at radiators, heating vents, ovens, and sunny windows.
- Keep them away from mirrors and glass surfaces that can reflect movement or sunlight.
- Don’t point them directly at fans, curtains, or hanging plants that move frequently.
Presence sensors can also misbehave if they face moving objects such as ceiling fans or waving curtains, so angle them toward seating and work areas instead.
Minimizing Wi‑Fi and Zigbee/Z-Wave interference
Most smart sensors use low-power radios (Zigbee, Z-Wave, Thread, or Wi‑Fi). Placement near metal or dense materials can hurt signal quality:
- Avoid mounting sensors directly behind metal appliances or inside dense cabinets.
- For Zigbee/Z-Wave, use a few mains-powered devices (plugs or switches) as repeaters to strengthen the mesh.
- Keep Wi‑Fi-based sensors away from microwaves and thick concrete walls when possible.
For a deeper overview of how these radios work, see the IEEE 802.15.4 standard used by Zigbee, which explains range and interference characteristics at a technical level.
Battery life tips based on placement and sensitivity settings
Battery-powered sensors live longer when they don’t fire constantly:
- Avoid placing motion sensors where pets constantly pass; use pet-immune models or angle them above pet level.
- Lower sensitivity or increase motion retrigger time in high-traffic areas.
- Keep sensors within good radio range; devices that struggle to reach the hub drain batteries faster.
- In cold areas (garages, attics), choose sensors rated for low temperatures and expect somewhat shorter battery life.
Entryway and Hallway Sensor Placement
Where to put motion and presence sensors for reliable arrival detection
For entryways, you want lights and automations to trigger as you step inside, not after you’ve already walked through.
- Mount a motion sensor on the side wall of the hallway, 6–7 ft high, aimed across the doorway path.
- If your door opens inward, place the sensor so the door doesn’t block its view when open.
- In wider entryways, combine a motion sensor near the door with a presence sensor aimed at a bench or coat area.
Some homeowners place a second motion sensor at the far end of a long hallway so lights stay on as you move through.
Using contact sensors on main doors, side doors, and internal doors
Contact sensors are essential on doors you care about for security and energy use:
- Front and back doors: Automate welcome lights, lock checks at night, or security alerts.
- Side or garage entry doors: Trigger garage lighting and status notifications.
- Internal doors: Track basement or attic doors, or create “door opened” triggers for specific scenes.
Mount the sensor body on the frame and the magnet on the door edge, ensuring gaps stay within the manufacturer’s recommended distance.
Creating lighting automations that follow you through hallways
Hallways are ideal for chained automations:
- Use multiple motion sensors along a long corridor, each turning lights on and extending the off timer.
- At night, switch to a dimmed scene or nightlight mode with warm, low brightness.
- For stairs, mount a motion sensor at the top and bottom, or use LED strip lights triggered by motion.
This creates a smooth “lights follow you” effect as you move from room to room.
Living Room and Common Area Sensor Placement
Motion vs. presence sensors in rooms where people sit still
Living rooms and family rooms are where traditional motion sensors struggle. People sit still for long stretches, leading to lights turning off at the worst time.
- Mount a presence sensor facing the sofa and main seating area.
- Use a motion sensor near the room entrance to turn lights on quickly.
- Configure your automations so motion turns lights on, but presence keeps them on.
Avoiding TV, windows, and heat vents to reduce motion sensor false triggers
Placement mistakes in living rooms often lead to random triggers:
- Do not point motion sensors directly at TV screens; changing light levels can cause triggers.
- Avoid aiming at large windows; passing cars, trees, or sun patterns can cause false motion.
- Keep away from fireplaces and vents, which create moving hot air.
Instead, position sensors to look across the room, along inner walls, and focused on doorways and walking routes.
Using contact sensors on patio doors, balcony doors, and windows
Living areas often connect to balconies, patios, or decks:
- Add contact sensors to sliding doors to trigger pathway lighting outdoors.
- Use sensors on balcony doors for safety and to remind you if they’re left open with HVAC running.
- On ground-level windows, contact sensors can supplement security systems.
Integrating sensors with smart lighting and media scenes
Once sensors are well placed, you can build layered scenes:
- Motion or presence triggers general lighting when someone enters.
- A “movie mode” scene dims lights and biases them away from the TV when presence is detected and your TV turns on.
- Late at night, motion sets low-level path lighting instead of full brightness.
Platforms like Home Assistant or Apple Home can use combined sensor states (presence + time + device status) to refine these behaviors.
Kitchen Sensor Placement
Motion sensors for task lighting at counters and islands
Kitchens benefit from fast, reliable lighting where you work:
- Mount motion sensors under cabinets or on walls near counter work areas and islands.
- Aim them across your standing area so they trigger as you walk up and move around.
- Use short timeouts (1–3 minutes) so lights don’t stay on unnecessarily when you leave.
Contact sensors for fridge, pantry, and cabinet automations
Contact sensors in kitchens enable handy automations:
- Pantry doors: Turn on pantry lights when opened, off when closed.
- Under-sink cabinets: Combine with a leak sensor for a “water + door open” alert.
- Fridge or freezer doors: Alert if left open beyond a few minutes.
Leak sensors near sink, dishwasher, and refrigerator water lines
Kitchens are high-risk leak areas. Place leak sensors:
- Under the kitchen sink, near plumbing joints.
- Behind or under the dishwasher, close to the front where water will escape first.
- Behind the fridge near the water line; if the floor slopes, place the sensor where water will pool.
Protecting sensors from steam, grease, and temperature swings
Kitchen environments are harsh on electronics:
- Don’t mount motion or presence sensors directly above the stove or near kettles, where steam rises.
- Keep sensors away from areas where grease splatters; use easy-to-clean housings or indirect placements.
- Choose sensors rated for higher humidity and temperature variations.
Bedroom and Nursery Sensor Placement
Where to place presence sensors for gentle wake-up automations
In bedrooms, you typically want subtle, low-light automations:
- Mount a presence sensor on a wall or ceiling facing the bed, but not directly above your face.
- Use it to trigger gradual wake-up lighting when combined with your alarm time.
- Pair with a motion sensor near the door for quick-on lights when you enter.
Using door contact sensors for night lights and child safety
Door sensors in bedrooms and nurseries are great for gentle safety automations:
- Turn on dim hallway or bathroom lights when a bedroom door opens at night.
- Alert parents if a nursery door opens during certain hours.
- For younger children, use contact sensors on closets or windows to detect unexpected openings.
Motion sensors for closet lights and ensuite bathrooms
Small, frequently used spaces benefit from automatic lighting:
- Install compact motion sensors inside closets pointing downward at the doorway.
- In ensuite bathrooms, mount a motion sensor near the entrance to trigger gentle lighting at night.
- Use different brightness levels based on time of day to avoid harsh light at 3 a.m.
Privacy considerations and what not to monitor
Bedrooms and nurseries are sensitive spaces. Avoid:
- Cameras where privacy is expected; favor motion/presence-only devices.
- Overly granular tracking that might feel invasive, such as logging every movement overnight.
- Sharing sensor data widely; keep these automations local or tightly permissioned.
For families, set clear expectations about what’s monitored and why, and offer manual override options.
Bathroom and Laundry Room Sensor Placement
Steam-safe locations for motion and presence sensors
Bathrooms challenge sensors with steam and humidity:
- Mount motion or presence sensors outside direct steam paths, away from showers.
- Ceiling corners or high on walls opposite the shower work well.
- Choose sensors with good humidity ratings or sealed housings.
Leak sensor placement near tubs, showers, sinks, toilets, and washing machines
In bathrooms and laundry rooms, focus on where leaks start:
- Place leak sensors beside or behind toilets, near the water connection.
- Under or near sinks, especially if there’s a history of slow drips.
- Next to washing machines, at the lowest point where water would pool first.
- Near tubs and showers only if splashes won’t trigger constant false alarms.
Automating exhaust fans and lights based on occupancy and humidity
Humidity or combined sensors can automatically control fans:
- Use a humidity sensor to turn the exhaust fan on when humidity rises above a threshold and off once it drops.
- Motion or presence sensors can manage bathroom lights, with longer timeouts for showers and shorter for quick visits.
- Consider linking a humidity threshold (e.g., 60–65%) with motion to avoid the fan running endlessly.
Home Office Sensor Placement
Presence sensors for desks to prevent lights from turning off while you work
Offices are classic “I’m sitting still, don’t turn the lights off” spaces:
- Mount a presence sensor on a wall or shelf facing your desk at head height.
- Avoid placing it directly behind monitors, which can block detection.
- Use motion near the office entrance for quick-on lighting.
Door contact sensors for focus modes and notification control
Door sensors can double as a “do not disturb” input:
- When the office door closes, set your status to focus mode and silence non-urgent notifications.
- When it opens, restore normal notification settings.
- Use door status to pause or resume media or to log work sessions.
Temperature and air quality sensors for comfort and productivity
Comfort affects productivity. Temperature and air-quality sensors can:
- Trigger heating or cooling when the office temperature drifts out of your comfort range.
- Turn on an air purifier when particulate or VOC levels rise.
- Remind you to open a window if CO₂ levels climb during long work sessions.
Air quality and ventilation have been widely studied; if you’re interested in the health side, the U.S. EPA’s indoor air quality overview gives useful background.
Basement, Utility Room, and Garage Sensor Placement
Leak sensors near water heaters, boilers, and sump pumps
Basements and utility rooms are the front line against major water damage:
- Place leak sensors at the base of water heaters and boilers, where drips first appear.
- Near sump pumps to catch overflow or pump failure.
- By main water shutoff valves and filtration systems.
Motion sensors for stairways, storage areas, and parking zones
These areas are usually dark, so instant-on lighting improves safety:
- Mount motion sensors at the top and bottom of basement stairs.
- In garages, aim sensors toward the parking area and main walkway to the house.
- Use narrow-beam sensors for long aisles of shelves or storage.
Contact sensors on garage doors, external doors, and tool cabinets
Contact sensors in these spaces give quick peace of mind:
- Garage doors: Confirm whether they’re open or closed and automate closing at night.
- Exterior utility doors: Monitor rarely used side doors for security.
- Tool or chemical cabinets: Alert if opened, especially in homes with children.
Handling cold temperatures and dusty environments
Garages and basements can be cold, damp, and dusty:
- Choose sensors rated for low temperatures if your garage is unheated.
- Keep sensors off the floor where dust and debris collect; mount them higher on walls.
- Wipe sensors occasionally to prevent dust blocking motion or presence detection.
Outdoor and Perimeter Sensor Placement
Weather-resistant motion sensors for driveways and yards
Outdoors, always use sensors rated for exterior use:
- Mount motion sensors under eaves or awnings to protect from direct rain and snow.
- Aim across driveways or walkways, not at busy roads.
- Use adjustable brackets so you can fine-tune detection zones.
Contact sensors for gates, sheds, and outdoor storage
Outdoor contact sensors help secure your perimeter:
- On gates to know when they’re left open.
- On shed doors or storage boxes with tools or bikes.
- Use weatherproof housings or sensors specifically designed for outdoor conditions.
Avoiding nuisance triggers from cars, pets, and passing traffic
Outdoor motion sensors are notorious for false alerts:
- Angle sensors downward and away from streets and sidewalks.
- Use zones or masks (when available) to ignore areas where pets roam.
- Combine motion detection with time schedules (e.g., only alert overnight) to reduce noise.
Sensor Placement by Home Type: Apartments, Townhouses, and Single-Family Homes
Minimizing sensors in small spaces without losing coverage
In apartments and smaller homes, you can often cover a lot with just a few sensors:
- One centrally placed presence sensor can manage combined living/dining spaces.
- A single motion sensor can cover hallway + entry in many floor plans.
- Prioritize front door, balcony/patio, and any shared entrances for contact sensors.
Multi-level homes: prioritizing stairs, landings, and key choke points
In multi-level houses, think in layers:
- Put motion sensors at top and bottom of staircases and major landings.
- Use presence sensors in high-use rooms on each floor.
- Place leak sensors at every level where there’s water plumbing.
This way, movement between floors is always covered without overloading every room with devices.
Rental-friendly sensor placement strategies and non-permanent mounting
Renters often can’t drill holes or rewire:
- Use adhesive strips for contact sensors and lightweight motion sensors.
- Choose battery-powered devices that don’t need neutral wires.
- Place sensors on shelves or furniture when wall mounting isn’t allowed.
Patching a few small screw holes is usually easy, but if in doubt, stick to reversible mounting.
Reducing False Alarms and Blind Spots
Fine-tuning sensitivity, detection zones, and delays
After initial placement, use software settings to refine behavior:
- Lower motion sensitivity in high-traffic or pet areas.
- Use no-motion delays to prevent lights from toggling rapidly when someone pauses briefly.
- If your sensor supports it, configure zones to ignore irrelevant areas.
Testing coverage with simple walk tests and automation logs
Before mounting permanently, test:
- Temporarily tape or tack sensors in place.
- Walk typical paths, sit in usual spots, and see if your automations trigger on time.
- Check your smart home platform’s logs or history to confirm detection patterns.
When to add a second sensor vs. repositioning an existing one
If coverage isn’t right:
- Reposition first if you notice a clear blind spot or bad angle.
- Add a second sensor only when a single location cannot cover both entry and seating/usage areas.
- For large or oddly shaped rooms, it’s normal to need more than one sensor type (e.g., motion + presence).
Planning Sensor Placement for Future Automation
Mapping your home for current and future sensor locations
A simple floor plan sketch can save time and money later:
- Draw each room and mark doors, windows, water sources, and stairs.
- Note your current sensors and where you’d like future automations.
- Plan conduit or power outlets in renovation projects to support future wired sensors or hubs.
Grouping sensors by room and function in your smart home platform
Labeling makes complex setups manageable:
- Use consistent names like “Kitchen – Motion 1” or “Basement – Leak – Water Heater”.
- Group sensors by room and by type in your hub or app.
- Use tags or helpers (where supported) to target presence-based vs security-based automations.
Example automation ideas unlocked by better sensor placement
With thoughtful placement, new ideas become possible:
- Adaptive hallway lighting that changes color temperature based on time, triggered by motion.
- Water shutoff automations that close a valve when leak sensors trigger in multiple locations.
- Energy-saving scenes that reduce heating/cooling when presence sensors show no one is on a floor for a set period.
Installation Checklist and Room-by-Room Placement Summary
Quick checklist before mounting any sensor
- Confirm the sensor’s operating temperature and humidity range.
- Check the recommended mounting height and orientation.
- Test communication with your hub at the intended location.
- Temporarily mount and run walk tests or usage tests.
- Only then use screws or permanent adhesive.
Room-by-room recap for motion, presence, contact, and leak sensors
As a quick reference:
- Entry & hallways: Motion across walking paths; contact on main doors.
- Living room: Presence facing seating; motion at entrances; contact on patio/balcony doors.
- Kitchen: Motion over counters; contact on pantry/fridge; leak under sink, dishwasher, and fridge.
- Bedrooms: Presence toward bed; motion in closets/ensuites; contact on doors for night lights.
- Bathrooms & laundry: Motion away from steam; humidity near shower; leak by toilet, sink, washer.
- Office: Presence aimed at desk; door contact for focus; temp/air-quality near seating.
- Basement/garage: Leak near water equipment; motion for stairs and parking; contact on doors and storage.
- Outdoors: Weather-rated motion under eaves; contact on gates and sheds.
When to consider professional installation or consultation
If you’re planning a large renovation, whole-home security, or complex multi-sensor automations, a professional can:
- Design coverage to avoid blind spots and radio dead zones.
- Recommend wired vs. wireless options for long-term reliability.
- Help integrate sensors with existing security or HVAC systems.
For most homeowners, though, following this placement guide and doing a bit of testing is enough to build a reliable, responsive sensor network.
Conclusion
Thoughtful sensor placement is the difference between a smart home that quietly does the right thing and one that constantly needs fixing. By matching each sensor type to the job, mounting them at the right height and angle, and tuning them room by room, you’ll cut false alarms, reveal blind spots, and unlock more useful automations over time.
Start with your most-used spaces—entryway, kitchen, living room, and bedroom—then expand to bathrooms, basements, and outdoors. As you live with your setup, adjust positions and settings instead of just adding more hardware. A small number of well-placed sensors will usually outperform a house full of poorly positioned ones.
FAQ
Do I need both motion and presence sensors in every room?
No. Use motion in transition spaces like halls, staircases, and bathrooms. Add presence sensors in rooms where you sit or stand still for long periods, such as living rooms, offices, and bedrooms. Some rooms benefit from both, but many work fine with just one type.
How high should I mount motion sensors?
Most ceiling or wall-mounted motion sensors work best between 6–8 ft (1.8–2.4 m) high, angled slightly downward and across the main walking path. Always check the manufacturer’s recommended height and detection diagram for the specific model you’re using.
Where should leak sensors go for maximum protection?
Place leak sensors where water will first appear, not just where it ends up. Typical spots are under sinks, at the base of water heaters and boilers, behind washing machines and dishwashers, near refrigerator water lines, and around sump pumps or main shutoff valves.
Will pets trigger my motion sensors?
They can. To reduce pet triggers, mount sensors higher and angle them so they look above pet level, use pet-immune models, reduce sensitivity, or mask lower parts of the lens if the design allows it. Testing with your actual pets is the only way to be sure.
How many sensors does an average home need?
It depends on size and goals, but many homes start effectively with 4–8 motion/presence sensors, 4–10 contact sensors (doors and key windows), and 3–6 leak sensors near water sources. You can always add more later as you discover new automation ideas.