Pairing a smart thermostat with a whole-home energy monitor is one of the most effective ways to tame a rising electric bill. One device controls your biggest energy user: heating and cooling. The other shows you, in real time, exactly where your power is going.
If you’ve ever wondered why your bill is high even though you “don’t use that much,” this combo gives you hard data and tools to act on it. You’re not just guessing at savings—you can see the impact of every change you make.
This guide walks through how to reduce your electric bill with a smart thermostat and energy monitor working together. You’ll learn what to buy, how to install it safely, which settings matter, and how to build simple automations that keep saving you money month after month.
Why Pairing a Smart Thermostat with an Energy Monitor Cuts Your Electric Bill
What each device does: smart thermostat vs. energy monitor, in plain language
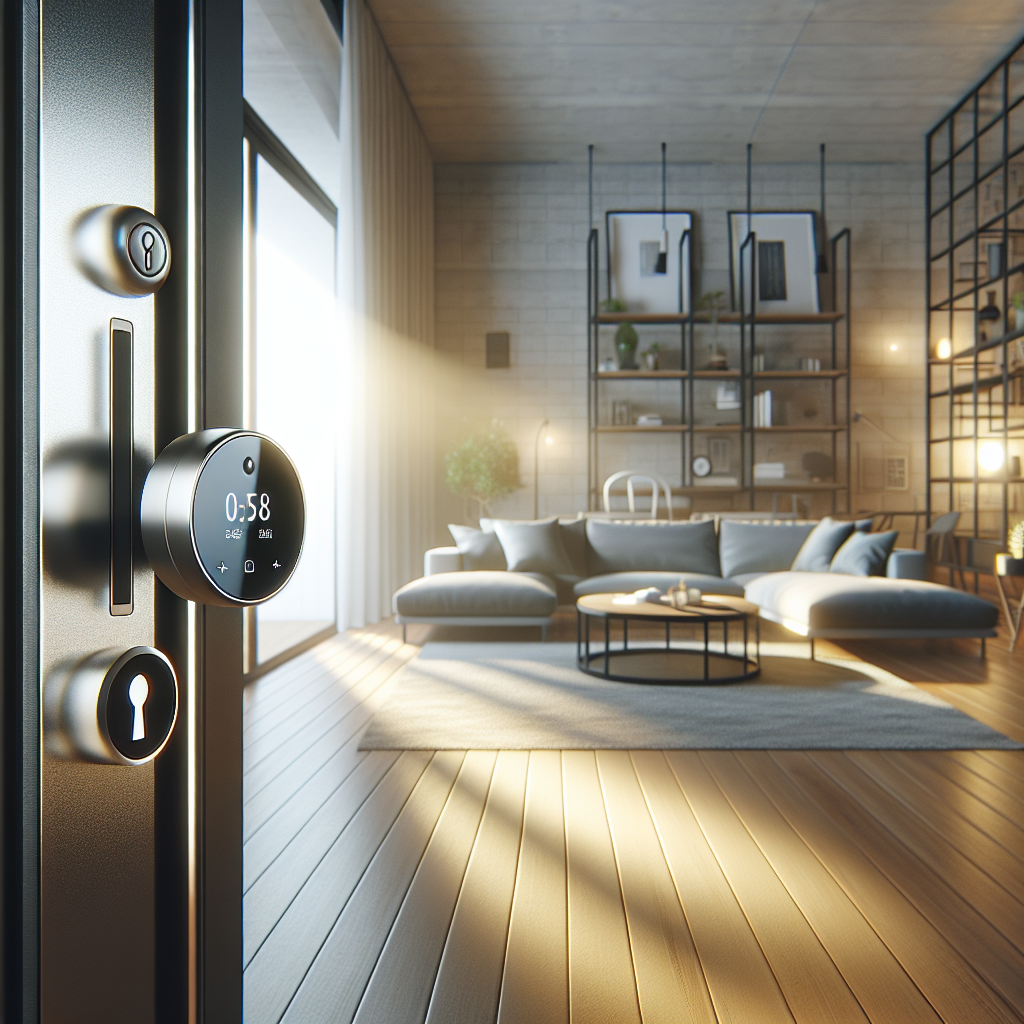
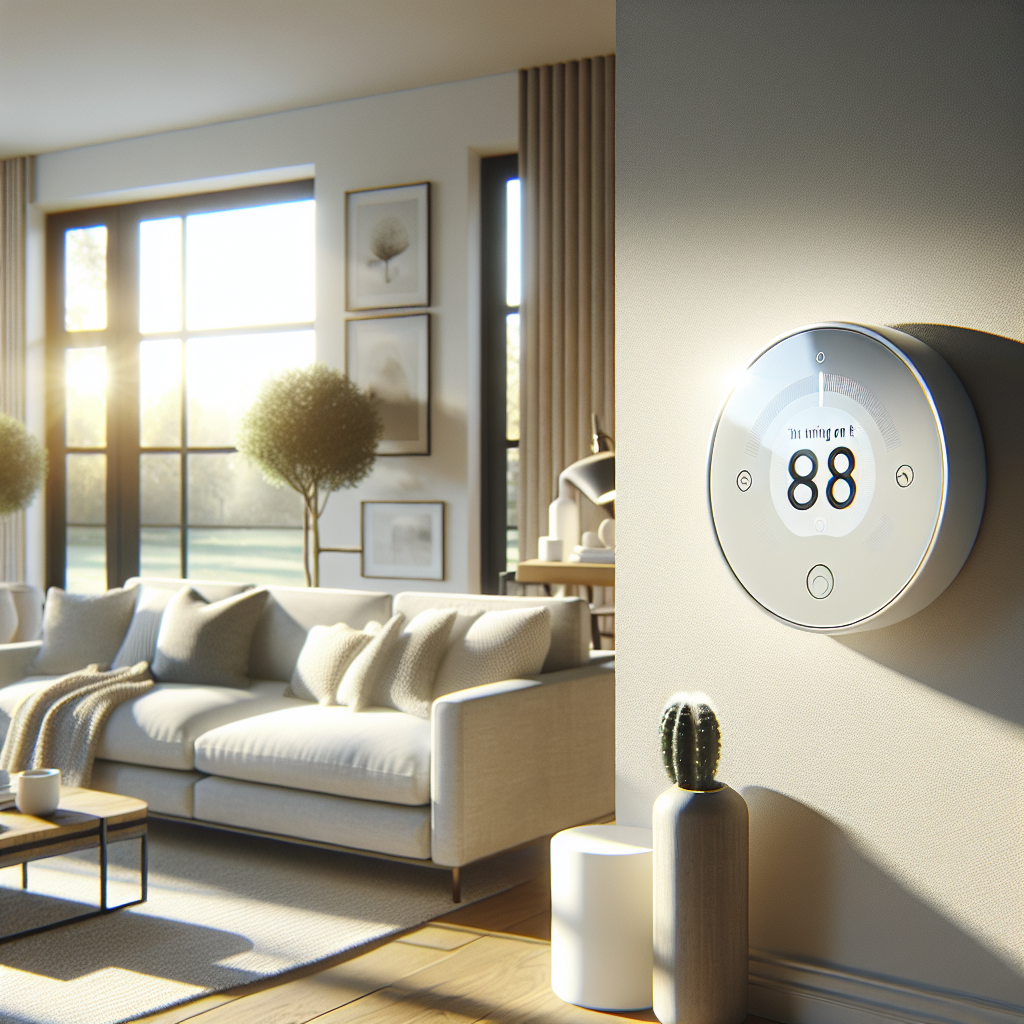
A smart thermostat replaces your old wall thermostat. It connects to Wi‑Fi so you can control heating and cooling from your phone, set flexible schedules, and use features like learning and occupancy detection. Common examples include Google Nest Thermostat, Ecobee Smart Thermostat, and Honeywell Home T9.
A whole‑home energy monitor connects inside your electrical panel and measures how much electricity your home is using every second. It sends that data to an app so you can see:
- Current power usage (e.g., 4.2 kW right now)
- Daily and monthly kWh usage
- Which circuits or appliances are using the most energy (depending on model)
Popular options include Sense, Emporia Vue, and tech‑forward utility monitors like Span. While the smart thermostat controls your HVAC, the energy monitor shows you the full picture of everything drawing power.
How they work together to reveal hidden waste and optimize heating and cooling
On its own, a smart thermostat can lower your bill by running your HVAC more efficiently. On its own, an energy monitor can show you where energy is going. When you pair them, you get a feedback loop:
- You adjust thermostat schedules or temperature setpoints.
- The energy monitor immediately shows how your whole‑home usage changes.
- You spot wasteful behavior—for example, AC running while windows are open or heat running far into the night.
- You refine your settings or add automations based on real data.
For example, you might notice big usage spikes every weekday at 5 p.m. when your AC kicks on during peak rates. You can then create a smarter pre‑cooling schedule or an automation that raises the setpoint slightly during peak hours to flatten those spikes.
Typical percentage savings homeowners can expect on electric bills
Actual savings depend on your climate, electric rates, and how your home is insulated, but most homeowners see meaningful reductions when they combine these tools thoughtfully.
- Smart thermostat alone: Many manufacturers report 10–15% savings on heating and cooling costs when scheduled and used properly.
- Whole‑home energy monitor alone: Simply seeing your real‑time usage often drives 5–10% savings as you fix obvious waste and phantom loads.
- Together: It’s realistic to aim for 15–25% savings on the electric portion of your bill related to HVAC and other big loads over time, especially in homes with electric heating or central air.
The key is not just installing the devices, but using the data and features consistently—something this guide will help you do.
Choosing the Right Smart Thermostat and Energy Monitor for Your Home
Compatibility checklist: HVAC types, wiring, smart meter, and Wi‑Fi
Before you buy anything, confirm compatibility. A quick checklist:
- HVAC type: Most smart thermostats support single‑stage gas furnaces, heat pumps, and central AC. If you have high‑voltage baseboard heaters or a multi‑zone mini‑split system, you’ll need specialized models or adapters. Check the brand’s online compatibility tool.
- Thermostat wiring: Remove your old thermostat cover and take a photo. Look for a C‑wire (common wire). Many modern thermostats need this for power. If you don’t have one, some models (like Google Nest) can work without it, or they include a power adapter.
- Electrical panel space: Energy monitors require access to your main service wires and enough room in the panel for current clamps. Panels that are extremely crowded may be tricky.
- Smart meter/utility rules: Clamp‑on monitors go inside your panel, not on the utility side of the meter, which is usually off‑limits. Always stay on the homeowner side of the installation.
- Wi‑Fi and phone: Both devices rely on a stable 2.4 GHz Wi‑Fi network and a compatible iOS or Android app.
Features that matter for savings: scheduling, learning, occupancy sensing, reports
Almost every smart thermostat can be controlled from your phone, but a few features have the biggest impact on savings:
- Flexible scheduling: Look for easy weekday/weekend and per‑day schedules that support multiple time blocks.
- Learning behavior: Devices like Nest can learn your schedule and preferred temperatures, then automatically create efficient programs.
- Occupancy sensing: Ecobee, for example, bundles occupancy sensors that detect if rooms are in use and adjust HVAC accordingly.
- Eco/away modes: Dedicated energy‑saving modes that automatically relax setpoints when you’re not home.
- Usage reports: Monthly and daily breakdowns of HVAC runtime and energy estimates, so you can see trends.
On the energy monitor side, prioritize:
- Circuit‑level monitoring (Emporia Vue with circuit modules, for example) if you want to see usage by breaker.
- Device recognition (like Sense) if you prefer the system to identify appliances automatically.
- Integrations with platforms like Home Assistant, Alexa, or Google Home if you want to trigger automations based on real‑time power data.
Energy monitor options: clamp‑on, breaker‑level, and smart plug‑based monitoring
There are three common approaches to monitoring energy use:
- Clamp‑on whole‑home monitors: Devices like Sense and Emporia Vue use current transformers (CT clamps) around your main service wires. They give you real‑time total usage and, depending on the model, circuit‑level detail.
- Breaker‑level monitors: Some systems add CTs on individual breakers (e.g., large loads like HVAC, EV charger, water heater). This helps you see exactly what each big circuit costs to run.
- Smart plug‑based monitoring: Smart plugs with energy monitoring (like TP‑Link Kasa HS300 or Emporia smart plugs) show usage for specific appliances, such as window AC units, dehumidifiers, or entertainment centers. These are great supplements to a whole‑home monitor, not replacements.
For most homeowners who want to reduce their electric bill with a smart thermostat and energy monitor, a clamp‑on whole‑home monitor with optional circuit sensors offers the best mix of detail and value.
Step‑by‑Step Setup: Installing Your Smart Thermostat and Energy Monitor
Pre‑install prep: photos of wiring, breaker labeling, and safety basics
Before you touch anything, do a bit of preparation:
- Take photos: Remove the existing thermostat faceplate and photograph the wiring and labels. Do the same for the inside of your electrical panel and main breakers with the cover removed (if you’re comfortable removing it).
- Label breakers: If your breaker panel labels are incomplete, update them. This makes it much easier to match circuits to energy monitor channels later.
- Safety first: For any work inside the electrical panel, turning off the main breaker is strongly recommended—and hiring a licensed electrician is even better if you’re unsure.
Installing the smart thermostat (or when to hire a pro)
Most handy homeowners can install a smart thermostat with basic tools:
- Turn off power to your HVAC system at the breaker.
- Remove the old thermostat faceplate and base.
- Label each wire according to the terminals (R, C, Y, W, G, etc.), even if the colors seem obvious.
- Install the new thermostat base and connect the wires to the matching terminals.
- Attach the thermostat, restore power, and follow the on‑screen setup.
Hire a professional if you have complex systems (dual‑fuel, multi‑stage, zoned systems) or missing C‑wires and you’re not comfortable running new wires or installing a power adapter.
Installing the energy monitor in the electrical panel safely
Energy monitor installation is more advanced and potentially hazardous since it involves your main service conductors. Typical steps (which a licensed electrician can handle quickly) include:
- Turn off the main breaker (where allowed and safe).
- Remove the panel cover to expose the breakers and main service wires.
- Clamp the CT sensors around the main service wires, ensuring the arrows on the clamps align with the direction of current flow as specified in the manual.
- Connect the monitor’s power leads to a dedicated breaker or an existing two‑pole breaker per the manufacturer’s instructions.
- Replace the panel cover and restore power.
If you’re not completely confident working inside the panel, this is the point where hiring a pro is strongly recommended. The cost is usually modest compared to the long‑term savings and peace of mind.
First‑time app setup: naming devices, rooms, and circuits for clarity
Once both devices are powered, it’s time to set up the apps:
- Connect to Wi‑Fi: Use each app’s setup wizard to connect the devices to your home network.
- Name the thermostat: Use clear names like “Main Floor Thermostat” or “Upstairs Thermostat” rather than leaving default labels.
- Assign rooms: For thermostats with remote sensors, assign them to specific rooms (e.g., “Master Bedroom,” “Living Room”).
- Label circuits: In the energy monitor app, match channels to actual breakers: “AC compressor,” “Air handler,” “Water heater,” “Dryer,” etc.
Good naming now makes your energy data much easier to interpret later, especially when you start building automations.
Dialing In Your Smart Thermostat for Maximum Savings
Creating energy‑saving schedules for weekdays, weekends, and vacations
Start with simple schedules that match your routine:
- Weekdays: One schedule for mornings, one for daytime while you’re away, one for evenings, and one for overnight.
- Weekends: Often more time at home, so fewer deep setbacks but still some overnight adjustments.
- Vacations: Use a dedicated vacation or hold mode with wider temperature ranges to avoid heating or cooling an empty home.
After a few days, glance at your energy monitor’s daily usage chart. Look for drops in usage during away times and verify that HVAC isn’t running heavily when no one is home.
Using eco/away modes and occupancy detection to avoid cooling or heating an empty home
Eco or away modes are your best friend for automatic savings. Enable:
- Auto‑away detection: Thermostats like Nest use motion sensing and phone location to decide when you’re gone.
- Occupancy sensors: Ecobee’s room sensors help reduce runtime in unused spaces and avoid overheating or overcooling empty rooms.
Once enabled, watch your energy monitor during typical workdays. You should see a clear reduction in HVAC‑related power draw when your home switches into away or eco mode.
Recommended temperature setpoints for comfort vs. savings in summer and winter
Exact comfort levels are personal, but these ranges balance comfort and savings for many households:
- Summer (cooling):
- Occupied: 75–78°F (24–26°C)
- Away: 80–85°F (27–29°C)
- Winter (heating):
- Occupied: 68–70°F (20–21°C)
- Away/sleep: 62–65°F (17–18°C)
Adjust by a degree or two at a time and watch your energy monitor’s daily kWh; a small change in setpoint can yield noticeable savings, especially in extreme climates.
Leveraging geofencing so your HVAC reacts when you actually leave or return
Most smart thermostat apps support geofencing, which uses your phone’s location to trigger home/away modes:
- Set a radius around your home (for example, 500–1,000 meters).
- When everyone with the app leaves the radius, the thermostat goes to away mode.
- When anyone returns, it switches back to comfort mode, often pre‑conditioning the home.
This approach usually saves more than fixed schedules because it reflects how you actually live rather than how you thought you’d stick to a routine.
Using Your Energy Monitor to Find and Fix Hidden Energy Waste
Understanding real‑time usage, daily trends, and peak demand spikes
Once your monitor has been running for a few days, get familiar with three views:
- Real‑time usage: See your current power draw and experiment—turn HVAC on and off, run the oven, or start the dryer to see how each affects the total.
- Daily trends: Look at 24‑hour graphs to see when your usage is highest. Are there huge spikes in the afternoon or at night?
- Peak demand: Some monitors highlight your highest demand periods. These often align with expensive peak‑rate windows in time‑of‑use plans.
Identifying which appliances and circuits drive your highest usage
If you have circuit‑level monitoring, identifying big loads is straightforward:
- Sort circuits by kWh or cost over the past week.
- Highlight HVAC‑related breakers, water heater, dryer, pool pump, and EV charger.
- Check which ones align with your bill’s high‑usage periods.
With device‑recognition systems like Sense, you may see labels like “AC,” “Heat Pump,” or “Dryer” appear over time. Use these to prioritize where you focus your efficiency efforts.
Spotting inefficient HVAC behavior, short cycling, and phantom loads
Your energy monitor can reveal issues that a thermostat alone won’t show:
- Short cycling: If you see the HVAC circuit turning on and off every few minutes, your system may be oversized or misconfigured, wasting energy and wearing equipment.
- Constant low‑level draw: Look for a baseline usage that never dips—even at night. This often points to phantom loads like older electronics, networking gear, or always‑on lights.
- Overnight HVAC usage: If your AC or heat runs heavily overnight despite mild outdoor temperatures, your setpoints may be tighter than needed or your home may have insulation problems.
Setting alerts when usage jumps unexpectedly (e.g., stuck heater, AC fault)
Most energy monitors let you set alerts for unusual behavior:
- Notify you when total usage exceeds a certain kW level.
- Warn you when a specific circuit (like HVAC or water heater) runs for longer than usual.
- Send alerts when daily usage crosses a chosen threshold.
These alerts can catch problems like a stuck heat strip, malfunctioning pool pump, or AC running nonstop after a thermostat misconfiguration—before they translate into a painful bill.
Automation Ideas: Making the Thermostat Respond to Real‑Time Energy Data
Lowering HVAC usage automatically during peak‑rate hours from your energy monitor data
If your utility has time‑of‑use rates, you can use automations to trim HVAC usage when power is most expensive. Examples:
- Pre‑cool your home one to two hours before peak rates start, then raise the AC setpoint a couple of degrees during peak times.
- Pre‑heat in winter before peak, then lower the heating setpoint slightly during those hours.
With compatible platforms, you can have your automation trigger when your energy monitor detects you’ve entered a high‑usage or high‑rate period.
Using scenes and routines to reduce HVAC setpoints when overall load is high
Create simple scenes that coordinate devices:
- “High Load” scene: When whole‑home usage exceeds, say, 6 kW, raise the cooling setpoint by 2°F or lower the heating setpoint by 2°F.
- “Eco Evening” scene: Dim lights, shut off non‑essential plugs, and relax thermostat settings slightly if the energy monitor shows unusually high draw.
These small, short‑term adjustments can flatten spikes and reduce both demand charges and peak kWh use.
Integrating with smart plugs, fans, and blinds to reduce cooling and heating demand
Your thermostat doesn’t have to work alone. Tie it into other smart devices:
- Ceiling fans: Turn on fans automatically when the AC runs so you can stay comfortable at a higher setpoint.
- Smart blinds: Close blinds on sunny windows when your energy monitor detects the AC compressor running heavily, cutting heat gain.
- Smart plugs: Power down space heaters or portable AC units during peak hours if your whole‑home load is already high.
Example automation workflows with popular platforms (Home Assistant, Alexa, Google Home)
Some practical examples:
- Home Assistant: Use an Emporia Vue or Sense integration as a trigger. When power > X kW, call a thermostat service to adjust setpoints, and turn off selected smart plugs.
- Alexa: With supported monitors and thermostats, create routines based on voice commands or schedules, such as “Alexa, start Energy Saving Mode” that lowers HVAC and turns off non‑essentials.
- Google Home: Combine thermostat actions with smart plug and lighting scenes triggered by time of day and your expected peak windows.
Tracking Your Savings: Reading Reports and Fine‑Tuning Over Time
Comparing your electric bills before and after installation
To really see the impact of using a smart thermostat and energy monitor together, compare:
- Electric bills from the same months last year vs. this year.
- Total kWh usage rather than just dollar amounts (rates can change).
Note weather differences—if this summer was much hotter, but your kWh stayed the same or went down, your system is clearly working.
Using weekly and monthly reports to adjust schedules and automations
Both your thermostat and energy monitor apps likely offer reports. Once a week:
- Check HVAC runtime and kWh contribution.
- See if new schedules or automations reduced peaks or total usage.
- Adjust setpoints and away thresholds gradually, then watch the impact in the next report.
Seasonal tuning: adjusting for heatwaves, cold snaps, and shoulder seasons
Energy‑saving settings in mild spring weather might not be ideal in a winter cold snap. Use seasonal tuning:
- Increase setbacks slightly in shoulder seasons when comfort is easier to maintain.
- During extreme weather, prioritize comfort but still use your monitor to avoid unnecessary waste, such as running HVAC with windows open.
When to consider adding more sensors or smart devices to boost savings
After a few months, you may spot patterns that suggest upgrades:
- Hot or cold spots in certain rooms may benefit from additional thermostat room sensors or smart vents.
- High overnight baseload could justify adding smart plugs to control always‑on electronics.
- Persistent high usage on a single circuit might lead you to upgrade an old fridge, water heater, or pool pump to a more efficient model.
Common Mistakes That Kill Savings (and How to Avoid Them)
Overriding schedules too often and disabling eco features
Constantly cranking the thermostat up or down defeats your carefully built schedules. Try to:
- Adjust setpoints in small increments rather than big swings.
- Resist the urge to disable eco or away modes after one slightly chilly or warm day.
- Use temporary holds rather than permanent ones so schedules resume automatically.
Misconfigured occupancy detection that keeps the system running
If occupancy sensing is too sensitive or not sensitive enough, your HVAC may run when it shouldn’t. Common fixes:
- Place motion sensors where people actually walk, not hidden corners.
- Include multiple phones in geofencing rules so the home doesn’t switch to “home” when only one person drives by.
- Review device activity in the app if you notice HVAC running in “away” periods.
Ignoring high‑usage alerts and unusual energy patterns
Alerts and odd graphs are early warning signs. Don’t ignore them:
- Investigate new spikes or extended runtimes on the HVAC circuit.
- Check for stuck relays, clogged filters, or incorrect thermostat modes (such as heat and cool fighting each other).
- Address issues promptly; one month of abnormal behavior can erase many months of savings.
Forgetting about other big loads: water heaters, dryers, and always‑on devices
Your thermostat and energy monitor can guide you toward other savings:
- Schedule laundry and dishwashing outside peak hours, if possible.
- Use timers or smart controls for electric water heaters, pool pumps, and well pumps.
- Tackle always‑on loads like DVRs, old routers, and game consoles with smart plugs or better power management.
Budget vs. Maximum Savings: How Much to Spend and What to Expect Back
Typical device costs and installation options
Ballpark costs (which vary by region and sales):
- Smart thermostats: $100–$250 per unit.
- Whole‑home energy monitors: $130–$350, plus optional circuit sensors.
- Professional installation: $100–$200 for a thermostat; $150–$350 for an energy monitor, depending on panel complexity.
You can start with a single smart thermostat and add an energy monitor later, or install both at once for an immediate full‑picture view.
Calculating simple payback time from your expected monthly savings
To estimate payback:
- Add up your total setup cost (devices + installation).
- Estimate monthly savings. If your electric bill is $200 and you cut it by 15%, that’s $30/month.
- Divide cost by savings. For example, $500 in equipment and labor divided by $30/month ≈ 17 months to pay back.
Beyond the simple payback, you’ll continue benefiting from lower bills and better insight into your home’s energy behavior.
Rebates and utility programs that can reduce upfront costs
Many utilities and local governments offer:
- Rebates for qualifying smart thermostats.
- Free or discounted devices for enrolling in demand‑response programs that briefly adjust your thermostat during grid peaks.
- Energy audit incentives that may recommend and partially fund monitoring equipment.
Check your utility’s website or call customer service before buying; you may be able to cut your upfront cost significantly.
Getting Started: A 30‑Day Plan to Reduce Your Electric Bill
Week 1: Install, connect, and set basic schedules
Focus on:
- Installing the smart thermostat and energy monitor (DIY or pro).
- Connecting both to Wi‑Fi and naming devices and circuits clearly.
- Setting simple weekday/weekend thermostat schedules and enabling eco/away modes.
Week 2: Analyze energy monitor data and fix obvious waste
Once you have a few days of data:
- Identify your major circuits by kWh or cost.
- Fix easy waste—turn off unused electronics, tweak thermostat setpoints a degree or two, schedule laundry and dishwashers smarter.
- Set basic high‑usage alerts.
Week 3: Add automations and adjust thermostat setpoints
Now start fine‑tuning:
- Enable geofencing if available.
- Create basic automations to relax setpoints during peak hours or high‑load events.
- Experiment with slightly wider temperature ranges for away and sleep periods.
Week 4: Review your usage trends and refine for long‑term savings
At the end of the month:
- Review weekly and monthly reports in both apps.
- Compare your bill or usage with the previous month or the same month last year.
- Decide if you want to add additional sensors, smart plugs, or automations to target remaining high‑usage areas.
Conclusion: Turning Your Smart Thermostat and Energy Monitor into a Long‑Term Savings System
Key habits that keep your electric bill low without sacrificing comfort
The hardware gets you started, but habits keep the savings coming:
- Let schedules, eco modes, and geofencing do most of the work instead of constant manual changes.
- Check your energy monitor briefly once a week to spot trends.
- Make small, incremental adjustments to setpoints, not drastic swings.
- Respond to alerts instead of ignoring them.
When to expand your setup with more smart home energy devices
Once you’re comfortable using a smart thermostat and energy monitor together, consider upgrades that build on that foundation:
- Room sensors or smart vents to improve comfort and reduce over‑conditioning.
- Smart plugs and power strips for always‑on electronics and office equipment.
- Smart blinds or window film to trim solar heat gain.
- Eventually, smart water heater controls or EV charger scheduling tied into your energy data.
Step by step, you’ll turn your home into a responsive, data‑driven system that keeps you comfortable while steadily pushing your electric bill down.
FAQ
Do I really need both a smart thermostat and an energy monitor to save money?
You can absolutely save money with just a smart thermostat or just an energy monitor, but using both together gives you better results and more control. The thermostat actually changes HVAC behavior, while the monitor proves whether those changes are working and highlights other waste you might miss.
Is it safe to install a whole‑home energy monitor myself?
The low‑voltage part of the installation is simple, but clamp‑on sensors go near high‑voltage service wires. If you’re not experienced with electrical work or comfortable opening your panel, hiring a licensed electrician is the safest choice and usually not very expensive.
How long does it take to see a lower electric bill?
Many homeowners see some reduction in their next bill, especially if they make obvious changes right away. Deeper savings accumulate over two to three billing cycles as you refine schedules, learn from the data, and add automations.
Will a smart thermostat and energy monitor still help if I rent?
If your landlord allows it, you can often install a smart thermostat and then reinstall the old thermostat when you move. For energy monitoring, renters might lean more on smart plugs with energy monitoring rather than opening the main panel. You still get valuable insights and control over your portion of the usage.
What if my HVAC uses gas—does an energy monitor still help?
Yes. Even if your furnace uses gas, your blower fan, AC compressor, and other big loads like dryers and water heaters may be electric. The monitor helps you see all of that, and your smart thermostat still optimizes run times, so you reduce both electric and gas usage overall.