Apartment renters need security just as much as homeowners, but most traditional alarm systems are built around drilling, hardwiring, and long contracts. That doesn’t work if you have a lease, a security deposit, and a landlord who doesn’t want holes in the walls.
This guide walks through how to choose the best smart security system for apartments, with a focus on portable indoor kits that combine cameras and sensors. You’ll see what features matter, how to set things up without damage, and how to take everything with you easily when you move.
Why Apartment-Friendly Smart Security Systems Need a Different Approach
Common renter limitations: no drilling, no hardwiring, no contracts
Most renters face three major constraints that shape what “apartment-friendly” security looks like:
- No drilling or permanent changes: Many leases forbid drilling into walls, doors, or window frames. That rules out traditional wired keypads, wall-mounted control panels, and screwed-in sensors.
- No electrical work or hardwiring: Running new cables or adding junction boxes typically isn’t allowed. You need gear that runs on batteries or standard outlets, with no electrician required.
- No long-term contracts: Multi-year monitoring contracts don’t make sense if you may move in 12–18 months. Apartment-friendly systems should work great as a DIY setup, with optional month-to-month monitoring at most.
The best smart security system for apartments leans heavily on peel-and-stick mounts, stands, and wireless connections so you can install and remove everything without leaving a trace.
Why portability matters when you move to a new apartment
Unlike a built-in home alarm, your apartment security kit should move as easily as your TV or coffee maker. Portability affects what you buy:
- No custom wiring: If you have to cut cables or patch drywall to uninstall it, it isn’t truly portable.
- Flexible mounting: Cameras and sensors that mount with adhesive, clamps, or magnetic bases can be removed and reused in your next place.
- Easy Wi‑Fi re-setup: Devices should let you quickly update Wi‑Fi credentials in the app when you move, without factory-resetting everything.
- Scalable design: A kit that works in a studio should be expandable with extra sensors or cameras if your next place is larger.
Think of your security setup as part of your “go bag” when you move. If it can’t pack into a couple of boxes and be online again in an hour, there’s a better option for renters.
Key differences between apartment security kits and traditional alarm systems
Apartment-focused kits are designed very differently than older-style alarm systems:
- No dedicated landline or panel: Most modern kits use Wi‑Fi and a mobile app instead of a wall keypad and landline connection.
- Modular and self-contained: Kits bundle a few key pieces (camera, motion sensor, door sensor) instead of full-house coverage with dozens of wired zones.
- Self-monitoring first: You get push alerts and can check cameras yourself. Professional monitoring, if offered, is usually optional and month-to-month.
- Smaller footprint: Indoor-only, compact devices make more sense for apartments where you can’t install outdoor cameras or sirens on the building.
These differences are exactly what make modern smart kits more flexible and renter-friendly than traditional alarms.
Key Features to Look For in the Best Smart Security System for Apartments
Truly wireless installation: battery power, adhesive mounts, and USB power
To avoid damage and wiring, prioritize kits that offer:
- Battery-powered sensors: Door/window contacts and motion sensors should run on replaceable batteries for at least 1–2 years.
- Adhesive or magnetic mounts: Look for 3M-style adhesive strips, removable pads, and magnetic plates instead of screw-based brackets.
- USB-powered cameras: Indoor cameras that plug into standard outlets via USB or small power bricks are easy to relocate and hide behind furniture.
- Stand or clamp mounts: Many indoor cameras can sit on a shelf, clamp to a piece of furniture, or attach magnetically to a metal surface.
The less you need a toolbox, the more suitable a kit is for renters.
Hub vs hubless systems: what works best in small spaces
Apartment-friendly kits come in two broad styles:
- Hub-based systems: A central hub connects to your router and talks to sensors using low-power protocols like Zigbee or Z‑Wave. These can offer better battery life and support more devices, which is helpful if you plan to expand.
- Hubless systems: Cameras and sensors connect directly to Wi‑Fi or Bluetooth. This keeps things simple, with fewer boxes to plug in and carry when you move.
In most small and medium apartments, a hubless system or a compact hub that doubles as a siren is ideal. Go hub-based if you want broader smart home integration or plan to add many sensors over time.
Wi‑Fi requirements, mobile app quality, and notification reliability
Your security kit is only as good as its connection and app:
- Wi‑Fi band support: Many devices only support 2.4 GHz Wi‑Fi. That’s fine for range, but check your router or building Wi‑Fi to avoid compatibility issues.
- Network stability: If your apartment Wi‑Fi is unreliable, consider a kit that can store clips locally on a card so you still get recordings during outages.
- App usability: Look for clear event timelines, easy arming/disarming, and quick access to live video. Poor apps lead to missed alerts.
- Notification options: Push notifications should arrive quickly, with options to fine-tune for motion, people, door opens, and system status.
Skim app store reviews before you buy. A well-reviewed app is a strong signal that day-to-day use will be smoother.
Privacy and data security: local storage, encryption, and account controls
Security gear has access to your home, schedule, and video feeds, so privacy matters:
- Local vs cloud storage: Systems that support local microSD or base-station storage let you keep footage in your home instead of only in the cloud.
- Encryption: Check whether video streams and account data are encrypted in transit (TLS) and at rest.
- Account protection: Two-factor authentication (2FA), hardware-based reset buttons, and login alerts add important safety layers.
- Camera privacy controls: Physical shutters, software privacy zones, and “home/away” modes help protect roommates and guests.
For background on how modern alarms work, the overview at Wikipedia’s security alarm article is a useful reference point.
Smart home compatibility: Alexa, Google, Apple Home, SmartThings
If you already use a voice assistant or smart hub, make sure your kit fits in:
- Alexa / Google Assistant: Many apartment kits support arming, status checks, and camera feeds on smart displays.
- Apple Home: If you’re heavily invested in iPhone, iPad, or HomePod, look for Apple Home or Matter support so sensors and cameras show up in the Home app.
- SmartThings / other hubs: Z‑Wave or Zigbee-friendly sensors can be reused later if you move into a bigger smart home setup.
Think ahead: a kit that plays nicely with multiple ecosystems gives you more flexibility if your tech or living situation changes.
Best All-in-One Smart Indoor Security Kits for Apartments (Cameras + Sensors)
Kit 1: Compact camera + door/window sensor bundle for studio apartments
For studios and micro-apartments, a single high-quality indoor camera plus 2–3 door/window sensors can provide surprisingly complete coverage. Look for:
- One 1080p or 2K indoor camera with night vision and two-way audio.
- Door sensors for your main entry door and any balcony or patio door.
- A simple app-based “home/away” mode so you can arm everything with one tap.
Place the camera to cover the main living area and entry door. In a studio, that usually means mounting or standing it opposite the front door, angled across the room.
Kit 2: Multi-room camera kit with motion sensors for larger apartments
One- and two-bedroom apartments benefit from an extra camera and motion sensors:
- Two or three indoor cameras for entry, hallway, and living room.
- One motion sensor positioned to watch a hallway or main traffic path.
- Door/window sensors for your front door and any accessible windows.
This setup gives you both visual coverage and motion-based alerts. Some kits link motion to camera recording so you automatically capture clips whenever movement is detected while you’re away.
Kit 3: Budget-friendly starter kit for first-time renters
If you want to keep costs down, start small and expand:
- One affordable indoor camera with cloud or microSD recording.
- One or two door sensors for your front door and most vulnerable window.
- No hub required; all devices connect via Wi‑Fi.
Choose products that let you add more sensors and cameras later without replacing the core system. This way, if you move to a bigger apartment, you only need to buy add-ons.
Kit 4: Privacy-focused kit with local storage and no monthly fees
Some renters prefer to avoid subscriptions and cloud storage entirely. For that style of setup, focus on:
- Cameras with microSD slots or a local NVR/base station for video storage.
- On-device or local person detection so basic features don’t require a subscription.
- Local siren capability for a loud deterrent without monitoring fees.
These kits often cost a bit more upfront but can be cheaper over a few years since there’s no monthly bill.
Kit 5: Apartment kit with professional monitoring as an optional add-on
If you want the option of someone else calling emergency services, look for:
- A kit that works fully as a DIY system but supports optional 24/7 monitoring.
- Month-to-month or no-contract monitoring that you can pause if you travel or move.
- Clear in-app controls to switch between self-monitoring and professional monitoring.
This hybrid approach is ideal for renters who travel frequently or keep irregular hours but don’t want to be locked into a traditional alarm contract.
Portable Indoor Security Cameras Every Renter Should Consider
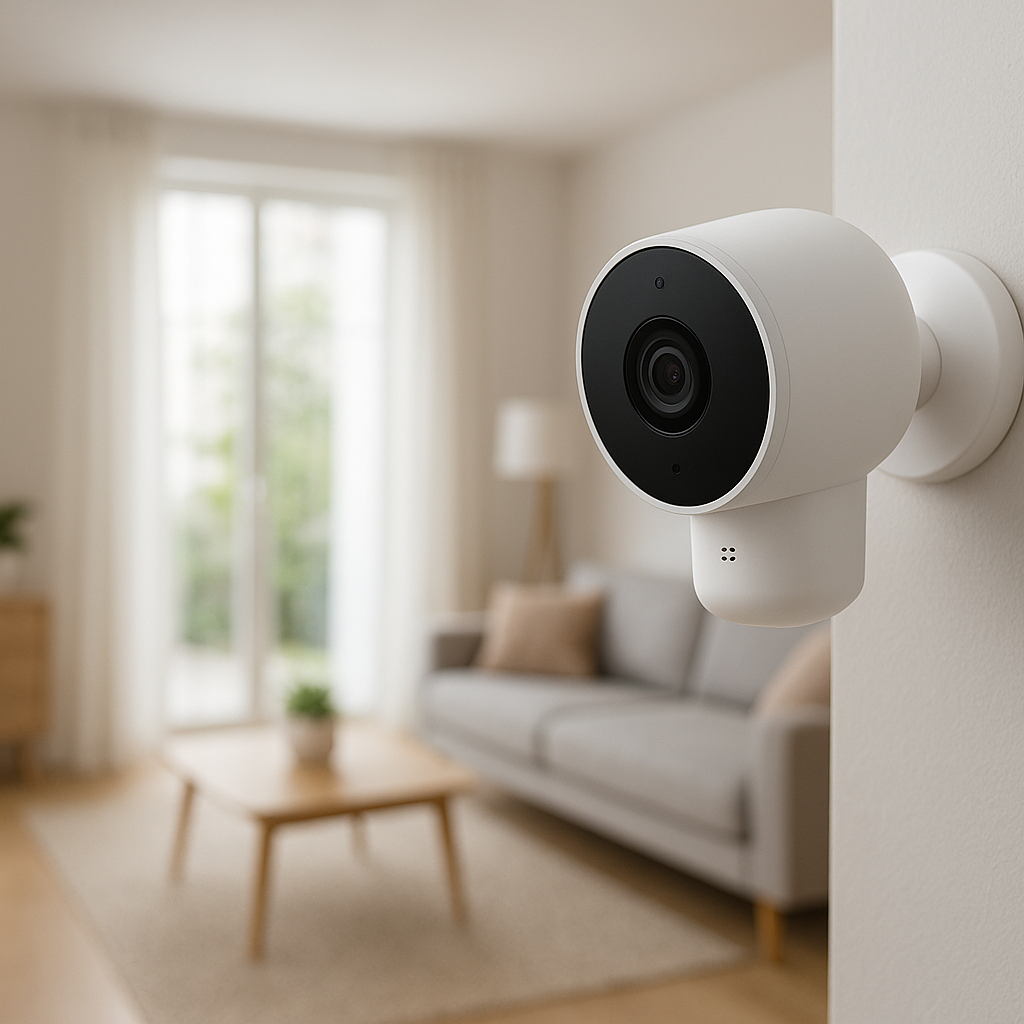
Best indoor cameras with magnetic or stand mounts (no drilling required)
Mounting flexibility is key in rentals. Look for cameras that offer:
- Magnetic bases: Attach to fridges, metal shelves, or adhesive metal plates without screws.
- Stable stands: Let the camera sit on a bookshelf, TV stand, or countertop.
- Flexible necks or ball joints: Make it easier to angle the lens precisely, even when the camera is low or off-center.
Many mainstream indoor cameras ship with both a stand and a wall plate, which lets you adapt as your layout changes.
Cameras with built-in sirens, two-way talk, and person detection
Feature-rich cameras can do more than just record:
- Built-in sirens: Trigger a loud siren from your phone if you see something suspicious.
- Two-way talk: Speak through the camera to visitors, delivery drivers, or even pets.
- Person detection: Filter out motion from curtains or light changes so you only get alerts for people.
- Activity zones: Highlight areas like your door and ignore others (such as a window facing the street).
These features make a single camera far more effective, especially in smaller apartments where you want minimal hardware.
Subscription vs no-subscription camera features (cloud backup vs microSD)
Most cameras fall into three categories:
- Cloud-first with subscription: Pay monthly for video history, smart detection, and rich notifications. Good if you want easy access from anywhere and don’t want to manage storage.
- Hybrid: Basic recording and live view are free, with optional paid features like extended history or advanced AI detection.
- Local-only: Record to microSD or a base station, with no required subscription. You manage storage and backups yourself.
For renters, hybrid systems are often the sweet spot: you can start free and upgrade only if you need longer history or smarter alerts.
Smart Sensors That Make Apartment Living Safer
Door and window contact sensors that won’t damage frames
Contact sensors are lightweight and easy to mount without tools:
- Adhesive backing: Most come with removable adhesive that peels off cleanly at the end of your lease.
- Low-profile designs: Slim sensors blend into door frames and window sashes, making them less noticeable.
- Re-usable mounts: Some include extra adhesive pads so you can move them to a new place without buying new hardware.
Install them on your main entry door, any sliding balcony doors, and ground-level or easily accessible windows.
Motion sensors tuned for small spaces and pets
In apartments, you don’t want constant false alarms from your cat or robot vacuum. Look for motion sensors with:
- Pet immunity: Sensors that ignore motion below a certain height or weight.
- Sensitivity settings: Let you reduce triggers in small rooms where a tiny movement fills the whole field of view.
- Corner mounts or stands: So you can aim them across a room without drilling.
Place motion sensors in hallways or near the main entry rather than bedrooms, unless you specifically want coverage there.
Leak, smoke, and CO detectors that send smart alerts to your phone
Beyond intrusion, environmental sensors can prevent costly damage and keep you safer:
- Smart leak sensors: Place under sinks, near the water heater (if accessible), and by the washing machine to catch leaks early.
- Smart smoke and CO detectors: These can send phone alerts even if you’re away, which is helpful if building alarms aren’t integrated into your phone.
To understand why CO monitoring matters, the overview at Wikipedia’s carbon monoxide detector page explains the dangers and typical sensor behavior.
How to Choose the Right Apartment Security Kit for Your Layout
Matching camera coverage to studio, one-bedroom, and two-bedroom layouts
Use your floor plan to decide how many cameras you need:
- Studio: One camera covering the main living/sleeping area and entry door is usually enough.
- One-bedroom: One camera in the living room facing the entry, optionally a second in the hallway or near the bedroom door.
- Two-bedroom: One camera near the entry, one covering the main living area, and optionally a third in a hallway or office.
Start with the minimum and add more only if you find blind spots or want additional coverage.
Where to place cameras and sensors in an apartment for best coverage
Good placement often matters more than the number of devices:
- Mount or stand cameras at chest to head height, angled slightly down.
- Avoid pointing cameras directly at windows to reduce glare and motion false alarms from street traffic.
- Place door sensors at the top of the door where they’re less likely to be bumped.
- Use motion sensors in hallways or central points where people must pass through.
Do a walkthrough in the app’s live view to confirm you’ve covered entry paths without capturing areas you want to keep private.
Balancing security with roommate privacy and shared spaces
If you share your apartment, be clear about what’s being monitored:
- Keep cameras out of bedrooms and bathrooms.
- Focus on entry doors, hallways, and living areas where guests come and go.
- Use privacy zones to block out desks or areas where roommates work or relax.
- Share access or event logs responsibly so everyone can see what’s happening without feeling surveilled.
A quick conversation before installing cameras in shared spaces can avoid tension later.
Installation Tips for Renters: No-Drill, No-Damage Setup
Using adhesive strips, removable hooks, and stands instead of screws
To protect your deposit:
- Use the included adhesive pads or high-quality removable strips for sensors.
- Stand cameras on shelves, bookcases, or TV stands instead of mounting them whenever possible.
- For higher placement, use removable hooks or adhesive shelves rated for the camera’s weight.
Always test adhesive on a small, hidden area if you’re unsure how your wall paint will react.
Power and cable management when outlets are limited
Many apartments have limited outlets, especially near doors:
- Use short extension cords or flat cables to reach outlets without running cords across walkways.
- Secure loose cables with removable clips or cable raceways to avoid tripping hazards.
- Consider USB power strips or surge protectors near your TV stand to power multiple cameras and a hub from one outlet.
Keep power bricks and cables off the floor to reduce dust buildup and accidental unplugging.
Setting up Wi‑Fi, guest access, and secure admin accounts
A secure network is part of your security system:
- Change your router’s default admin password and Wi‑Fi password.
- Create a guest Wi‑Fi network for visitors so they aren’t on the same network as your cameras.
- Enable two-factor authentication on your camera and sensor accounts.
- Use different, strong passwords for your security app and Wi‑Fi router.
Spending 15–20 minutes on network security greatly reduces the risk of unauthorized access to your devices.
Moving to a New Place: How to Take Your Smart Security Kit With You
How to safely remove cameras and sensors without wall damage
When it’s time to move:
- Gently twist adhesive-mounted sensors instead of pulling straight out to reduce paint peel.
- Use dental floss or fishing line to “saw” behind stubborn adhesive pads.
- Clean leftover residue with a gentle adhesive remover safe for painted walls.
- Save all brackets, screws, and extra adhesive pads in a labeled bag for your next place.
Take photos of where devices were originally placed; this can help you recreate or improve the layout later.
Resetting devices and updating your new home’s Wi‑Fi and layout
Once you’re in your new apartment:
- Decide whether to factory reset devices or simply update Wi‑Fi credentials (follow the manufacturer’s instructions).
- Rename rooms and devices in the app to match your new layout (e.g., “Living Room Cam,” “Hall Motion”).
- Check for firmware updates after reconnecting to ensure you have the latest security patches.
Use the move as a chance to tidy up your device list by deleting any old or offline devices.
Re-optimizing detection zones and notifications after you move
A new layout means new traffic patterns and potential false alarm sources:
- Adjust motion zones to avoid busy streets or elevator hallways if visible through windows.
- Update schedules so the system arms when you typically leave the new place.
- Test each sensor and camera by walking through monitored areas and opening doors.
Spend a few days fine-tuning notifications so you get meaningful alerts without constant noise.
Privacy, Neighbors, and Apartment Policies
What you can and can’t record in shared hallways and common areas
Many buildings restrict recording in shared spaces like hallways, laundry rooms, and gyms. Even if your lease doesn’t mention it, local laws may limit where you can point cameras.
- Avoid mounting cameras outside your unit’s door unless building rules clearly allow it.
- Be extra cautious with audio recording, which is regulated differently than video in many places.
- Focus on monitoring inside your apartment; indoor kits are usually more than enough for security.
If you’re unsure, ask your landlord or property manager before installing anything facing shared areas.
How to avoid recording inside neighbors’ units and public corridors
Even if your camera can “see” into other units or long hallways, you can usually configure around that:
- Use privacy zones to block out parts of the frame that include neighbors’ doors or windows.
- Aim cameras away from windows or angle them down to focus on your doors and interior spaces.
- Use narrower fields of view or digital zoom to concentrate on your own entryway.
Respectful placement reduces conflict with neighbors and potential complaints to management.
Talking to your landlord about smart security devices
If you plan any installation that’s even slightly permanent, a quick email can prevent issues:
- Explain that your devices are wireless and use removable adhesive or stands.
- Clarify that you won’t modify building wiring or shared spaces.
- Offer to remove everything and repair minor marks when you move out.
Most landlords are supportive of portable, non-invasive security setups that don’t affect the building or other tenants.
Saving on Costs: Kits, Subscriptions, and DIY vs Monitoring
One-time purchase kits vs ongoing monitoring fees
Budgeting for security as a renter means watching both upfront and recurring costs:
- One-time kits: Generally cheaper over time, especially if you don’t need professional monitoring.
- Subscription-based systems: Lower hardware costs but monthly fees for video storage and monitoring.
- Pay-as-you-go monitoring: Some brands offer optional monthly monitoring that you can enable only when needed.
For many renters, a solid DIY kit with optional add-ons provides the best balance of cost and flexibility.
When monitoring makes sense for renters (and when it doesn’t)
Professional monitoring can be worth it if:
- You travel frequently or work overnight shifts.
- You don’t always have your phone handy to respond to alerts.
- Your building doesn’t have on-site security or a doorman.
It may be unnecessary if you’re almost always home, live in a secure building, or primarily want cameras for checking on packages, pets, or kids.
How to get the most value from free tiers and trial periods
Many camera and security brands offer free tiers or trial upgrades:
- Use trial periods right after move-in, when you’re tuning detection and activity zones.
- Decide which features you actually use (person alerts, extended history) before paying.
- Downgrade to free plans once your system is dialed in, and only re-subscribe during travel or busy seasons.
Track renewal dates so you’re not surprised by subscription charges you no longer need.
Quick Apartment Security Kit Recommendations by Scenario
Best smart security system for a small studio apartment
For a typical studio, your ideal setup might be:
- One good-quality indoor camera with person detection and two-way audio.
- Door sensor on the main entry door.
- Optional window or balcony door sensor if accessible from outside.
This combination keeps costs low while still covering the key risk points in a single-room space.
Best system for renters with pets and frequent visitors
If you host often and have pets, prioritize:
- Motion sensors with pet immunity and adjustable sensitivity.
- Cameras with activity zones and smart detection to reduce pet-triggered alerts.
- Guest modes or temporary PINs so visitors can come and go without setting off alarms.
This setup reduces false alarms and makes your system more livable day to day.
Best portable kit for frequent movers or digital nomads
For people who move often or split time between cities:
- Hubless, Wi‑Fi-based cameras and sensors that pack flat.
- USB-powered gear with universal mounts or stands.
- Local storage or cloud recording that travels with you easily.
Keep everything in a dedicated box with labeled cables and mounts so you can set up and tear down quickly in each new place.
Final Checklist: Setting Up the Best Smart Security System for Your Apartment
Pre-purchase checklist: compatibility, internet, and permission
Before you buy:
- Confirm your apartment has reliable Wi‑Fi and enough bandwidth.
- Check that the system supports your phone OS and any voice assistants you use.
- Review your lease and, if needed, get landlord approval for cameras or sensors.
- Decide whether you want local storage, cloud storage, or both.
Setup checklist: placement, alerts, and test routines
During installation:
- Place cameras and sensors using stands and adhesive, avoiding drilling.
- Configure home, away, and night modes with different motion and alert settings.
- Walk-test each sensor and camera while watching the app.
- Verify notifications arrive quickly on your phone (and smartwatch, if you use one).
Ongoing maintenance: battery changes, firmware updates, and access control
After setup, keep everything running smoothly by:
- Checking battery levels monthly and replacing batteries before they fully die.
- Installing firmware updates to fix bugs and security issues.
- Reviewing device and account access when roommates move out or relationships change.
- Occasionally cleaning camera lenses and sensor surfaces to maintain performance.
Treat your smart security system like any other essential appliance: a little regular maintenance keeps it dependable.
FAQ
Do I need my landlord’s permission to install an apartment security kit?
For fully indoor, wireless kits that use adhesive strips or stands, many renters install them without special permission. However, if you plan to drill, modify doors or frames, or place cameras facing hallways or shared areas, it’s wise to get written approval first.
Can I use an apartment security kit if my building provides a buzzer or intercom system?
Yes. Your smart kit is mainly for what happens inside your unit. You can still use your building’s buzzer or intercom while using cameras and sensors to monitor your entry door, living room, and other interior spaces.
Will my security cameras work if the power or Wi‑Fi goes out?
Most indoor Wi‑Fi cameras stop streaming during a power or network outage. Some can keep recording locally if connected to a battery backup or if they’re battery-powered. If outage resilience matters, look for cameras with local storage and consider a small UPS (battery backup) for your router and hub.
Can I use my apartment security kit in a future house?
Usually yes. Portable cameras and wireless sensors can move with you to a house and often integrate with more advanced systems later. You might add outdoor cameras, more sensors, or a hub, but your original indoor gear remains useful.
Is professional monitoring worth it for a small apartment?
It depends on your lifestyle. If you travel frequently, live alone, or prefer someone else to handle emergency calls, month-to-month monitoring can be reassuring. If you’re home most of the time and mainly want awareness, self-monitoring with notifications is often enough.