Smart LED strip lights can turn a plain TV or monitor into the centerpiece of your living room or gaming desk. With the right strip, you get eye-friendly bias lighting, vivid RGB effects, and smart automations – all without drilling into your walls or damaging the back of your screen.
This guide walks through the best smart LED strip lights for TV setups, what features matter, how to mount them with no tools, and how to dial in colors and automations so your lighting feels like part of your entertainment system, not an afterthought.
Why Smart LED Strip Lights Are a Must-Have for TVs and Gaming Setups
Benefits of bias lighting for eye comfort and picture quality
Bias lighting is a soft light placed behind your TV or monitor, creating a gentle glow on the wall instead of shining directly into your eyes. This reduces the contrast between your bright screen and a dark room, which can cut down on eye strain during long movie nights or gaming sessions.
With a good LED strip set to a neutral white behind your screen, you:
- Reduce eye fatigue by avoiding a harsh, high-contrast viewing environment
- Perceive deeper blacks and better contrast because your pupils aren’t fully dilated
- Can keep the room “dark” for immersion while still having enough ambient light to move around safely
There’s solid research on how bias lighting improves perceived picture quality. If you want to dive deeper, the bias lighting article on Wikipedia offers a good technical overview.
How smart LED strips boost immersion for movies and gaming
Beyond comfort, smart LED strips add a visual layer that reacts to what’s on screen. RGB and RGBIC strips can create:
- Ambient color washes that match the dominant color of your movie
- Pulsing effects that sync to music or game audio
- Directional color zones (left, right, top) to extend the action beyond the frame
For example, some HDMI- or camera-based TV backlight kits can mirror the on-screen content in real time. Explosion on the left side of the screen? The left side of the strip glows orange. Racing through a blue tunnel in a game? The whole wall behind your monitor turns blue. This kind of extension makes even older TVs feel more modern and immersive.
Smart control: voice, app, and routines with Alexa, Google, and HomeKit
Smart TV strips connect to Wi-Fi, Bluetooth, or a hub, letting you control them with your phone or voice. Typical controls include:
- On/off and brightness sliders
- Color wheels and scene presets
- Music-reactive modes and screen-sync toggles
Most popular strips work with Amazon Alexa and Google Assistant, and some support Apple HomeKit. That means you can say things like:
- “Alexa, turn on TV backlight to movie mode.”
- “Hey Google, dim the gaming lights to 30%.”
- “Siri, set TV bias light to warm white.”
Integrating strips into routines is particularly useful: have them turn on with your TV, dim automatically at night, or switch to a softer white after a certain hour to wind down.
Key Features to Look For in the Best Smart LED Strip Lights for TV
TV size compatibility and recommended strip lengths
To avoid dark corners or wasted strip, match the length to your screen size. As a rough guide:
- 24–32″ monitors: 1–2 meters (3–6 ft)
- 40–55″ TVs: 3–4 meters (9–13 ft)
- 65–75″ TVs: 4–5 meters (13–16 ft)
Many TV-specific kits are labeled for 55″, 65″, or 75″ screens and often include corner-friendly layouts. Check if the strip can be cut at marked points; you can trim excess but you usually can’t reattach cut pieces without special connectors.
No-drill mounting options: adhesives, clips, and reusable mounts
If you rent or simply don’t want holes, focus on strips designed for no-drill mounting. Common options include:
- Pre-applied 3M-style adhesive: Peel-and-stick backing that grips plastic TV housings well when surfaces are cleaned properly.
- Adhesive-backed clips: Small plastic clips you stick on, then snap the strip into. These help around corners and vents.
- Reusable mounting strips: Velcro-like or gel pads that let you remove the strip later with minimal residue.
Look for kits that include extra clips and cable ties. These small pieces make the difference between a sagging strip and a professional-looking install.
Brightness, color accuracy, and RGB vs RGBIC vs white-only
Not all LED strips look the same. Three main types you’ll see:
- White-only bias strips: Great if you only care about eye comfort. They often offer better, more consistent white tones and less distraction for serious movie watchers.
- RGB strips: Each section of the strip shows one color at a time. Perfect for simple color scenes and mood lighting.
- RGBIC (individually addressable) strips: Different sections can show different colors simultaneously, enabling chasing effects and complex gradients ideal for gaming.
Brightness is measured in lumens, but many TV-specific strips don’t list an exact number. Use user reviews and photos as a guide. For bias lighting, you actually rarely need maximum brightness; you want a halo, not a wall flood.
Music and screen-sync options for gaming and movies
Sync features vary widely:
- Built-in microphone modes: Strip reacts to sound in the room. Easy, but less accurate for on-screen content.
- App-based audio sync: App listens to your phone’s mic or system audio and drives the lights. Good for PC gaming or music.
- Camera-based TV sync: A small camera mounted on the TV “sees” the screen and mirrors colors on the strip.
- HDMI sync boxes: HDMI video passes through a small box that analyzes the signal and controls the strip in real time.
Gamers and movie lovers usually prefer HDMI or camera-based systems for more precise and lower-latency effects, especially on consoles or streaming boxes.
Smart home platform support and app quality
Don’t overlook software. A great strip with clunky software will annoy you over time. Look for:
- Clear, stable app with quick color changes
- Easy grouping with other lights in your home
- Support for the platform you use most (Alexa, Google, HomeKit)
- Cloud-free local control if you care about privacy and responsiveness
Brands like Philips Hue, Govee, Nanoleaf, and TP-Link Kasa generally have more mature apps and better integration than unbranded budget strips.
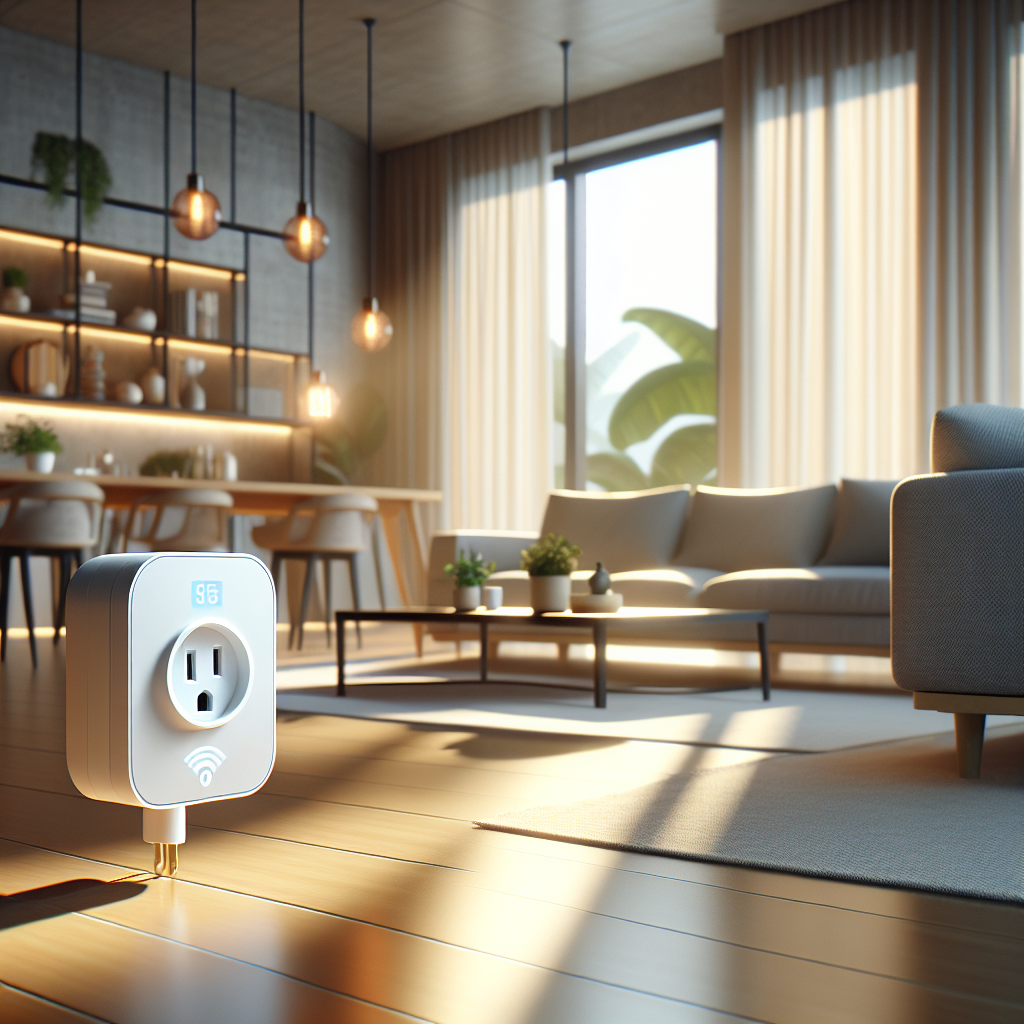
Power, USB vs wall plug, and cable management considerations
TV LED strips are usually powered in one of two ways:
- USB-powered: Plug into the USB port on your TV or monitor. Simple and often turns on/off with the screen, but limited in brightness and length.
- Wall-powered with adapter: Plugs into a nearby outlet or power strip. Supports brighter, longer strips and advanced sync boxes, but you need to hide the cable.
Plan where your power brick will go. Cable clips, adhesive channels, and zip ties help route cables along the TV’s back or down a wall for a clean look.
Best Smart LED Strip Lights for TV (No Drilling, Easy Mounting)
Best overall: full-featured TV backlight with screen-sync and strong adhesive
For a feature-rich option, look for an HDMI- or camera-based kit that includes:
- A TV-sized LED strip with strong adhesive
- A control box or sync box
- Support for major voice assistants
- Multiple screen-sync and music modes
These kits are ideal for 55–75″ TVs in a main living room. They usually include corner-friendly layouts, clear instructions, and extra adhesive clips. A popular high-end example in this category is the Philips Hue Play Gradient Lightstrip for TV, which works with a separate sync box to match your screen content.
Best budget: affordable Wi-Fi strip with simple app control
If you want smart control and color scenes without paying for HDMI sync, a budget Wi-Fi RGB strip is a good fit. Look for:
- Pre-applied adhesive backing
- At least basic Alexa/Google Assistant support
- Scene presets and music-reactive modes
- Cut lines to trim to your TV size
These are great for casual TV viewing and accent lighting, especially in bedrooms or secondary rooms where perfect color matching to the screen isn’t essential.
Best for gamers: HDMI or camera-based sync for low-latency effects
Gamers benefit most from low-latency, screen-accurate effects. Look for:
- HDMI passthrough up to your preferred resolution and refresh rate (4K HDR, 120 Hz if needed)
- RGBIC strips for multi-zone color effects
- Adjustable sync intensity and color calibration
- Profiles for different consoles or PC inputs
These systems cost more but dramatically enhance immersion on PS5, Xbox Series X, or high-end gaming PCs.
Best for renters: removable, non-damaging mounting solutions
Renters should prioritize easy removal. Look for strips or kits that include:
- Reusable, non-permanent mounting strips or hooks
- Adhesive that’s safe for plastics and painted walls
- Clear instructions on removal (often with heat or slow peeling)
You can also pair a standard strip with third-party removable mounting clips. This allows you to take the entire setup with you when you move, without cleaning off heavy residue from your TV or wall.
Best HomeKit-friendly option for Apple users
If your smart home runs on Apple Home, look for strips labeled “Works with Apple HomeKit.” These allow you to:
- Control lights from the Home app on iPhone, iPad, or Mac
- Use Siri voice commands
- Create automations tied to other HomeKit devices (like motion sensors or door locks)
Many HomeKit-compatible strips also support Matter or Thread, giving you more reliable and local control with lower latency.
Best USB-powered strip for smaller monitors and desk setups
For a clean desk setup, a USB-powered bias strip is often the easiest choice. Benefits include:
- Automatic power on/off with your monitor
- No extra power brick to manage
- Sufficient brightness for 24–32″ screens
Some USB strips include basic remote controls or Bluetooth apps. These are perfect for office monitors or secondary gaming screens where you just want a soft white or subtle color glow.
No-Drill, Easy Mounting: Step-by-Step Installation Guide
Preparing the TV or monitor surface for strong adhesion
Good prep prevents peeling. Before sticking anything:
- Turn off and unplug the TV or monitor.
- Wipe the back with a dry cloth to remove dust.
- If allowed by the manufacturer, lightly clean the mounting path with isopropyl alcohol and let it dry completely.
- Avoid textured or rubberized areas; smooth plastic sticks best.
Never spray cleaner directly onto the TV. Apply to a cloth first, then wipe.
Planning your strip path around corners, vents, and ports
Lay the strip out along the back of your TV before peeling the adhesive:
- Plan a rectangular path near the edges of the screen, not too close to the vents.
- Keep the controller or power lead near the bottom or side for easier access.
- Avoid covering ventilation grilles and ports you use (HDMI, USB, optical).
- Use the strip’s natural flexibility to manage corners rather than sharp bends.
Mark corner points mentally or with small pieces of painter’s tape if you need a guide.
Applying adhesive-backed strips without bubbles or sagging
Once you’re ready to stick:
- Peel back a short section of the adhesive liner, 6–8 inches at a time.
- Press the strip firmly along the planned path, holding each section for a few seconds.
- Work slowly around corners, using clips if provided.
- Avoid stretching the strip; stretching can cause it to pull back and detach.
Give the adhesive at least 30 minutes to cure before bending cables or moving the TV.
Using clips, corner connectors, and cable channels without drilling
Clips and channels improve stability and neatness:
- Stick adhesive-backed clips at each corner to hold the strip in place.
- If your kit includes corner connectors, use them instead of sharply bending the strip.
- Use self-adhesive cable channels or raceways to run power cables down the back of your TV stand or wall.
All of these solutions rely on adhesive, not screws, so they’re renter-friendly and easily removable later.
Connecting to power and hiding cables for a clean look
Connect the strip to its controller and power adapter, then:
- Route the cable along the back of the TV using small adhesive clips or zip ties.
- Run the cable down the back of the stand or wall, tucked into a cable channel if you have one.
- Aim for a single visible cable coming down from the TV area if possible.
On a desk, you can hide extra cable length under the desktop using adhesive clips or a cable tray.
First-time setup in the app and pairing with voice assistants
Once powered, follow the manufacturer’s app instructions:
- Connect the strip to Wi-Fi or Bluetooth as directed.
- Update firmware if prompted.
- Rename the strip to something memorable like “Living Room TV Backlight.”
- Link the strip to Alexa, Google Home, or Apple Home through their respective apps.
Test basic commands (on/off, brightness, a few colors) to confirm everything is working before you push the TV back into place.
Optimizing Colors, Scenes, and Automation for TV and Gaming
Best color temperatures for movies vs gaming vs casual viewing
Color temperature has a big impact on comfort:
- Movies: Warm white (around 2700–3000K) keeps things cozy and cinematic.
- Gaming: Neutral to cool white (3500–5000K) or subtle colored scenes helps with focus and intensity.
- Casual viewing: Neutral white around 3000–4000K is a good all-round choice.
If your strip doesn’t list color temperature, look for “warm,” “neutral,” and “cool” labels in the app and adjust by eye.
Creating custom scenes for Netflix, sports, and late-night gaming
Most apps let you save scenes. A few ideas:
- Netflix Night: Warm white at 25–40% brightness for drama series or movies.
- Sports Mode: Bright, neutral white with a hint of your team’s colors on the sides.
- Late-Night Gaming: Dim blue or purple gradient around 10–20% brightness to maintain visibility without waking the house.
Assign these scenes to voice commands (“Movie mode,” “Game time”) so you can switch quickly without opening the app.
Setting up automations: turn-on with TV, game consoles, or routines
Automations make your backlight feel built-in rather than an extra gadget:
- Use smart plugs or TV-integrated strips so lights turn on when your TV powers up.
- In smart home apps, link scenes to routines like “Movie Night” that also dim ceiling lights and close smart blinds.
- On gaming PCs, use manufacturer integrations (if available) to change scenes when certain games launch.
You can also schedule gentle dimming towards bedtime to encourage healthier screen habits.
Reducing eye strain with bias lighting presets
To keep bias lighting comfortable:
- Avoid saturated colors directly behind the screen for long sessions; use soft white or very desaturated colors instead.
- Keep brightness lower than your TV’s peak brightness; the backlight should be subtle.
- Create a “Comfort” preset you can quickly activate when you feel your eyes getting tired.
Some apps let you set a default state whenever the strip turns on. Setting this to a bias-friendly warm white keeps things easy on your eyes.
Fine-tuning brightness and saturation to avoid screen glare
If the glow on the wall is too strong, it can be as distracting as a lamp shining on the screen. Dial it in by:
- Lowering brightness until the wall glow is visible but gentle.
- Reducing color saturation; pastel tones are often easier behind a bright screen.
- Adjusting the TV’s position so the wall behind it is evenly lit without hot spots.
Test with a few different types of content (dark movie, bright sports, colorful animation) to find a good all-round balance.
Troubleshooting Common Issues with Smart LED TV Strips
Strips not sticking or peeling off the back of the TV
If your strip won’t stay put:
- Make sure the surface is completely clean and dry.
- Use additional adhesive clips or double-sided mounting tape on problem spots.
- Warm the adhesive slightly with a hairdryer on low for better bonding (avoid overheating the TV).
If the adhesive has failed entirely, you can replace it with thin 3M VHB tape or similar, cut to size.
Uneven brightness, color mismatch, or flickering segments
These issues often point to power or connection problems:
- Ensure the strip is fully and firmly connected to the controller.
- Avoid running longer strips than the power supply is rated for.
- Check for damage where the strip bends; sharp bends can crack connections.
- Use the app’s calibration or color reset tools if colors don’t match presets.
If specific segments stay the wrong color or flicker constantly, that part of the strip may be faulty and require replacement.
Wi-Fi, Bluetooth, or app connection problems
Connectivity issues can usually be solved with a few steps:
- Make sure your phone is on the same Wi-Fi network (2.4 GHz is most common) as the strip.
- Power-cycle the strip and your router if needed.
- Update the app and firmware to the latest versions.
- Move the controller closer to your router if the signal is weak.
If the strip supports local Bluetooth control, try connecting via Bluetooth first, then adding Wi-Fi credentials through the app.
Screen-sync delays and how to improve performance
A slight delay between on-screen action and backlight color changes can feel distracting. To minimize:
- Use HDMI-sync solutions instead of camera-based sync when possible.
- Close other heavy apps on your phone or PC if they’re handling sync.
- Use wired instead of wireless connections between your source device and sync box.
- Check if your app has performance vs quality settings and choose faster response.
Some minor delay is normal, but if it’s more than a fraction of a second, re-check your hardware and app settings.
Safe removal techniques to avoid damage to TV and walls
When it’s time to move or upgrade:
- Unplug the strip and let the TV cool down.
- Gently warm the adhesive with a hairdryer on low.
- Slowly peel the strip back on itself at a shallow angle, rather than pulling straight out.
- Remove any residue with a soft cloth and a small amount of isopropyl alcohol (if safe for the surface).
Never yank the strip off quickly; that’s when coatings and paint are most likely to come off too.
Alternatives and Add-Ons for a Complete Gaming Light Setup
Pairing strip lights with smart bulbs and bias light bars
For a fuller effect around your TV or desk, consider combining:
- LED strips behind the TV for bias lighting
- Smart bulbs in lamps for ambient fill light
- Bias light bars or light “wands” on either side of the screen for extra depth
Using a single brand or ecosystem makes it easier to keep everything in sync and control it from one app or with one voice command.
Using smart plugs to automate non-smart LED strips
If you already own a basic (non-smart) LED strip you like, you don’t have to replace it. A Wi-Fi smart plug lets you:
- Turn the strip on/off with Alexa, Google Assistant, or HomeKit (if the plug supports it).
- Schedule the strip to turn off automatically late at night.
- Include the strip in “Movie Night” or “Gaming” scenes alongside other smart devices.
Just make sure your non-smart strip remembers its last state when power is restored; most do, but some default to off.
Adding smart light panels behind or around the TV
Smart light panels add decorative flair and can act as a visual extension of your screen. Hexagonal, triangular, or bar-style panels can be:
- Mounted behind the TV to create a large, diffused glow
- Arranged around the TV to frame the screen
- Synced with music or games for an even more immersive setup
Some panel systems offer integrations with PC gaming ecosystems like Razer Chroma or Corsair iCUE for advanced lighting effects. For more background on LED technology and color mixing, the LED strip light entry on Wikipedia gives a good technical overview.
Conclusion: Choosing the Best Smart LED Strip Lights for Your TV Setup
Quick comparison checklist before you buy
Before you click “buy,” run through this quick checklist:
- Does the strip length match your TV or monitor size?
- Is it designed for no-drill, adhesive-based installation?
- Do you want simple bias lighting, or full RGB/RGBIC effects?
- Do you care about screen-sync (HDMI/camera) or just static scenes?
- Is it compatible with your preferred voice assistant or smart home platform?
- Will the power and cable routing work in your room without looking messy?
Answering these questions up front helps you avoid returns and ensures the strip actually fits your space and habits.
Recommended setups for living rooms, bedrooms, and gaming desks
To make things easier, here are some common setups that work well:
- Living room TV: Full-featured RGBIC strip with HDMI or camera-based sync, plus integration with smart bulbs or ceiling lights for one-tap movie scenes.
- Bedroom TV: Budget-friendly RGB or white-only strip with simple app control, focusing on warm, low-brightness bias lighting for evening viewing.
- Gaming desk: USB-powered strip on the monitor, plus additional RGB peripherals or light bars, with scenes tuned for specific games.
With a little planning and the right strip, you can upgrade any TV or gaming setup using no-drill, easy mounting and enjoy more comfortable, immersive viewing every day.
FAQ
Do smart LED TV strips work with any TV or monitor?
Most LED strips are universal as long as you can access the back of the screen and have somewhere to plug in power. TV-specific kits list recommended screen sizes, so match those as closely as possible. Ultra-thin or heavily curved displays may need extra care when placing strips and clips.
Will LED strips damage my TV or wall when I remove them?
Quality strips with decent adhesive usually come off cleanly if you peel slowly and, ideally, warm the adhesive first. Avoid yanking. If you’re worried, use removable mounting clips or reusable gel pads instead of relying entirely on the strip’s built-in tape.
Can LED strips stay on behind the TV all day?
Most smart LED strips are designed for long runtimes and run fairly cool, especially at lower brightness levels. Still, it’s wise to turn them off when you’re away for long periods. Automations, timers, or smart plugs make this easy.
How bright should bias lighting be behind my TV?
Bias lighting should be subtle, not the main light source in the room. A common starting point is around 10–30% brightness, then adjust based on your TV’s brightness and the size of the wall behind it.
Do I need Wi-Fi for smart LED strips to work?
Many smart strips use Wi-Fi for app and voice control, but some support Bluetooth or IR remotes only. Wi-Fi is required if you want to control the strip from outside your home or integrate with cloud-based assistants like Alexa and Google Assistant.