Detached garages and sheds are some of the easiest targets on a property. They often hold high-value tools, bikes, lawn equipment, and outdoor gear but don’t always get the same security attention as the main house.
A smart garage and shed security setup lets you see and control what’s happening around your outbuildings from anywhere. With the right mix of cameras, sensors, smart locks, and lighting, you can deter intruders, get instant alerts, and quickly check whether everything is locked up without walking outside.
This guide walks you through planning, device choices, connectivity options, and real-world automations so you can build a reliable, easy-to-manage security system for your detached spaces.
Why Detached Garages and Sheds Need a Dedicated Smart Security Setup
Common break-in risks for detached garages and garden sheds
Detached buildings are attractive targets because they’re often:
- Out of sight from neighbors and the street
- Less likely to have alarms or cameras
- Filled with resellable items like power tools, bikes, and lawnmowers
- Protected by only a basic padlock or simple handle lock
Typical attack points include:
- Side doors with weak locks or hollow-core construction
- Overhead garage doors forced up or bypassed with simple tools
- Small windows popped or broken for quick entry
- Back corners where thieves can work unseen
Police data shows that outbuildings are frequently targeted because the risk of being seen is lower than at the main house. For background on how these crimes are categorized, see the overview of burglary methods on Wikipedia’s burglary article.
What smart security can do that traditional padlocks and lights can’t
Traditional padlocks and motion lights help, but they don’t tell you what happened or whether someone is still there. A smart garage and shed security setup adds:
- Instant alerts when a door opens, motion is detected, or a lock is unlocked
- Live and recorded video so you can see who is there and what they’re doing
- Remote control of locks, doors, and lights from your phone
- Automations that turn on floodlights, sirens, or indoor lights automatically
- History logs showing when doors were opened or locks were used
This transforms a detached garage or shed from a “set-and-forget” padlock into an actively monitored, integrated part of your home security.
How much a basic smart garage and shed security setup typically costs
Costs vary widely by brand and features, but you can plan roughly:
- Budget setup (small shed): $80–$200 one-time for a basic outdoor camera, a couple of sensors, and possibly a smart padlock.
- Typical detached garage: $250–$600 for one or two cameras, several sensors, a smart deadbolt, and possibly a smart garage door controller.
- Premium detached workshop: $700–$1,500+ including multiple cameras, floodlights, sirens, hub, and advanced automations.
Many camera platforms and some lock providers charge optional subscriptions for cloud recording and advanced features (often $3–$15 per month per device or bundle).
Planning Your Smart Garage and Shed Security Strategy
Identify entry points: doors, windows, overhead garage doors, and roof access
Start by walking around each building and listing every way someone could get in:
- Main side door or back door
- Overhead or roll-up garage doors
- Windows (including small basement-style or transom windows)
- Roof access points (low eaves, attached fences, or overhangs)
Decide what each entry needs:
- Monitoring: camera views and/or door/window sensors
- Control: smart locks or garage door controllers
- Deterrence: floodlights or sirens nearby
This list becomes your device checklist so you avoid gaps and overspending.
Mapping Wi-Fi coverage and power outlets around your outbuildings
Before buying devices, check the basics:
- Wi-Fi signal: Stand inside and outside the garage/shed with your phone. Check your Wi-Fi indicator and run a quick speed test. If pages load slowly, cameras may struggle.
- Power outlets: Note where indoor and outdoor outlets are, as well as existing light fixtures that might be replaced with smart floodlights.
- Sun exposure: For solar cameras or solar chargers, identify areas with several hours of direct sun.
A simple sketch of the building with signal strength and outlet locations makes choosing wired vs battery vs solar devices much easier.
Choosing between Wi-Fi, long-range wireless, and local hub connections
Common connection options for outbuildings include:
- Wi-Fi (2.4 GHz): Most outdoor cameras and some locks. Easy to set up, but range can be an issue for distant sheds.
- Zigbee / Z-Wave / Thread: Low-power mesh protocols used by many sensors and some locks. They often reach farther and are more battery-friendly but require a compatible hub (e.g., Aqara Hub, SmartThings, Home Assistant, Apple HomePod mini for Thread).
- Proprietary long-range wireless: Some brands use their own long-range radios for cameras and sensors that connect to a base station in the house.
For a single detached garage near the house, Wi-Fi devices may be enough. For a shed at the back of a large yard, consider hub-based sensors with a strong mesh network or a camera system with a dedicated base station.
Privacy and data considerations for outdoor cameras and cloud storage
Outdoor cameras can easily see beyond your property, so think about:
- Camera angles: Aim cameras at your doors and driveway, not directly into neighbors’ yards or public sidewalks where possible.
- Video storage: Decide between cloud storage, local NVRs (network video recorders), or camera models with SD cards.
- Account security: Use strong, unique passwords and enable two-factor authentication on your camera and lock accounts.
- Sharing access: Use individual accounts or guest access, rather than sharing your login, for family members and trusted neighbors.
Review each platform’s privacy and retention policies so you’re comfortable with how long footage is stored and who can access it.
Choosing Smart Cameras for Garages and Sheds
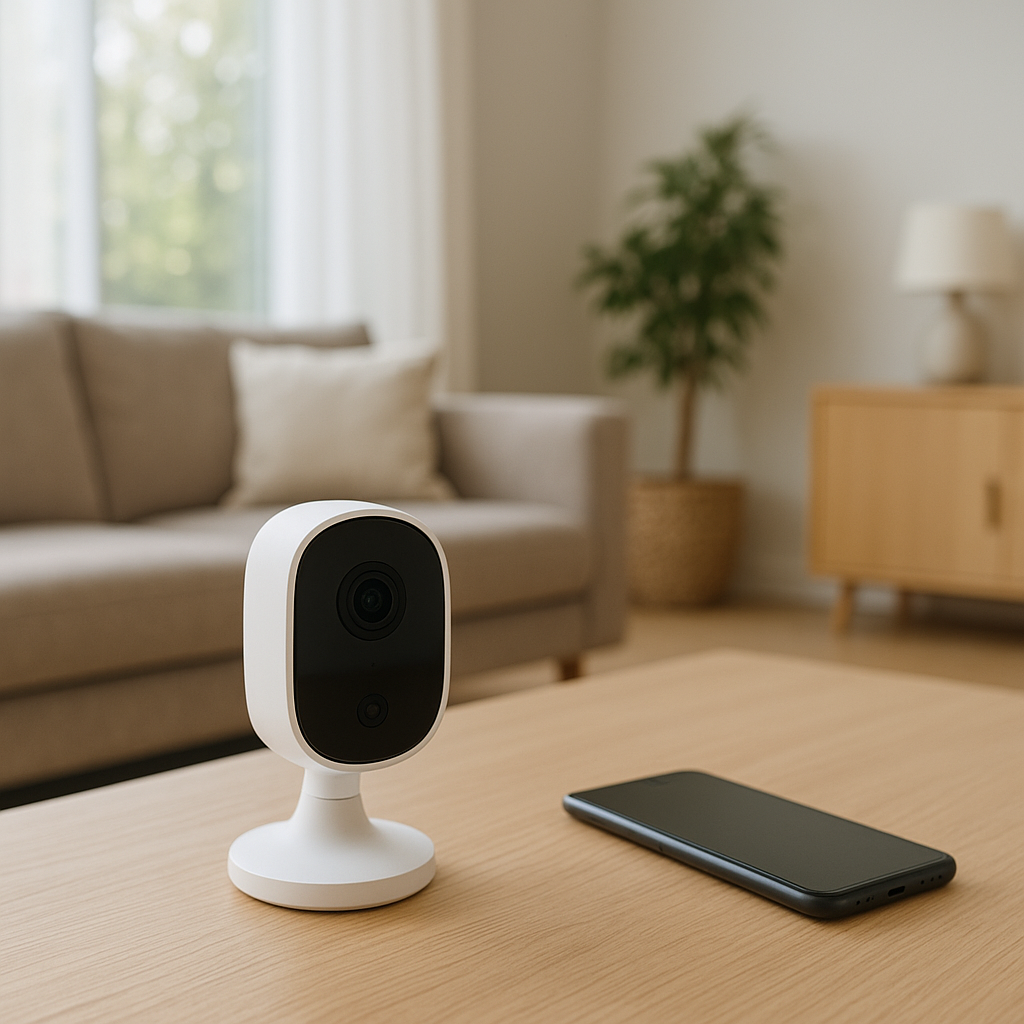
Key features: weatherproof rating, night vision, spotlight, and siren
For detached buildings, prioritize:
- Weather rating: Look for at least IP65 for outdoor mounting. This includes cameras like Arlo Pro, eufyCam, or Google Nest Cam (battery).
- Night vision: Infrared is standard; color night vision paired with a spotlight gives clearer details such as clothing color or vehicle type.
- Built-in spotlight: Helps deter intruders and improves recording quality at night.
- Siren: A built-in or linked siren can scare off intruders and draw attention.
- Smart detection: People/vehicle detection reduces false alerts from trees or animals.
Wired vs battery vs solar-powered cameras for detached buildings
Each power option has trade-offs:
- Wired (AC-powered): Reliable, no batteries to swap, and often supports continuous recording. Best if you have or can add an outdoor outlet or junction box.
- Battery-powered: Easiest to install anywhere, but you’ll need to recharge or swap batteries every few months depending on activity and settings.
- Solar-powered: Great for distant sheds with no power, as long as you have adequate sun and a compatible solar panel from the same brand.
For a garage with power, a wired camera above the main door is ideal. For a far-away shed, a battery or solar camera placed high under the eaves usually works best.
Placement tips to cover driveways, paths, and doors without blind spots
Use camera placement to capture both approach paths and entry points:
- Mount cameras 8–10 feet high to reduce tampering but still capture faces.
- Angle one camera to see the driveway or path leading to the building.
- Place another overlooking the main door or overhead garage door.
- Avoid aiming directly at bright lights or the sun to reduce glare.
- Consider a camera inside the garage positioned to see vehicles, tools, and the interior door.
Recommended smart camera setups for different garage and shed sizes
Some example layouts:
- Small shed: One battery/solar camera on the front peak of the roof covering the door and surrounding area.
- Single-car detached garage: One exterior camera covering the driveway and main door, plus an optional interior camera for tools and bikes.
- Large workshop or multi-car garage: Two or more exterior cameras (front and side), plus one interior camera covering workbenches and storage racks.
Stick with a single brand ecosystem where possible so you can manage all cameras in one app.
Adding Door and Window Sensors for Perimeter Protection
Types of sensors: contact sensors, tilt sensors, and vibration sensors
For garages and sheds, these sensor types are useful:
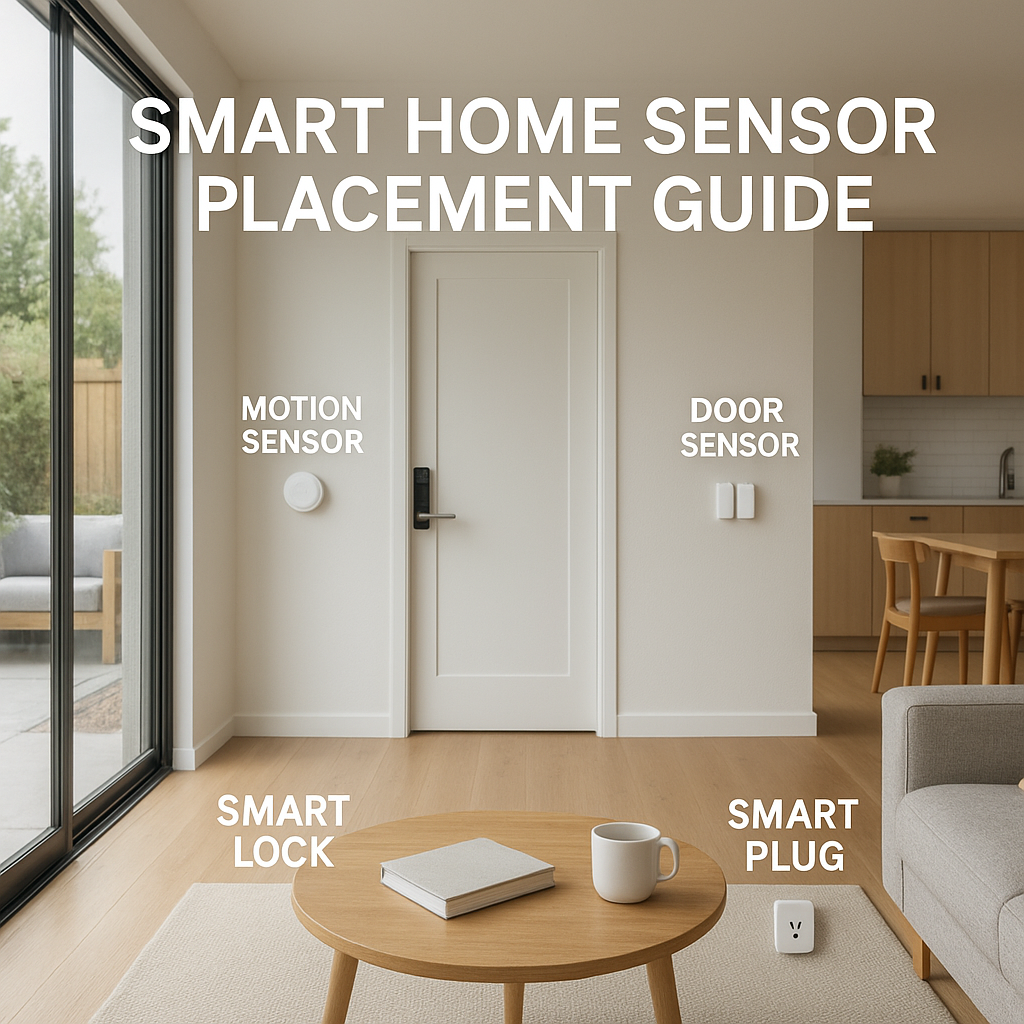
- Contact sensors: Two-piece sensors that detect when a door or window opens. Ideal for side doors, shed doors, and windows.
- Tilt sensors: Detect when a garage or roll-up door changes angle from closed to open.
- Vibration or shock sensors: Sense banging, drilling, or prying on doors, windows, or walls.
Many brands (e.g., Aqara, Ring, Wyze) offer multi-packs at reasonable prices, making it affordable to cover several openings.
Where to install sensors on side doors, overhead doors, and shed doors
For reliable operation:
- Side and shed doors: Mount the larger sensor body on the door frame and the magnet on the door edge, aligned within the manufacturer’s recommended gap.
- Windows: Place sensors on the moving sash and the fixed frame, preferably near the latch.
- Metal doors: Use adhesive specifically rated for metal, and test sensor range, as metal can sometimes affect wireless signals.
Using tilt sensors for garage doors and roll-up doors
Tilt sensors typically mount on the top panel of the overhead door. When the door moves from vertical (closed) to horizontal (open), the sensor reports the change.
This is especially useful if you:
- Frequently forget to close the garage door at night
- Want alerts only when the big overhead door is opened, not every time a side door opens
- Use automations to close the door automatically after a set time
Creating alerts and automations when a door or window opens unexpectedly
Once sensors are installed, create simple rules such as:
- After-hours alerts: Send a notification if the shed door opens between 11 p.m. and 6 a.m.
- Auto lights: Turn on the garage interior light and an exterior floodlight when the side door opens after dark.
- Forgotten door reminder: If the garage overhead door has been open for more than 10 minutes after sunset, send a reminder or close it automatically if your opener supports it.
Securing Access with Smart Locks and Smart Padlocks
Smart deadbolts vs smart padlocks vs retrofit lock controllers
You have several options for securing outbuilding doors:
- Smart deadbolts: Replace the existing deadbolt with a connected lock (e.g., Yale, Schlage, August). Ideal for solid side doors on garages or workshops.
- Smart padlocks: Great for shed hasps, gates, or storage lockers. They typically unlock via Bluetooth or Wi-Fi and often support PINs or app control.
- Retrofit lock controllers: Attach to existing deadbolts on the inside and turn the thumbturn (e.g., August Smart Lock). Good if you want to keep your current exterior hardware.
Choosing weather-resistant smart locks for exterior shed and garage doors
For exposed doors, look for:
- Outdoor-rated hardware: Many smart deadbolts list an operating temperature range and weather resistance.
- Keypad entry: Metal or well-sealed rubber keypads handle weather better than plastic membrane styles.
- Covered placements: If possible, install locks under an overhang to reduce direct rain and sun exposure.
For padlocks, check the IP rating and choose stainless or hardened steel shackles to resist rust and cutting.
Using PIN codes, phone unlock, and temporary access for guests or contractors
Smart locks shine when you need flexible access:
- Create unique PINs for family members who regularly use the garage or workshop.
- Generate time-limited codes for contractors, cleaners, or delivery services.
- Use Bluetooth or phone proximity unlock if you frequently have your hands full.
- Set up notifications when specific codes are used (e.g., “Gardener code used at 10:03 a.m.”).
Setting auto-lock, schedules, and geofencing for outbuilding doors
To avoid accidentally leaving doors unlocked:
- Auto-lock: Configure doors to lock automatically after a period (e.g., 1–5 minutes) of being closed.
- Schedules: Lock all outbuilding doors at a fixed time every evening.
- Geofencing: Some platforms allow locks to auto-lock when you leave a defined area or check status when you drive away.
Test geofencing carefully so you don’t accidentally lock people out who are still using the garage or shed.
Motion Sensors, Floodlights, and Sirens for Deterrence
Using PIR motion sensors vs camera-based motion detection
Many cameras have built-in motion detection, but adding dedicated motion sensors can improve reliability:
- Camera motion detection: Easy to set up, but can generate false alerts from trees, insects, or headlights.
- PIR (Passive Infrared) sensors: Detect body heat and motion, often more accurate for people and animals.
A good approach is to use camera-based detection for recording and PIR sensors to trigger lights or sirens.
Smart floodlights that pair with cameras and motion sensors
Smart floodlights mounted at the corners of a garage or above a shed door can:
- Turn on instantly when motion is detected
- Link with cameras to start recording in full color
- Act as a strong visual deterrent for would-be intruders
Many brands sell camera-floodlight combos, reducing wiring complexity by combining power and mounting in one unit.
Adding indoor sirens in garages and outdoor sirens near sheds
Sirens add an audible layer of security:
- Indoor sirens in garages: Loud enough to startle intruders and alert people in the house.
- Outdoor sirens near sheds: Can be heard across the yard and alert neighbors.
Choose sirens that integrate with your sensors or hub so they can trigger on specific events instead of every motion alert.
Automations that scare away intruders but limit false alarms
To avoid annoying neighbors or yourself:
- Trigger sirens only when both a door sensor and a motion sensor activate within a short window.
- Set sirens to sound only when the system is in “Away” or “Vacation” mode.
- Use lights and voice announcements (via smart speakers) as a first step, with sirens as a second step if motion continues.
Connectivity Solutions for Outbuildings Far from the House
Extending Wi-Fi with mesh systems and outdoor access points
If your shed or detached garage is outside your Wi-Fi range:
- Add a mesh Wi-Fi node in a nearby window or room facing the outbuilding.
- Install an outdoor-rated access point on an exterior wall pointing toward the garage or shed.
- Use wired backhaul (Ethernet) to that node when possible for stronger performance.
Even a single additional access point can transform connectivity for cameras and locks.
When to use low-power protocols like Zigbee, Z-Wave, or Thread
Low-power protocols can be more reliable for sensors in distant or challenging locations:
- Zigbee/Z-Wave: Form mesh networks through powered devices like smart plugs or repeaters, extending coverage to outbuildings.
- Thread: A newer, IP-based mesh standard used by platforms like Matter and Apple Home. It offers low latency and good range.
For a deeper dive into how one of these protocols works, see the Zigbee overview on Wikipedia.
Using a separate hub in the garage or shed and linking it to the main home
Another strategy is to place a small hub or bridge in the outbuilding:
- The hub connects via Wi-Fi or Ethernet back to your main network.
- Local sensors (contact, motion, locks) connect to the hub using Zigbee/Z-Wave/Thread or proprietary radio.
- The hub keeps local devices responsive even if the cloud connection is briefly down.
This can be especially useful for larger workshops with many devices.
Backup options: 4G/LTE cameras and battery backups during power outages
For critical security:
- Consider one or two 4G/LTE-enabled cameras that can continue sending alerts and video even if home internet goes down.
- Add a UPS (uninterruptible power supply) in the garage to keep the hub, Wi-Fi access point, and key cameras running during brief outages.
- Choose battery-backed smart locks and sensors that continue working if power fails.
Integrating Your Garage and Shed Security into the Rest of Your Smart Home
Linking to smart speakers for voice alerts and arm/disarm commands
Smart speakers (Alexa, Google Assistant, Siri) can announce security events, such as:
- “Garage side door opened.”
- “Motion detected at the shed.”
You can also use voice commands to:
- Arm or disarm your outbuilding security
- Lock or unlock smart locks (with a PIN for safety)
- Show a live feed from garage cameras on smart displays
Creating scenes for “Away”, “Night”, and “Vacation” modes
Scenes or modes help change many devices at once:
- Away: Arms all garage and shed sensors, turns on exterior cameras, and enables siren automations.
- Night: Keeps interior garage motion off (so you don’t trigger alarms walking in) but fully arms the shed.
- Vacation: Enables extra-sensitive alerts, longer recordings, and random light schedules to simulate occupancy.
Using routines to turn on indoor and outdoor lights when motion is detected
Link motion events to lights to create both convenience and deterrence:
- Turn on the garage interior light and workbench strip lights when the side door sensor opens.
- Trigger pathway lights or porch lights at the house when motion is detected near the garage at night.
- Use dim levels during overnight hours to avoid glare but still record clear footage.
Centralizing alerts from cameras, sensors, and locks into one app
To avoid alert fatigue, try to:
- Choose a primary ecosystem (e.g., Alexa, Google Home, Apple Home, SmartThings) as your main dashboard.
- Connect all compatible devices so you can see camera feeds, lock status, and sensor states in one place.
- Customize which notifications you receive and on which devices (phone, tablet, smartwatch).
Example Smart Garage and Shed Security Setups (Good, Better, Best)
Budget setup for a small shed (essential protection on a tight budget)
For a basic shed storing tools and bikes:
- 1 battery or solar-powered outdoor camera covering the shed door
- 1–2 contact sensors (door and any small window)
- Optional Bluetooth smart padlock or keypad padlock
Use push notifications and simple motion alerts. Skip subscriptions initially; some brands offer limited free cloud storage or local SD card recording.
Balanced setup for a typical detached garage and workshop
For a one- or two-car garage with tools and a workbench:
- 1 exterior camera covering the driveway and main garage door
- 1 interior camera overlooking tools and interior access door
- Contact sensors on side door and any windows
- Tilt sensor on the overhead door
- Smart deadbolt on the side door
- Smart floodlight above the main garage door
This setup gives both perimeter protection and detailed coverage of valuable items.
Premium setup with full perimeter coverage and advanced automations
For a large workshop or high-value storage:
- Multiple exterior cameras covering all approaches and doors
- Interior cameras for key zones (workbenches, tool racks, vehicle bays)
- Contact sensors on all doors and windows
- Tilt sensors on all overhead/roll-up doors
- Smart deadbolts on side doors and high-security smart padlocks on external storage
- Smart floodlights on corners and above entries
- Indoor and outdoor sirens tied to sensor events
- Dedicated hub in the garage with battery backup
Estimated costs and subscription fees for each example setup
Approximate ranges (device-only; prices vary by brand and sales):
- Budget shed setup: $80–$200 one-time; $0–$5/month if you choose a basic cloud recording plan.
- Balanced garage setup: $250–$600 one-time; $5–$15/month for camera cloud plans and possibly smart lock premium features.
- Premium workshop setup: $700–$1,500+ one-time; $10–$30/month if you enable multi-camera recording and professional monitoring (where available).
Installation Tips and Safety Considerations
Basic DIY steps to mount cameras, sensors, and smart locks correctly
General DIY guidelines:
- Use the included mounting templates and recommended screws/anchors.
- Drill pilot holes for cameras and floodlights, especially into brick or masonry.
- Clean surfaces before sticking adhesive-backed sensors, and press firmly for 30 seconds.
- Follow lock manufacturer instructions carefully to avoid misalignment or poor latch engagement.
Managing power: outlets, extension cords, and safe cable routing
Power safely:
- Use outdoor-rated outlets and covers for any external plugs.
- Avoid running extension cords through door gaps where they can be pinched.
- If you must drill through walls for cables, use grommets or bushings to protect wires.
- Consider hiring an electrician to add exterior outlets or convert existing fixtures for floodlight cams.
Weatherproofing devices and protecting cables from damage or tampering
For long-term reliability:
- Use drip loops on cables so water doesn’t run into enclosures.
- Seal exterior holes with silicone caulk.
- Route cables in conduit or along eaves to reduce tampering and UV damage.
- Choose devices with appropriate IP ratings for full exposure.
Labeling devices and documenting your setup for easy troubleshooting
As your system grows, documentation saves time:
- Label each sensor and camera physically and in your app (e.g., “Shed Door Left”).
- Keep a simple diagram showing device locations, hubs, and Wi-Fi nodes.
- Store device manuals, serial numbers, and receipts in one cloud folder.
Smart Routines and Notifications That Actually Work in Real Life
Setting up practical push notifications and reducing false alerts
To avoid “alert fatigue”:
- Disable non-critical alerts like every motion event during the day.
- Use person/vehicle detection when available.
- Limit critical alerts (door openings, late-night motion) to your phone and smartwatch.
Using schedules for “workshop hours” vs night-time protection
Separate daily use from security hours:
- During workshop hours, only log events but don’t sound alarms.
- After closing time, arm sensors and enable sirens and strong lighting automations.
- Use your calendar or routines to change modes automatically on weekdays vs weekends.
Automations for deliveries, gardeners, and regular visitors
Make access easier for trusted visitors while keeping logs:
- Give your gardener a recurring PIN that works only on certain days and hours.
- When a delivery arrives, briefly unlock the shed or garage via the app while you watch live video.
- Send alerts when specific access codes are used so you know who arrived and when.
Quick-response workflows: viewing cameras and locking doors in seconds
Practice how you’ll respond to alerts:
- Add camera and lock widgets to your phone’s home screen for one-tap access.
- Set up shortcuts like “Lock all outbuilding doors” or “Show garage camera.”
- Teach family members how to quickly open the app, view cameras, and call for help if needed.
Maintenance, Testing, and Long-Term Reliability
Monthly checks: test sensors, locks, and camera live views
Once a month, do a quick walk-through:
- Open each door/window to confirm sensors trigger correctly.
- Test lock/unlock from the app and at the keypad.
- View each camera live and check for obstructions, spider webs, or dirty lenses.
Managing batteries, solar panels, and firmware updates
Keep things running smoothly by:
- Setting reminders to check battery levels for locks, sensors, and cameras.
- Cleaning solar panels a few times a year to maintain charging efficiency.
- Scheduling firmware updates during low-activity times so you don’t miss important recordings.
Reviewing footage quality and storage limits before you need it
Take time to:
- Review sample clips at day and night to check clarity and coverage.
- Verify your cloud or local storage is retaining video long enough (e.g., 7, 14, or 30 days).
- Adjust resolution or recording schedules if storage fills up too quickly.
How to upgrade individual devices without breaking your whole setup
Over time, you may want to upgrade cameras or locks:
- Stick to open ecosystems and widely supported standards like Matter, Zigbee, or Z-Wave where possible.
- Replace one category at a time (e.g., all cameras) to simplify app management.
- Keep older devices for secondary coverage rather than discarding them immediately.
Summary: Building a Smart Garage and Shed Security Setup That Gives Peace of Mind
Key decisions to make before you buy anything
Before ordering devices, clarify:
- Which buildings and entry points you need to secure
- How strong your Wi-Fi and power options are in each location
- Which ecosystem (or two) you’ll standardize on for cameras, locks, and sensors
- Your budget for both initial hardware and ongoing subscriptions
Minimum must-have devices vs nice-to-have upgrades
For many homeowners, a practical baseline is:
- At least one camera covering the main approach
- Contact sensors on primary doors
- A smart deadbolt or padlock on the main entry
Nice-to-have upgrades include extra cameras, floodlights, sirens, and advanced automations that make your setup more convenient and resilient.
Next steps to design and deploy your own smart garage and shed security setup
Walk your property, map entry points, and note Wi-Fi and power availability. Decide on a primary platform, then start with a small batch of devices for your highest-risk building. Once you’re happy with reliability and alerts, expand to cover remaining doors, windows, and outdoor approaches.
With a bit of planning and the right mix of cameras, sensors, and smart locks, your detached garages and sheds can be as secure and convenient to use as your main home.
FAQ
Do I need a professional installer for garage and shed smart security?
Most homeowners can handle basic installation of cameras, sensors, and smart locks using simple tools. If you need new electrical outlets, hardwired floodlights, or complex cable runs, hiring an electrician or installer is a good idea for safety and code compliance.
Will smart cameras and locks still work if my internet goes down?
Many devices continue working locally (locks can still unlock via keypad or Bluetooth, sensors still trigger automations inside the hub). However, you may lose remote access and cloud recording until internet is restored. For critical coverage, consider local storage or one LTE-enabled camera.
Can I mix different brands of cameras, locks, and sensors?
Yes, but management is easier if you use a central platform like Alexa, Google Home, Apple Home, or SmartThings. Check compatibility before buying so you can control and automate devices together, even if they’re from different manufacturers.
How do I prevent constant motion alerts from animals and passing cars?
Use activity zones to focus only on doors and walkways, enable people/vehicle detection if available, and reduce sensitivity. Adding PIR motion sensors and using them to trigger recordings can also reduce false alerts compared to relying on camera motion alone.
Are smart locks safe for exterior doors on sheds and garages?
Quality smart locks from reputable brands are as secure as traditional locks with similar grades. Choose outdoor-rated models, keep firmware updated, and use strong PINs and account passwords. For higher security, combine smart locks with solid door construction and reinforced strike plates.